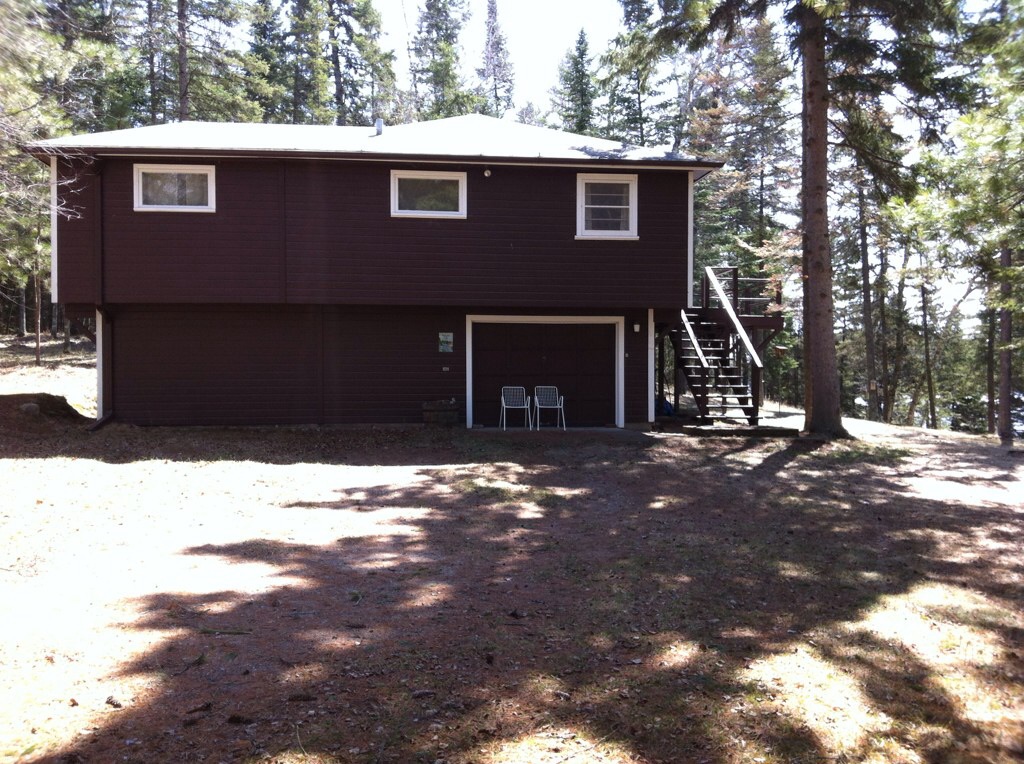
Everything looks just like I left it 6 months ago: the road was clear, electricity is on, water turned on with no leaks, Directv is working. Taken all together this is a minor miracle.
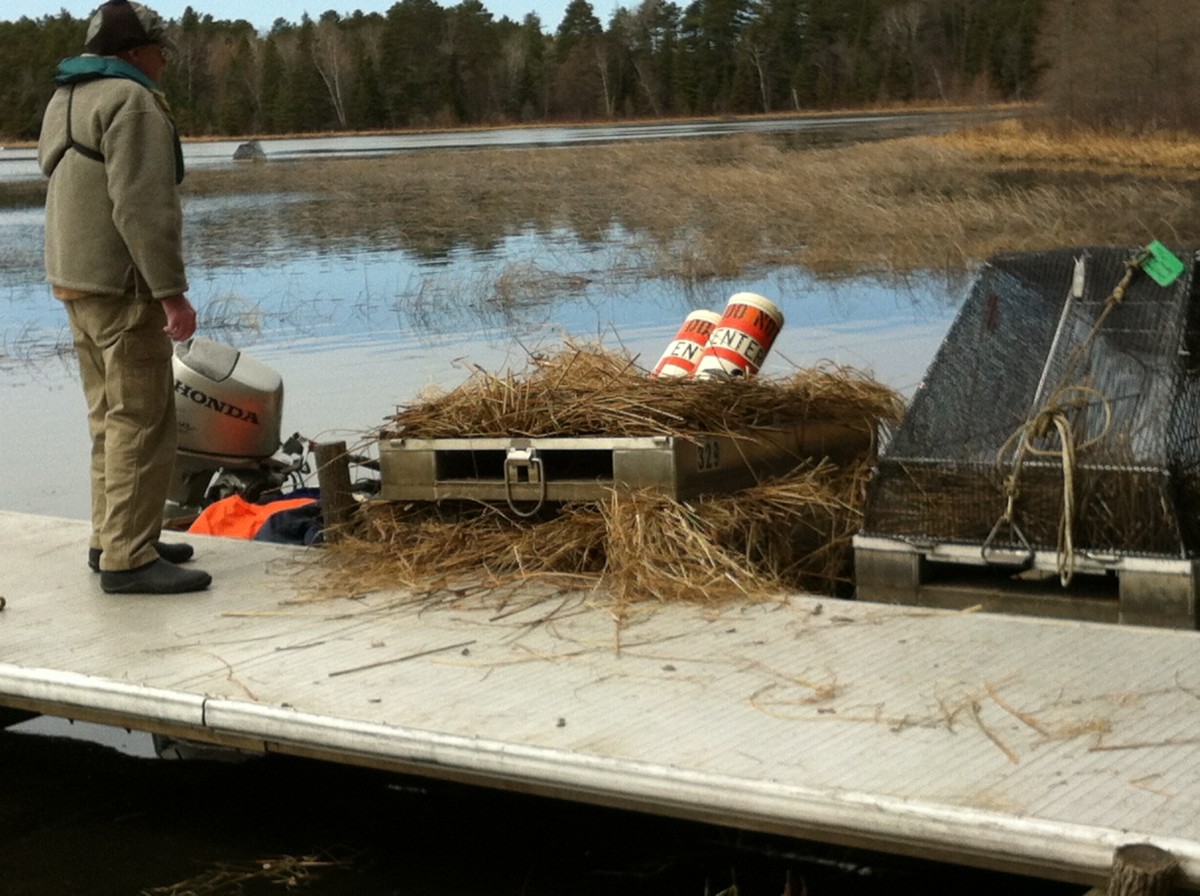
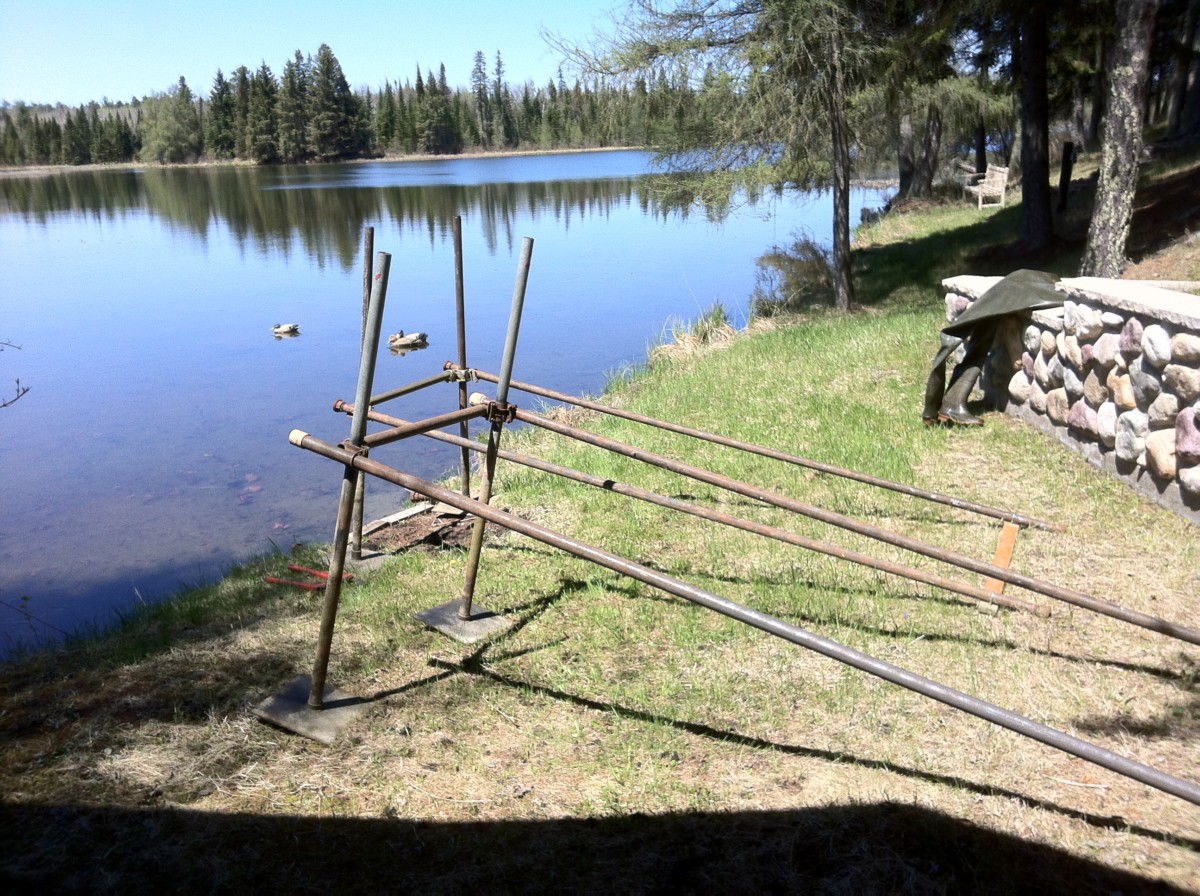
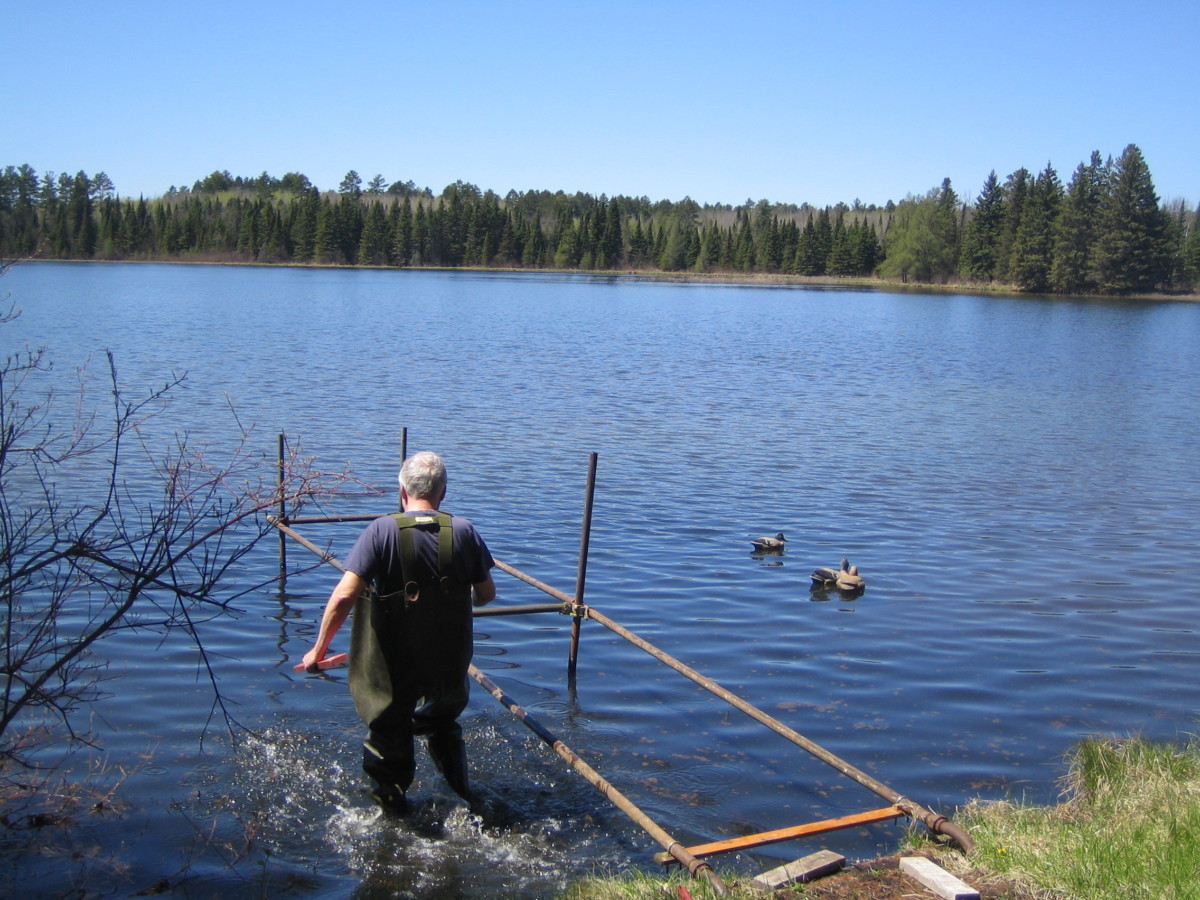
Cold and windy. Lyle with Warren and me putting loon rafts out on the lake. We did 7 today in those bays that are ice free.

Colder and windier. Almost all of the ice is off the lake. We put out the last 5 loon rafts and some loons were more than ready to hop on right away.
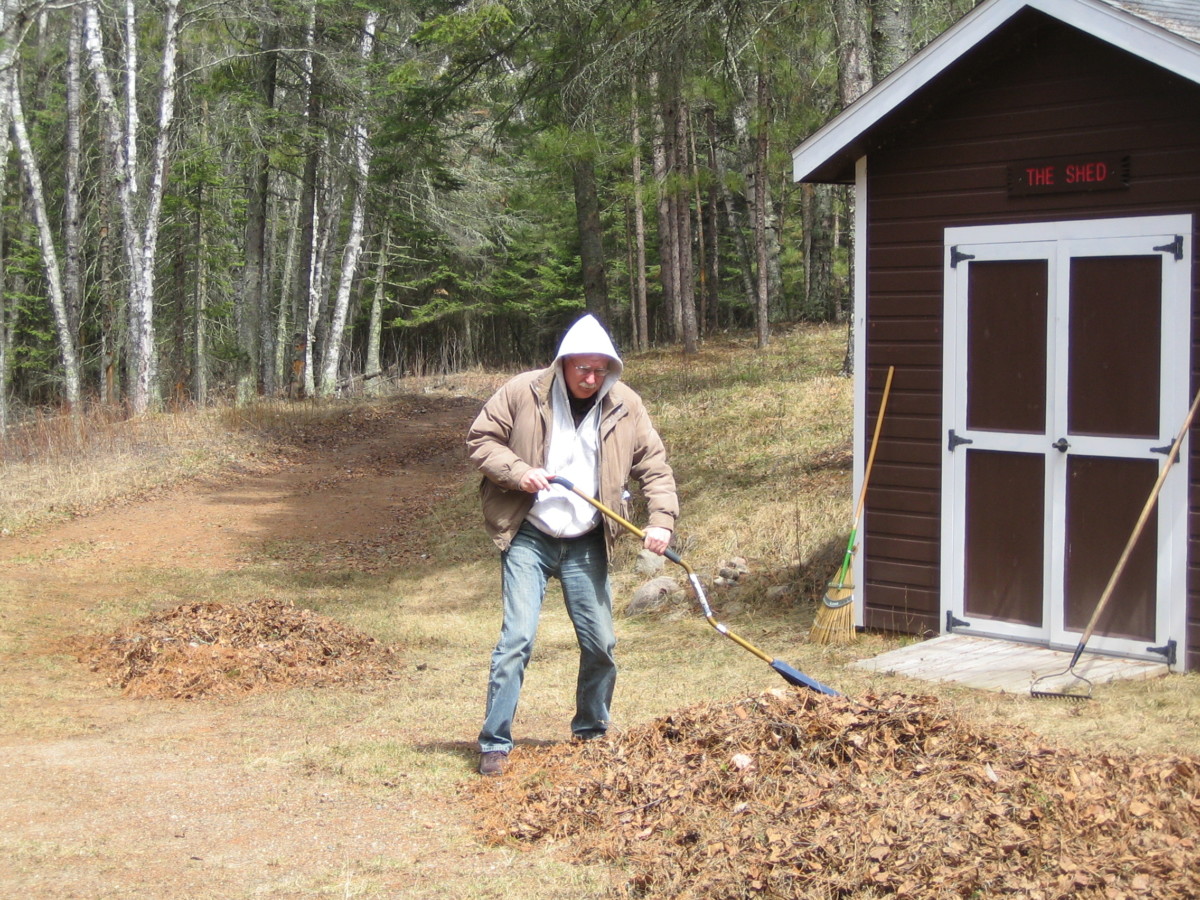
Yes it's still cold here but the rain has stopped so I don't really have an excuse to put off the raking.
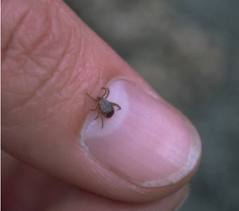
Another sure sign of spring - the first tick of the season.
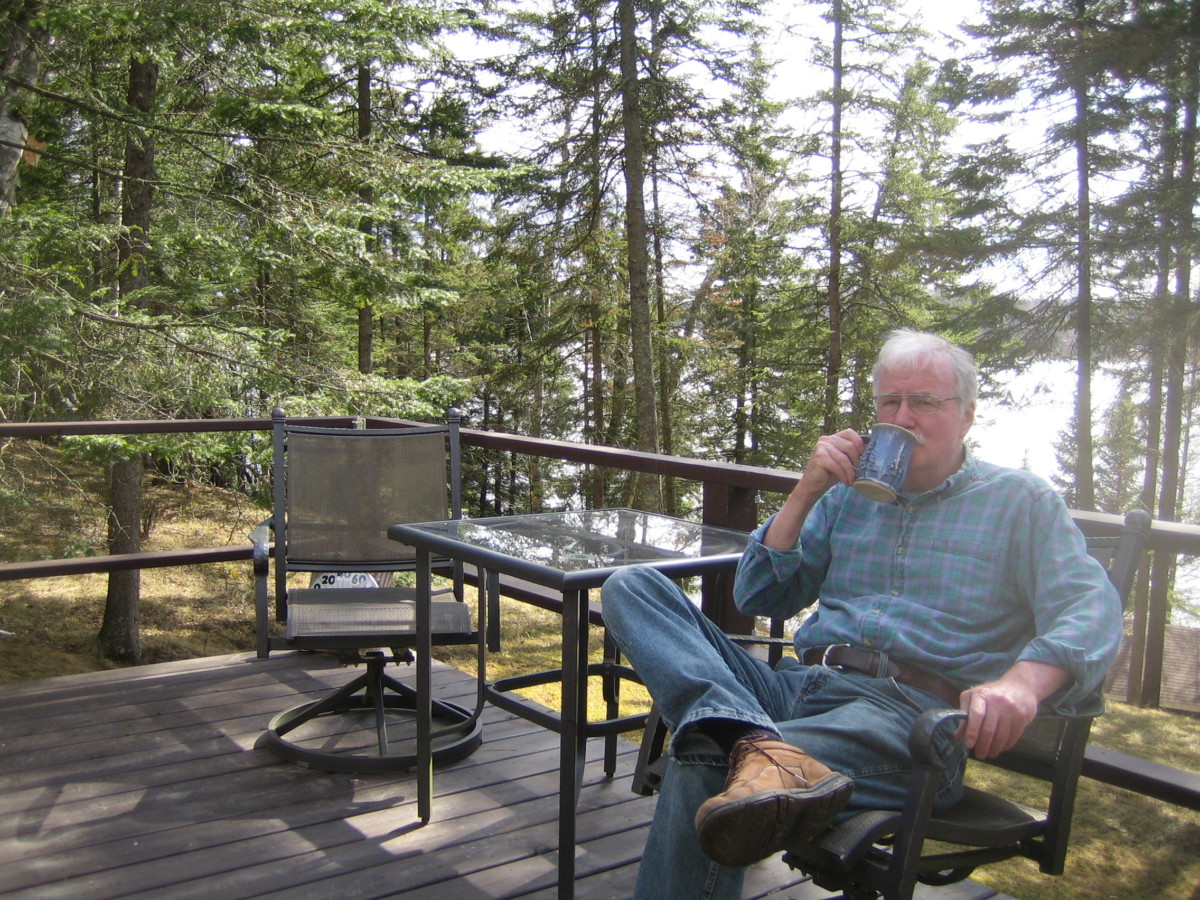
At last! 70° and sunny.
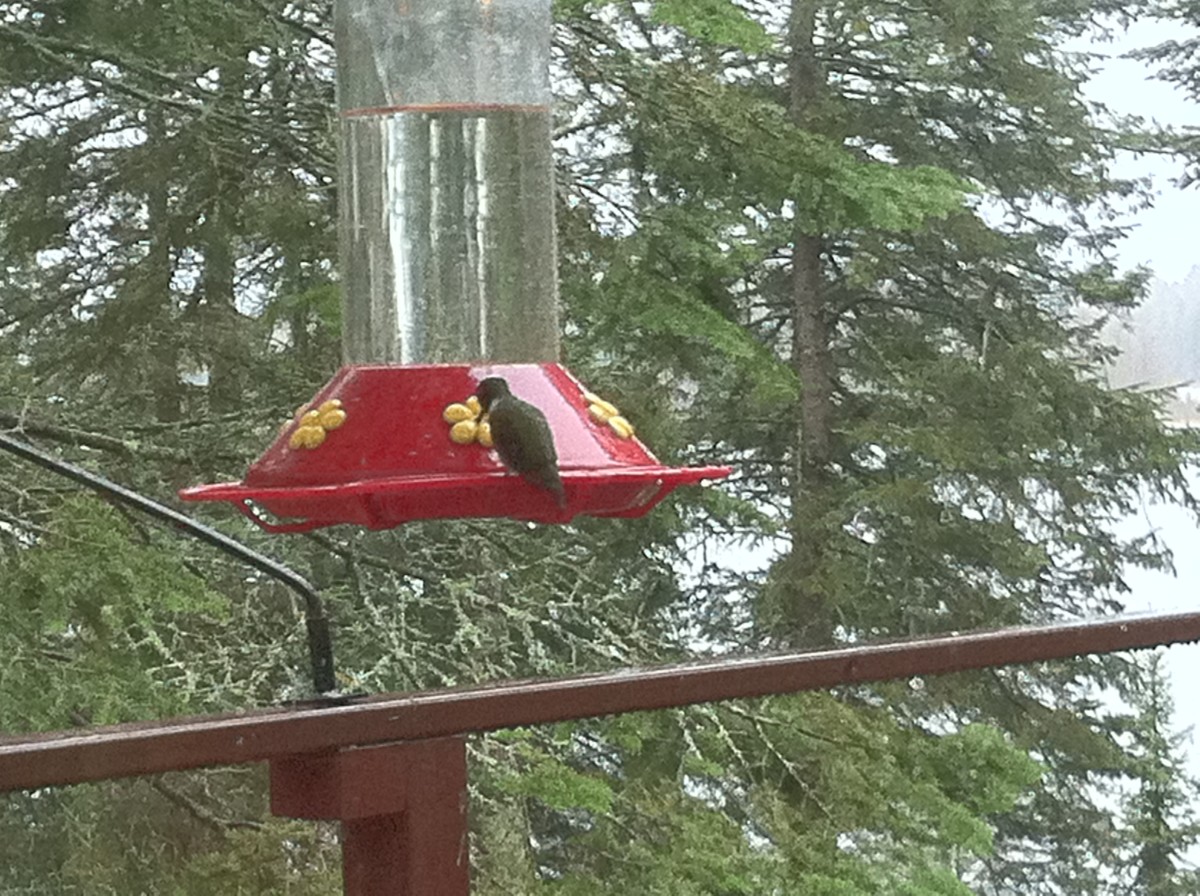
First hummingbird of the year. I hope this little guy didn't jump the gun - we have some more cold weather coming.

Out with the old: 32" Panasonic CRT.

In with the new: 46" Samsung LED.
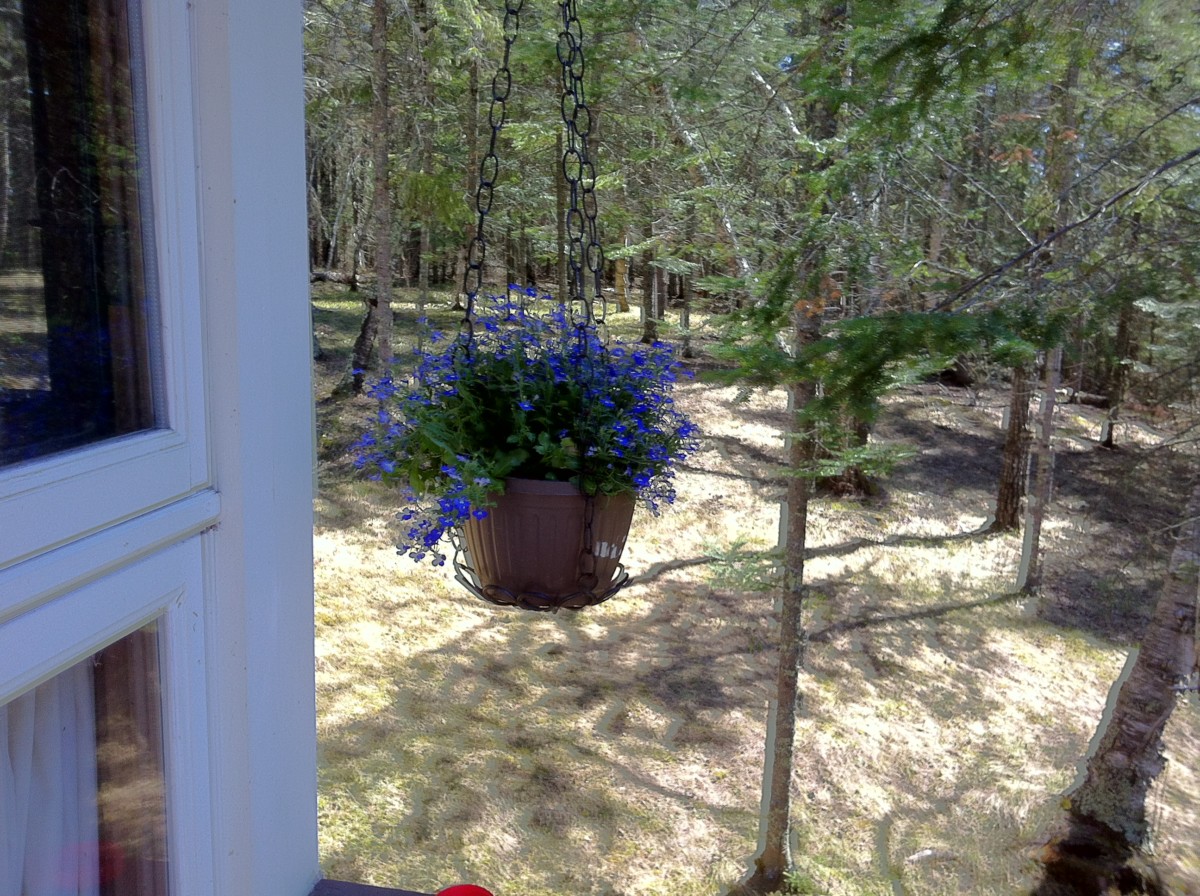
No more freezing temperatures! I'm puttng plants out.

Petunias in the barrel this year.
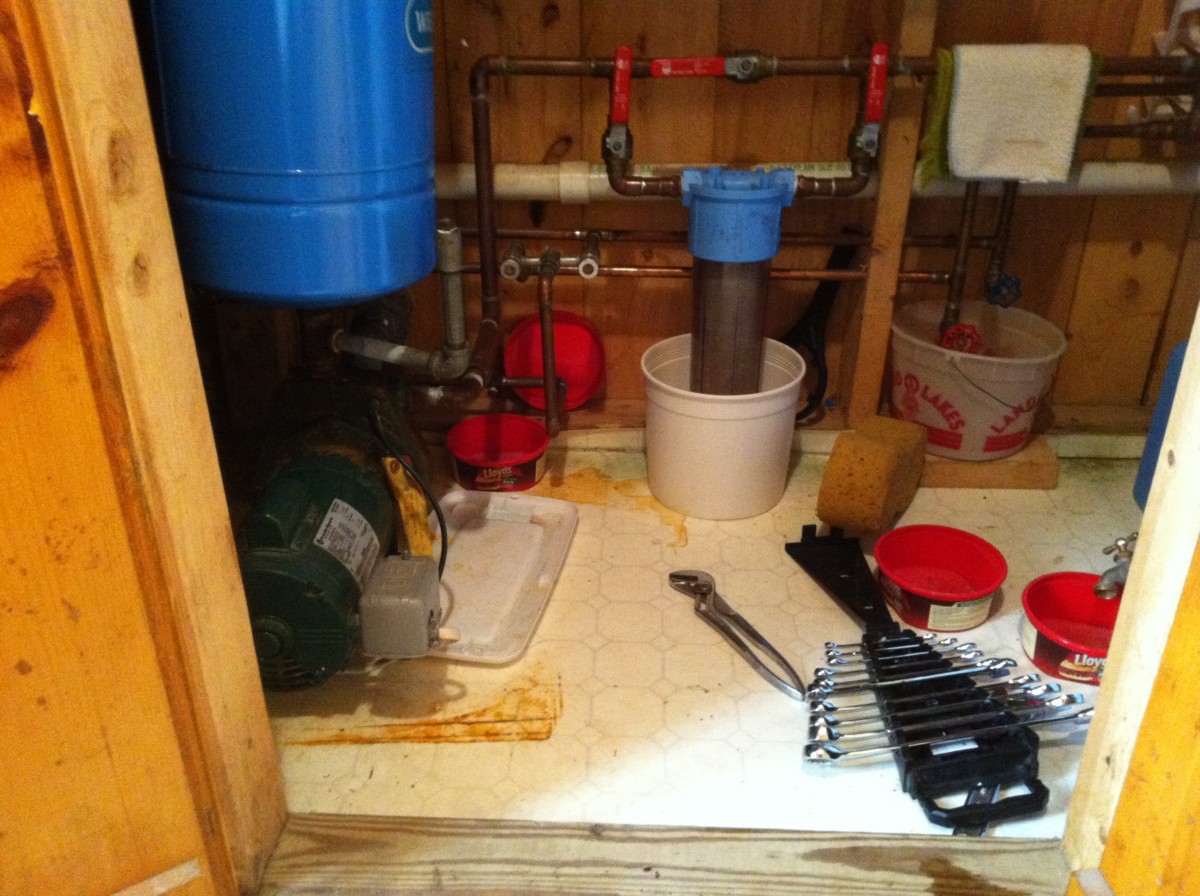
Getting the water running in the log cabin.
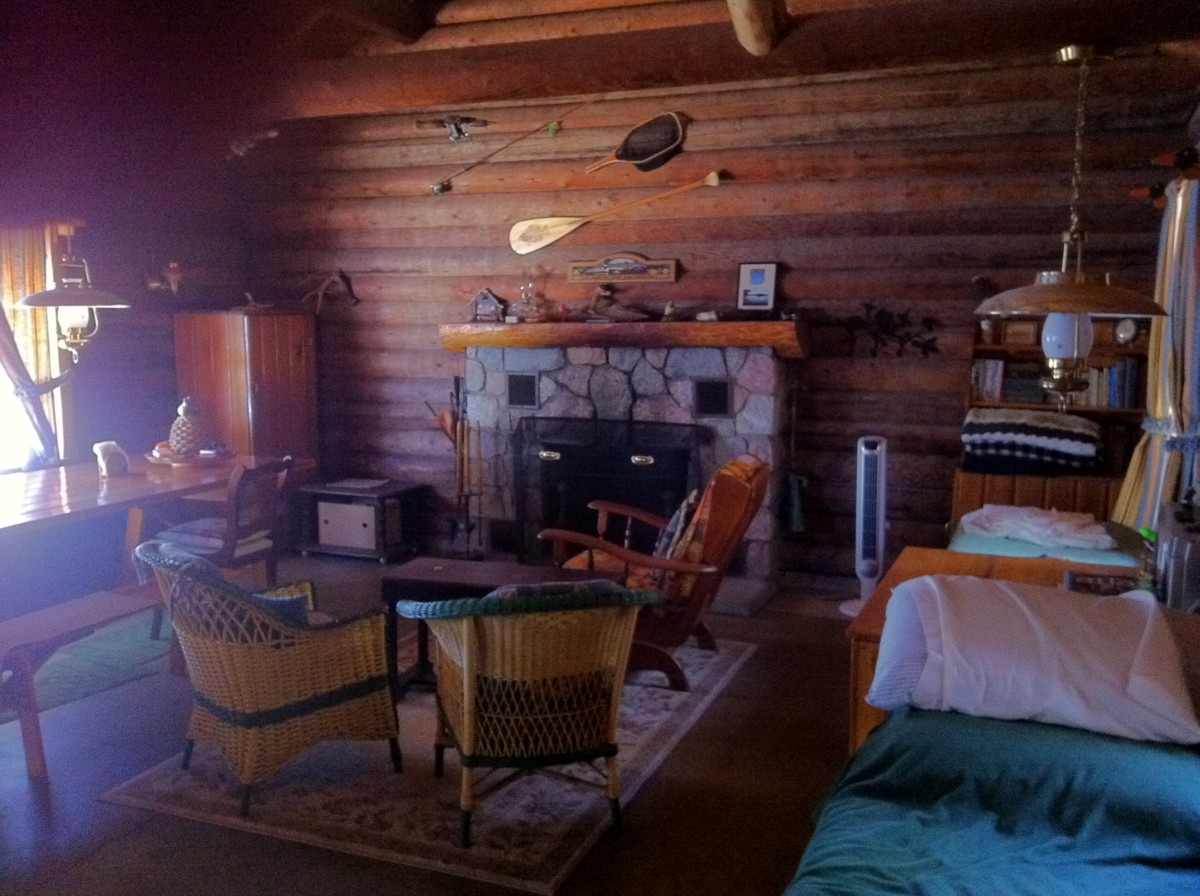
Everything looks good.
Since it's such a nice day I think I'll put the dock out.
An hour of grunting and moaning.

And I'm done.

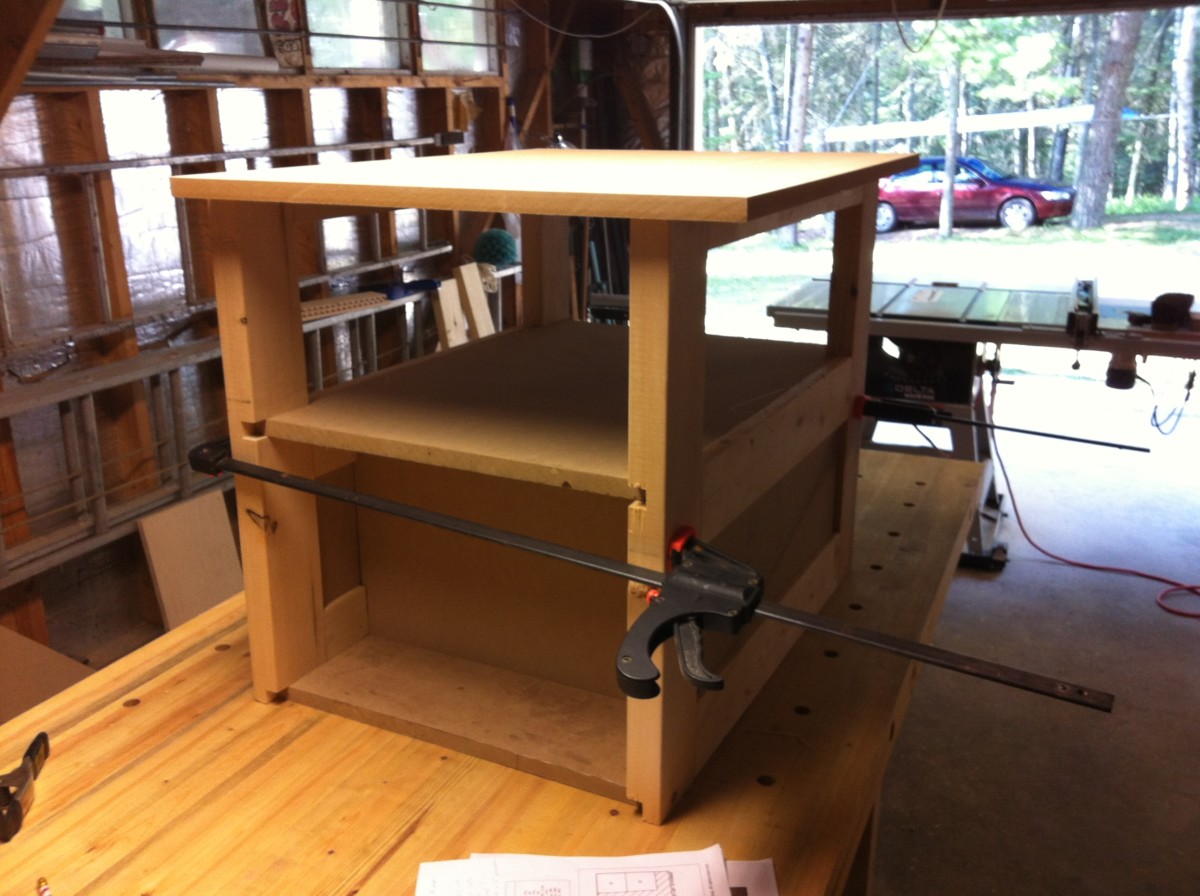
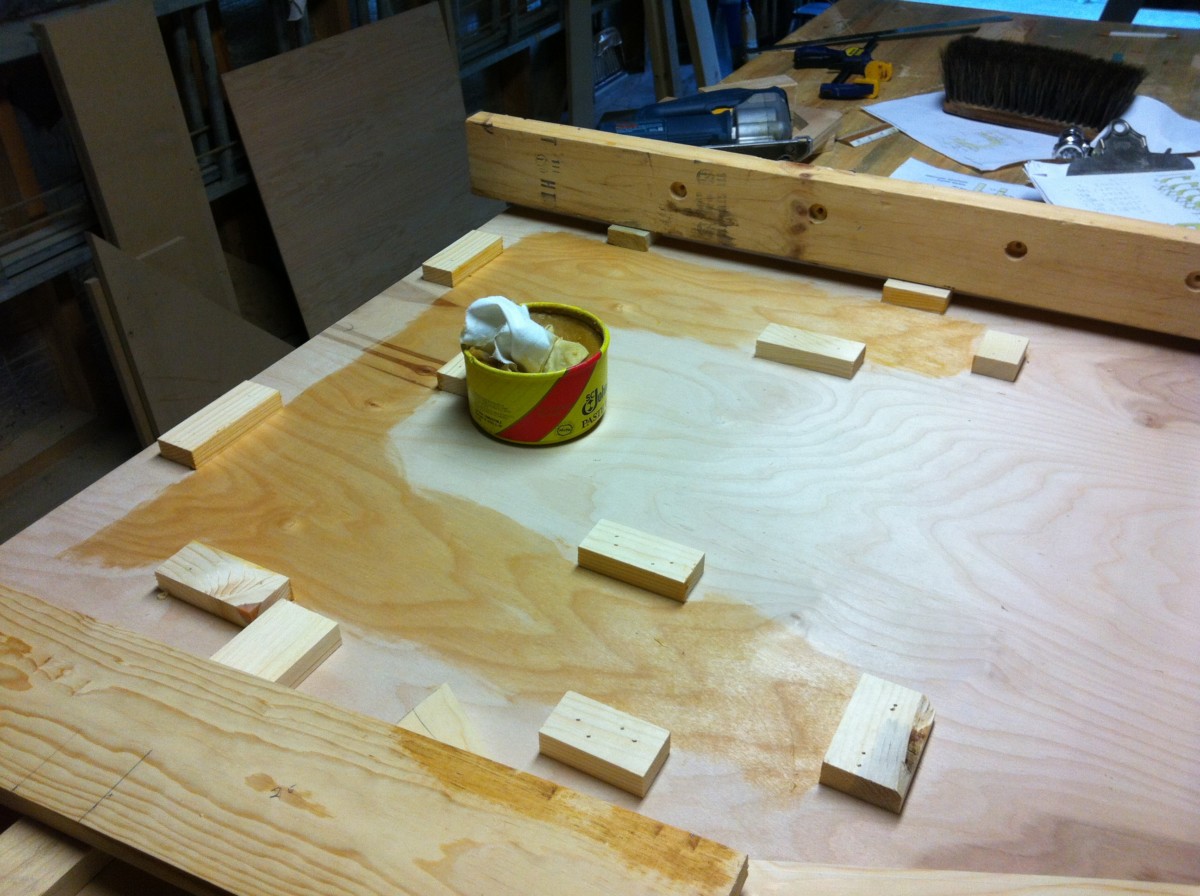
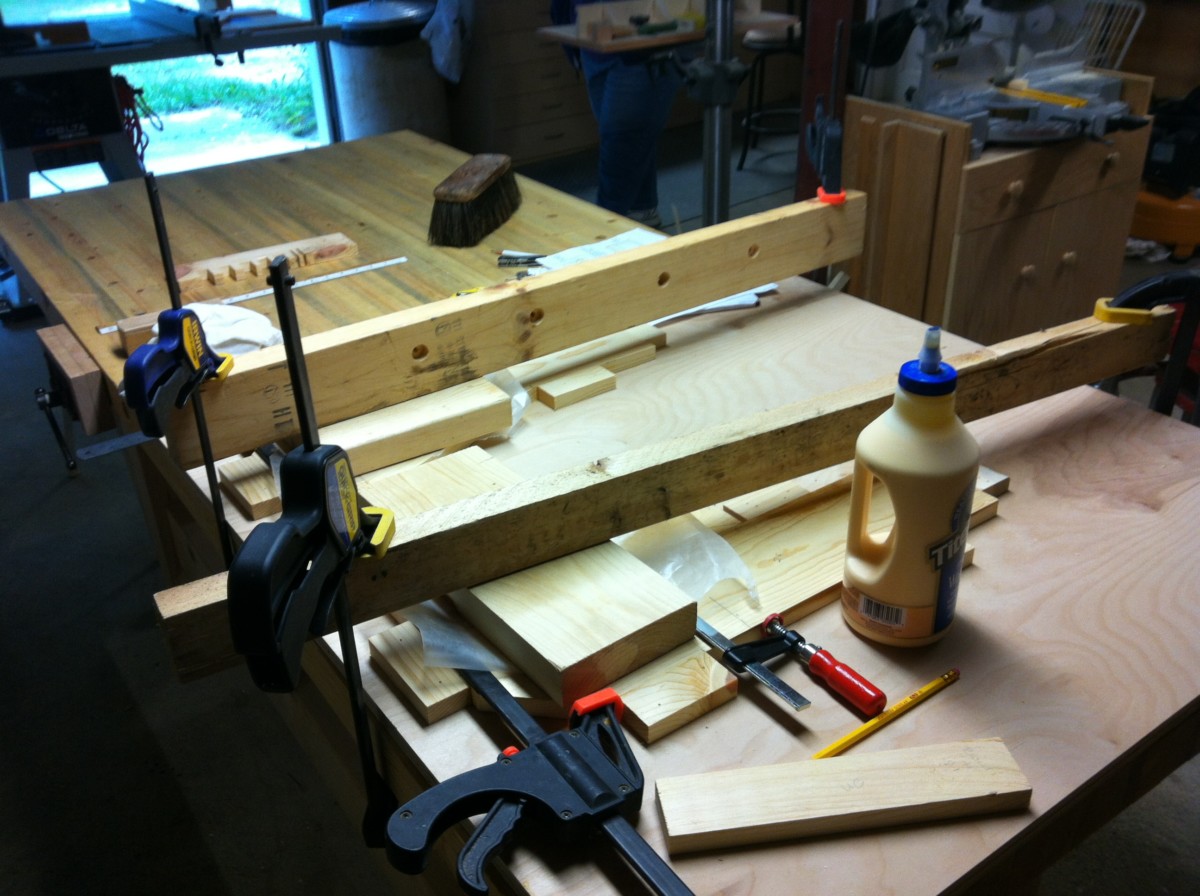
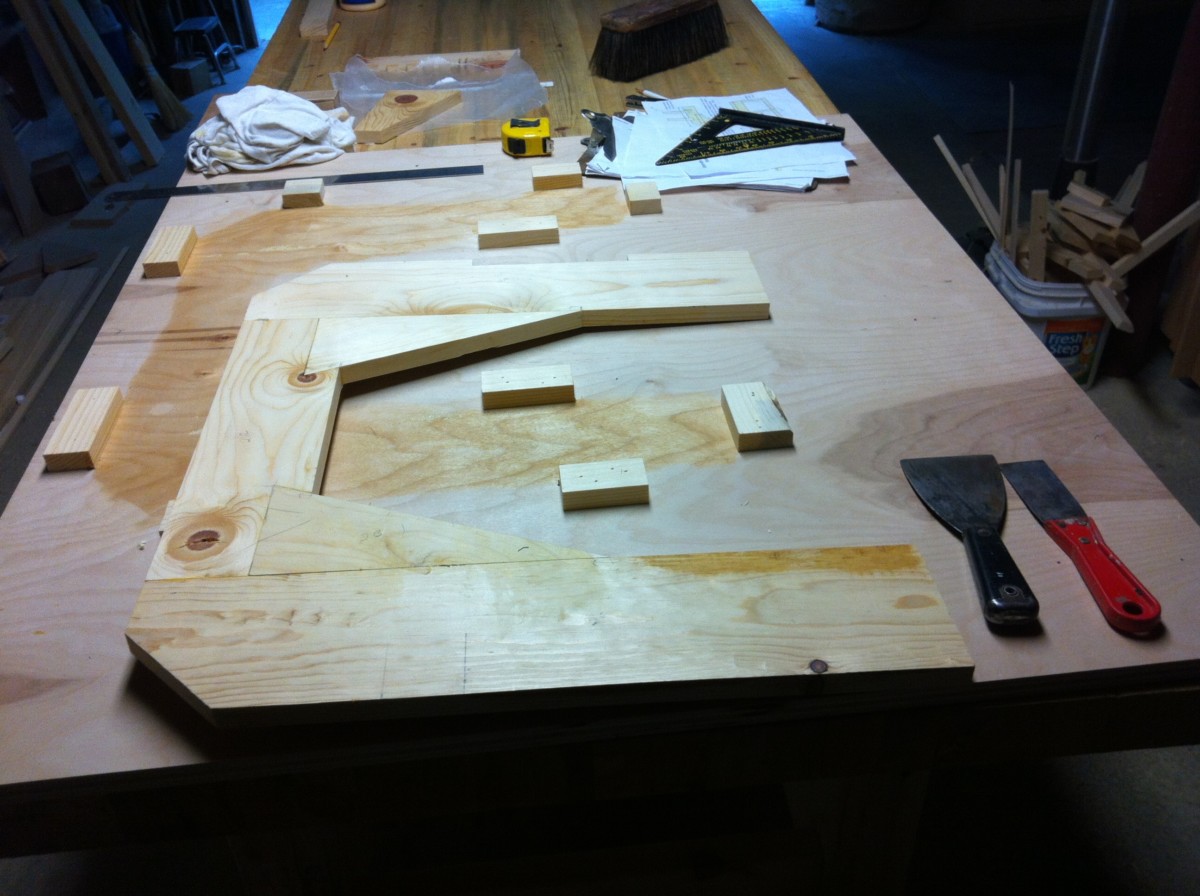
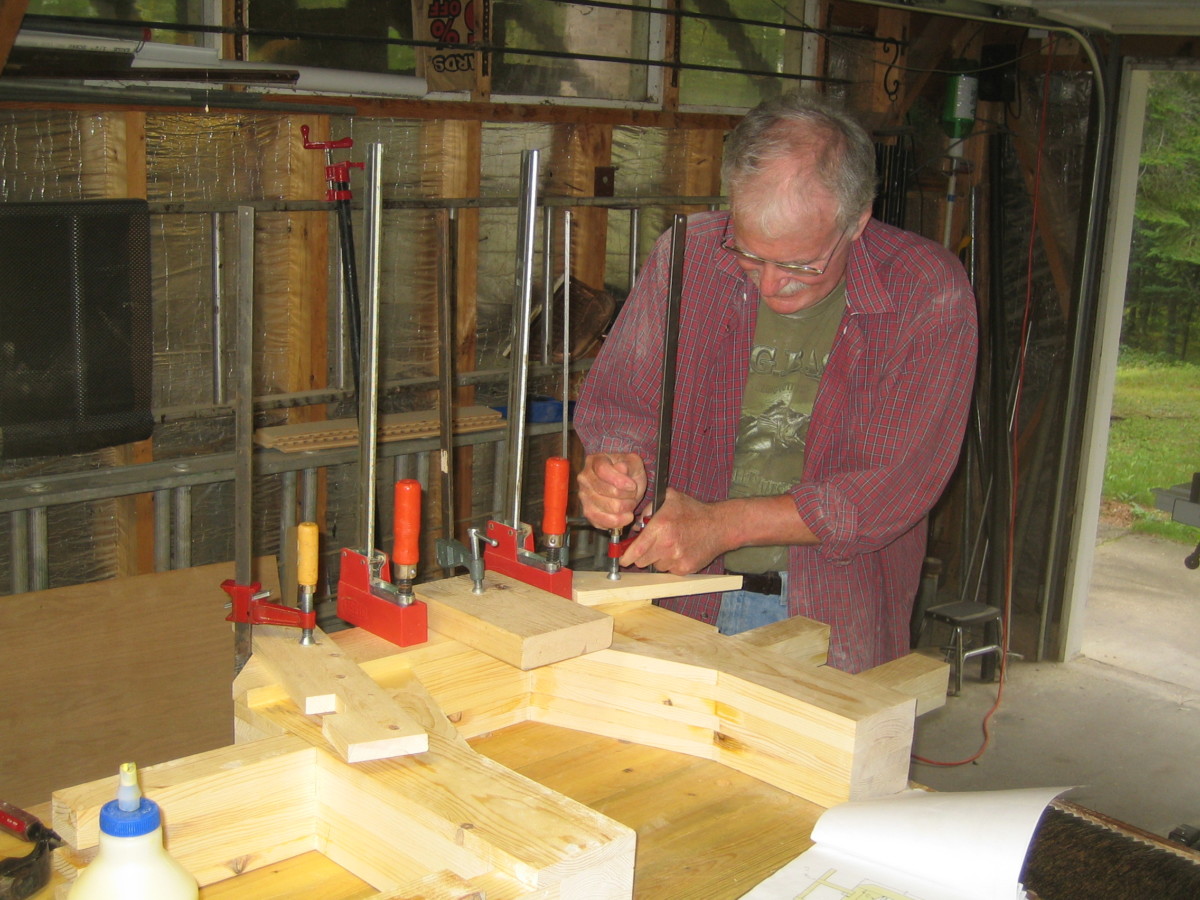
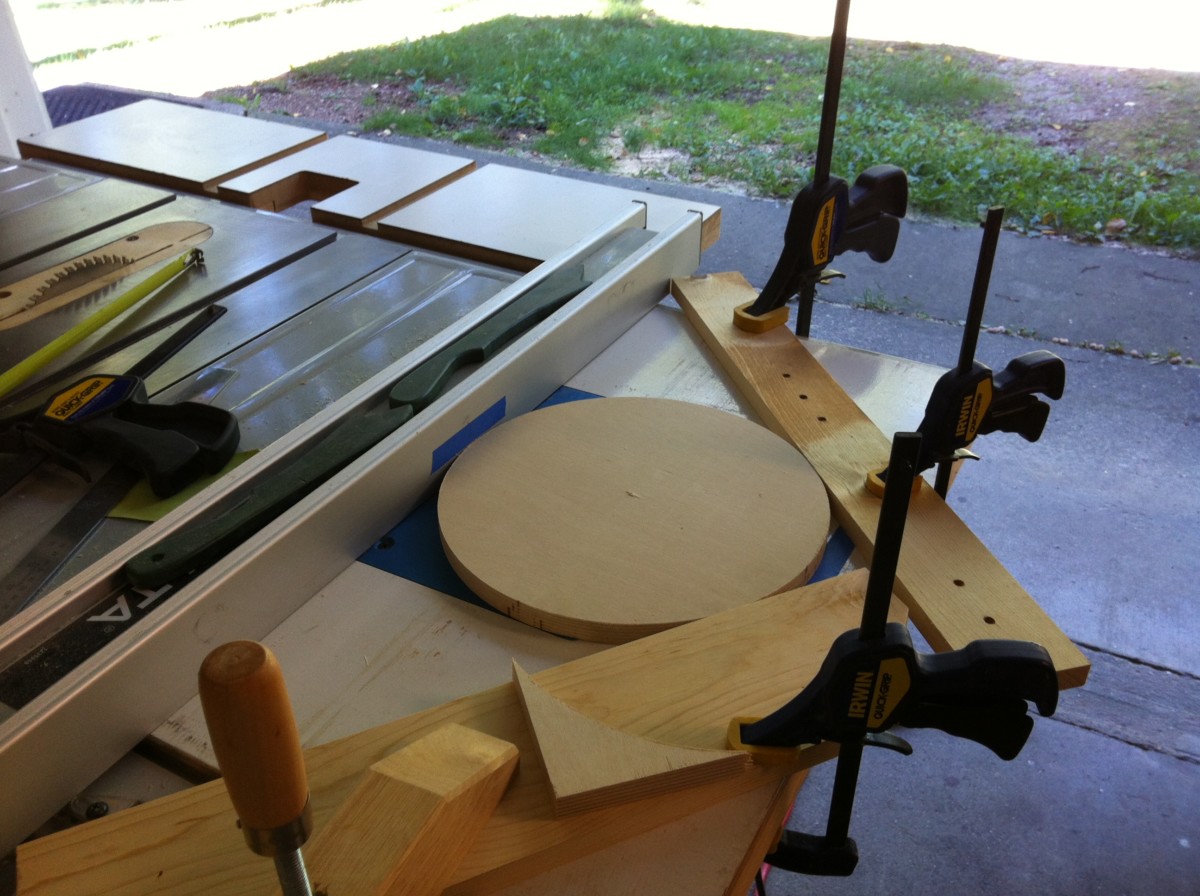
A piece of leftover 3/4" plywood for a small, easy project. I need to start slow.
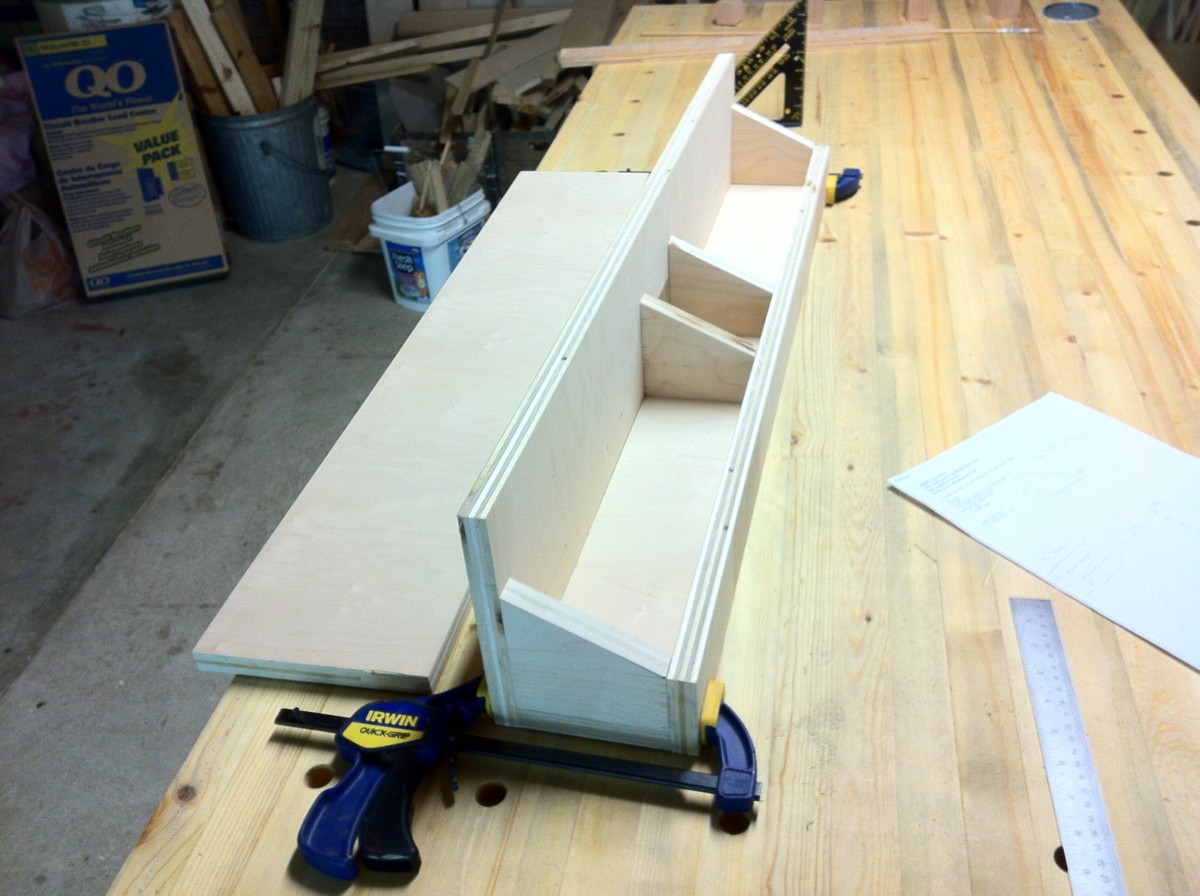
Most of the cutting is done. This should be easy since I watched Geoff make one of these last month.

Oh no!

Here's another sure sign of summer.

Contact cement applied to attach laminate to the front of the fence.

The front of the fence is almost done. A little more screwing around and it will be time for glue-up.
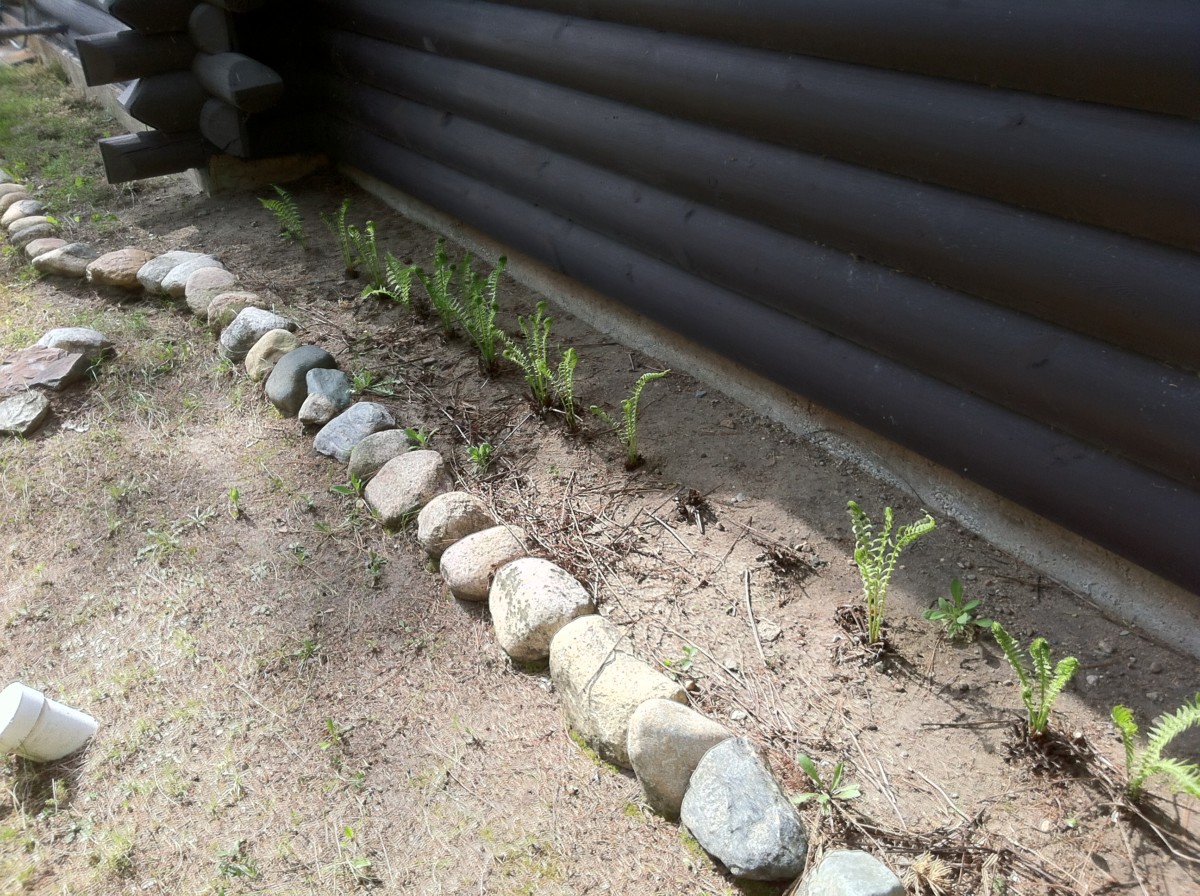
Surprise! Those ferns that Chris & I planted last year came back. They sure looked like they were dead.
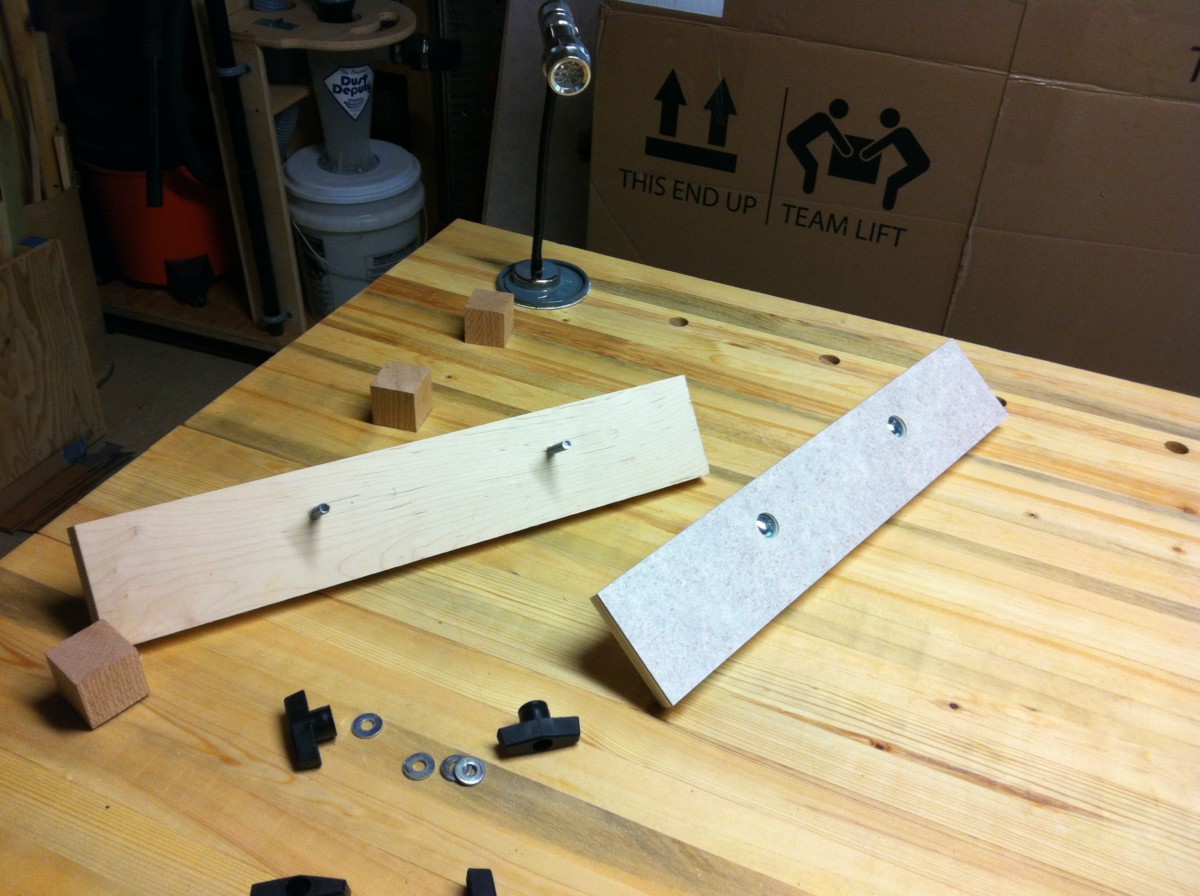
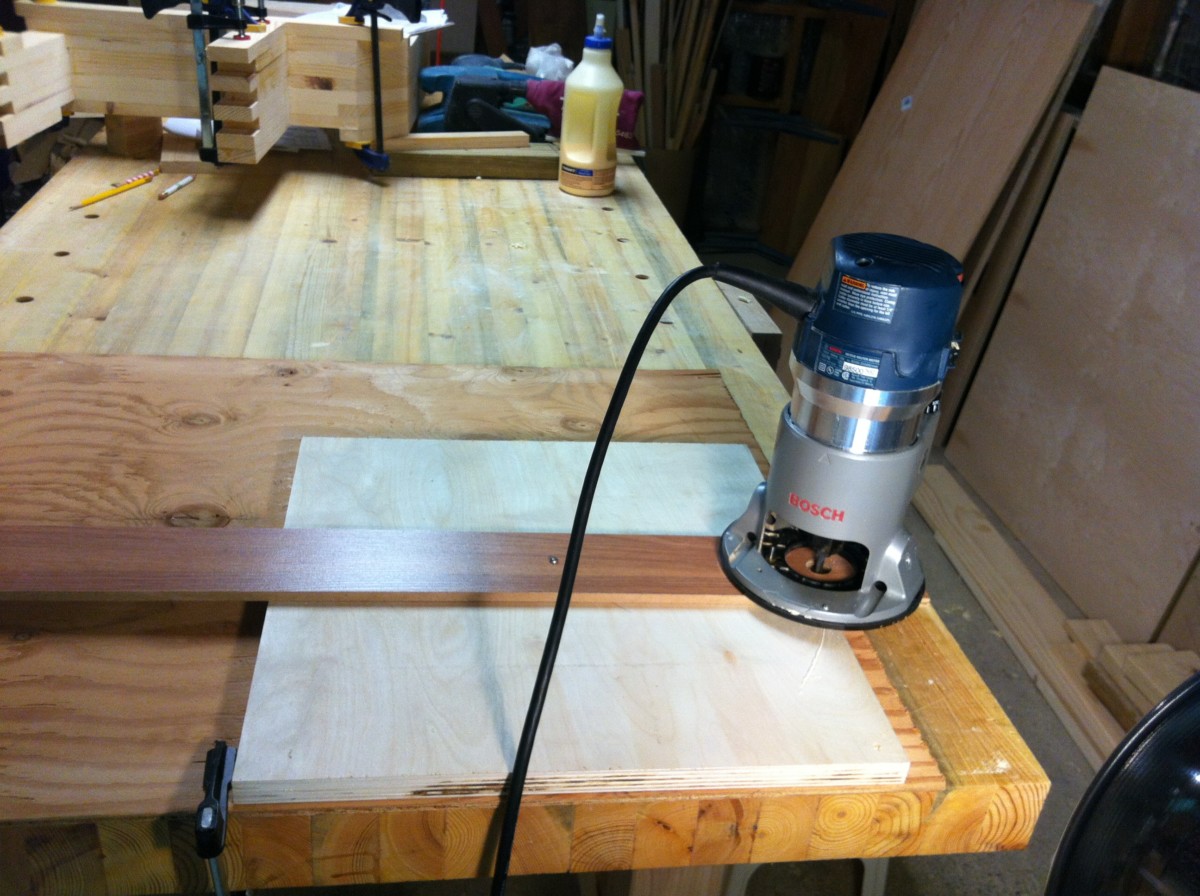
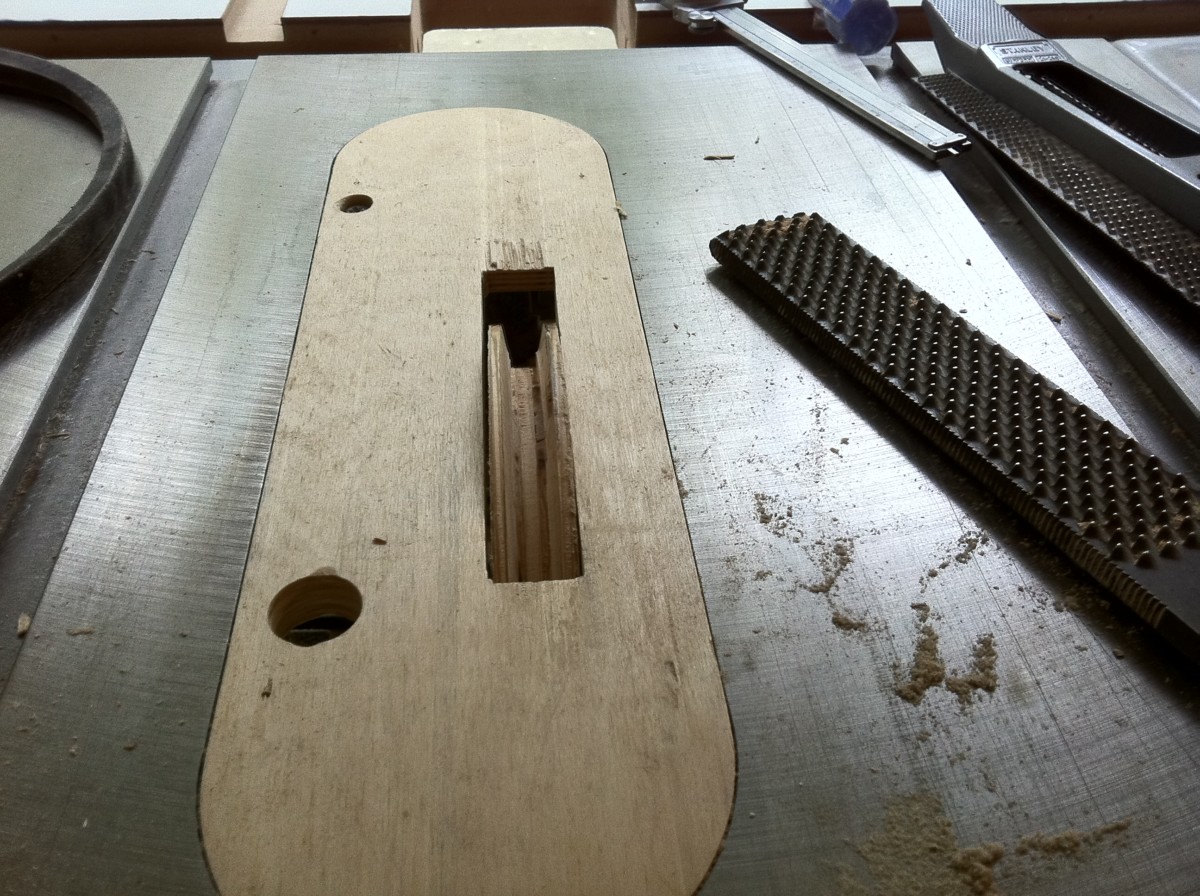
These are the two lower sliding segments of the router fence.
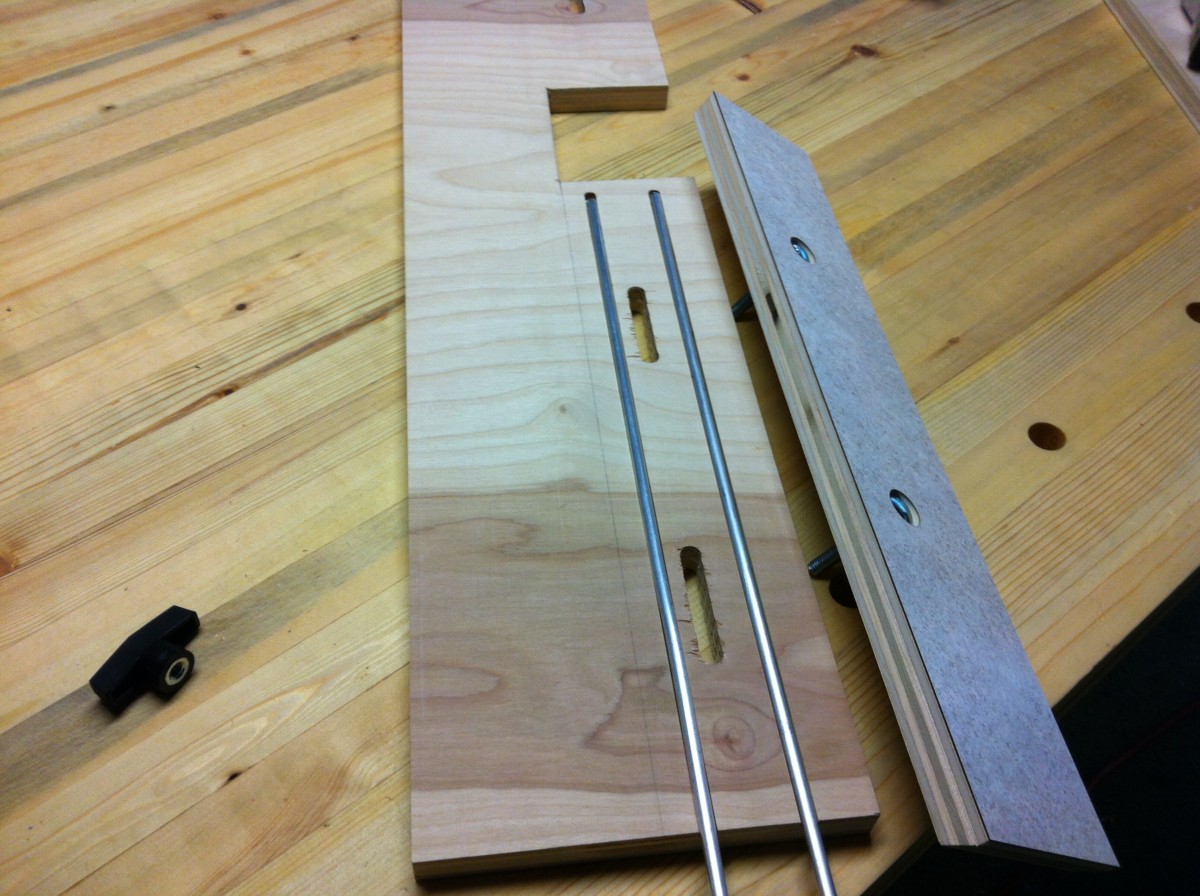
These grooves on the left hand side of the fixed fence are to allow an optional spacer (1/4" rod) to hold the movable fence out by 1/16" when needed.
This is a dado in the upper fence to accept a t-track. This let's me use a feather board when needed.

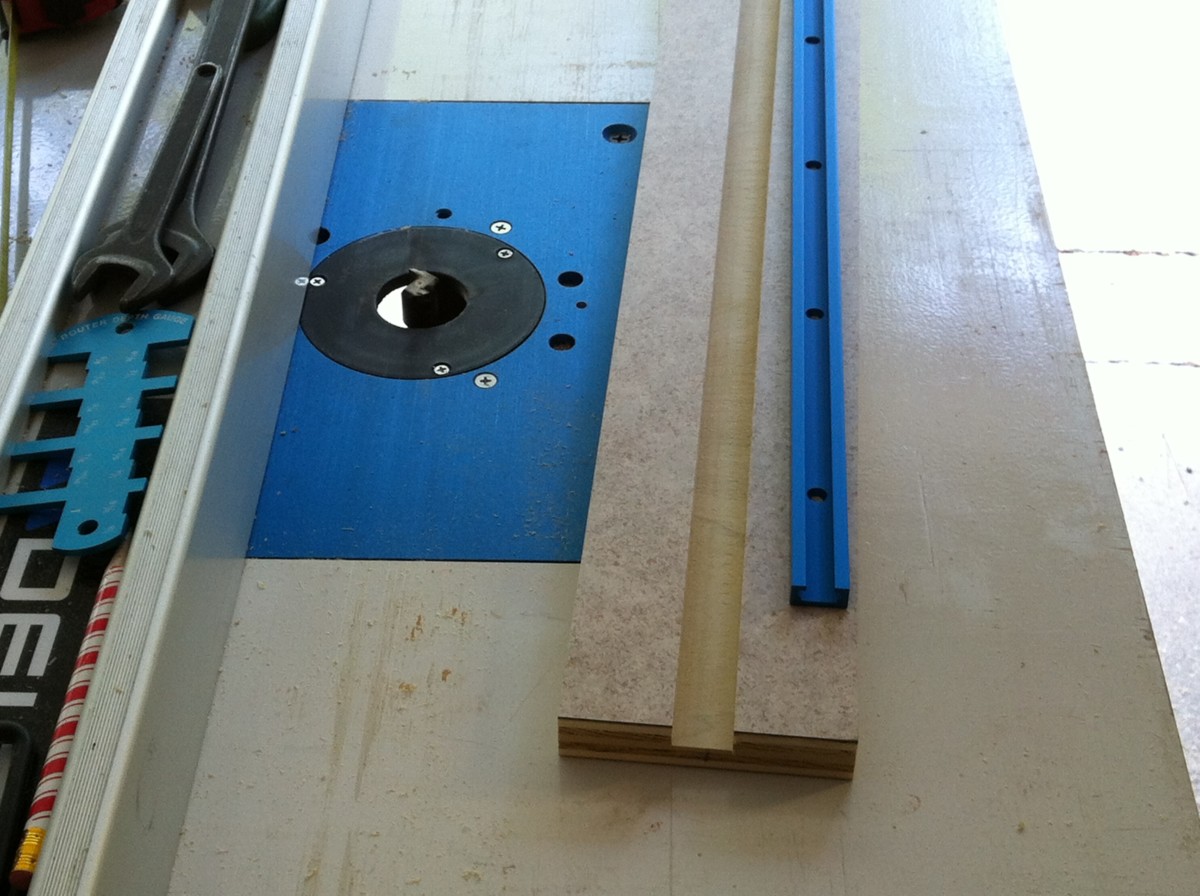
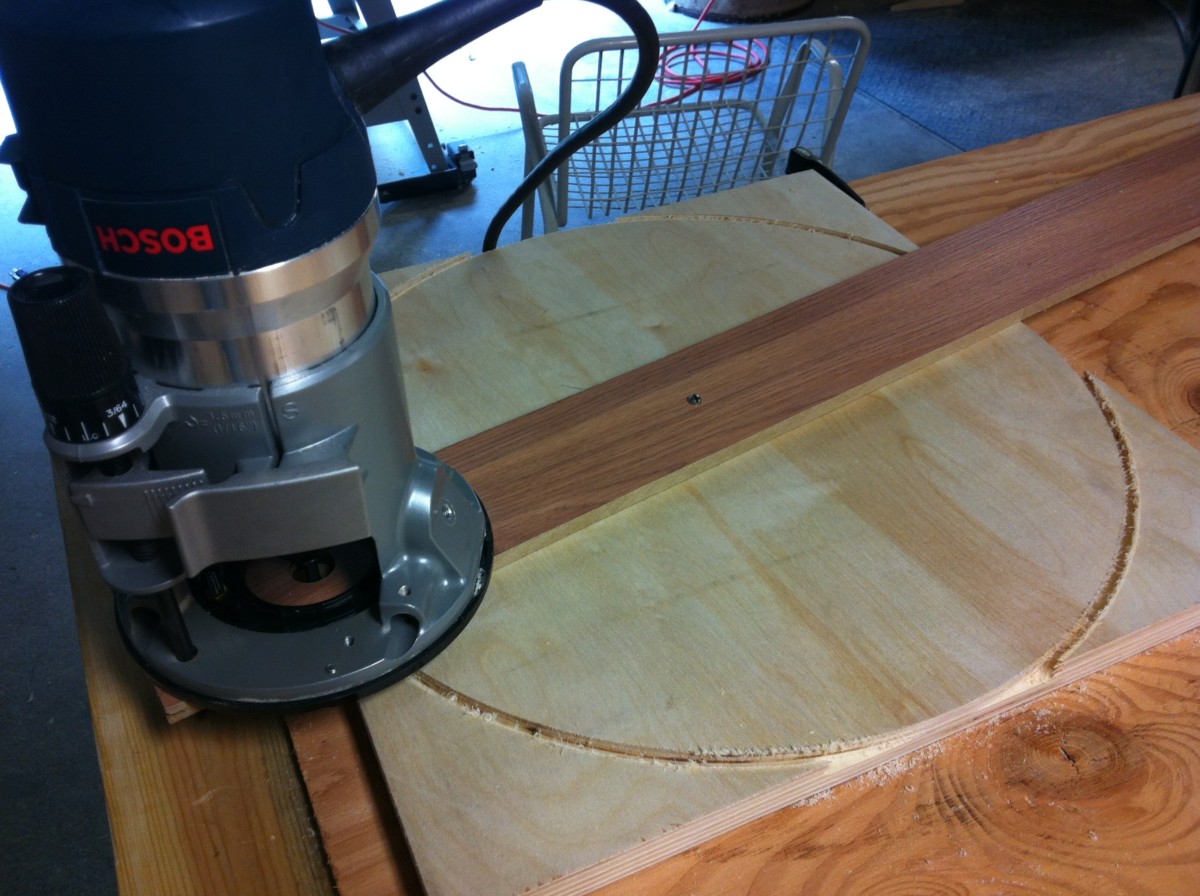
Finished with the router fence. This is a rear view
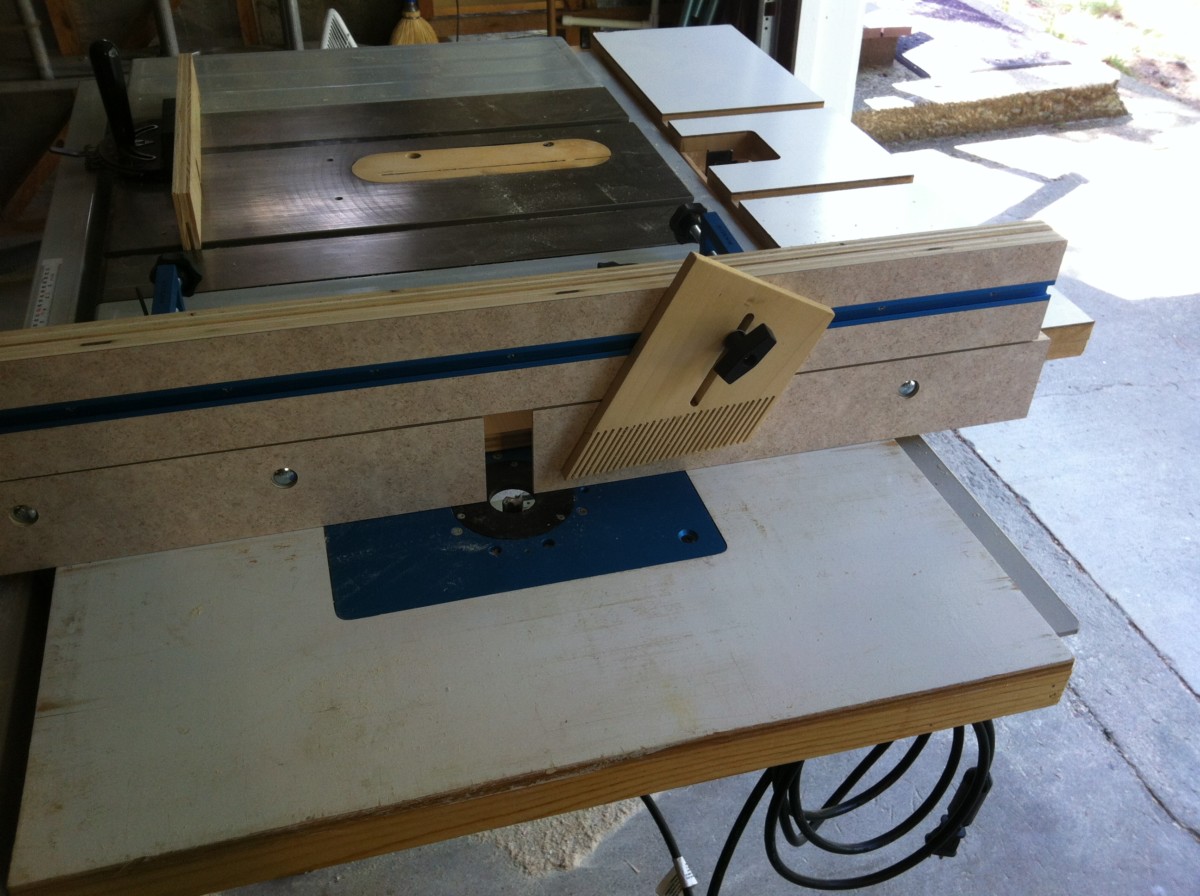
... and here is a front view.
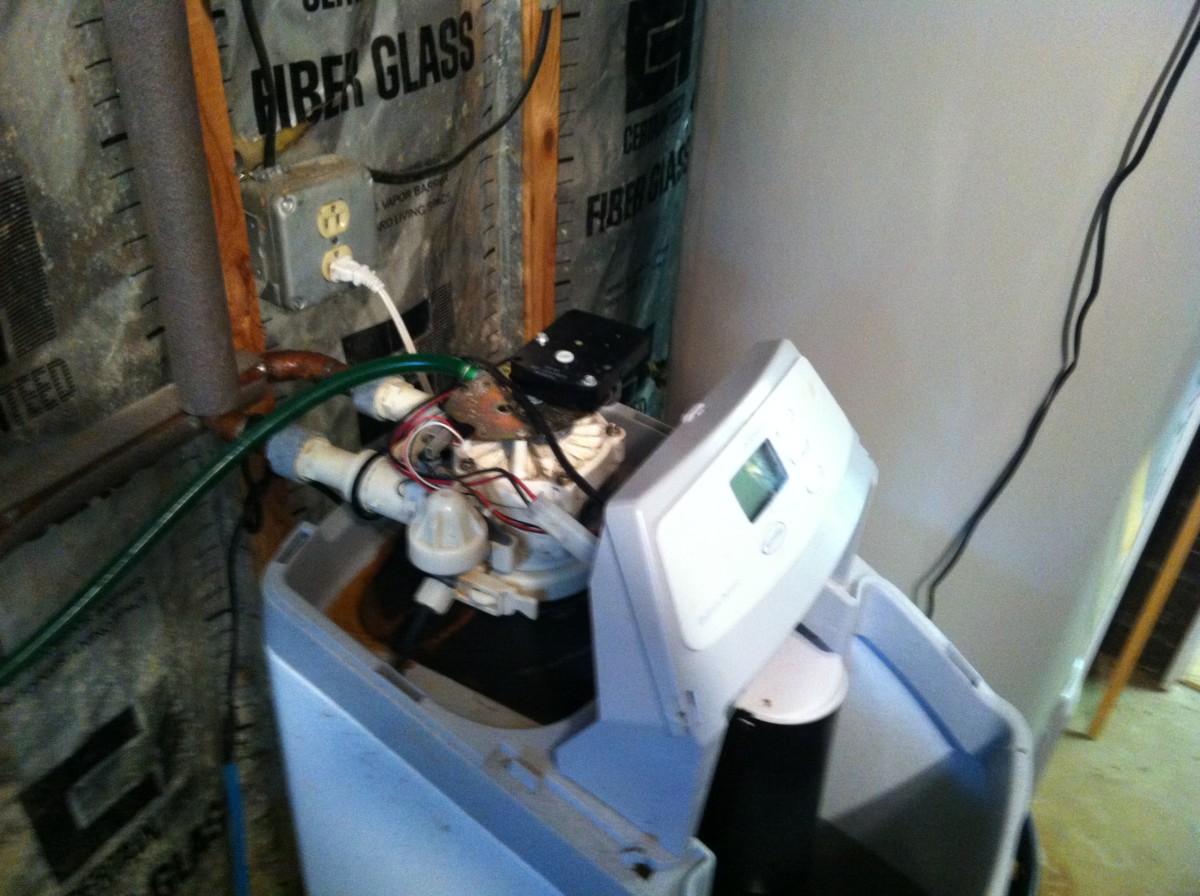
The water softener stopped working. The brine tank has filled up with water to the overflow vent.

The control unit has a lot of gears, springs and O-rings.

Taking this apart will be the easy bit.
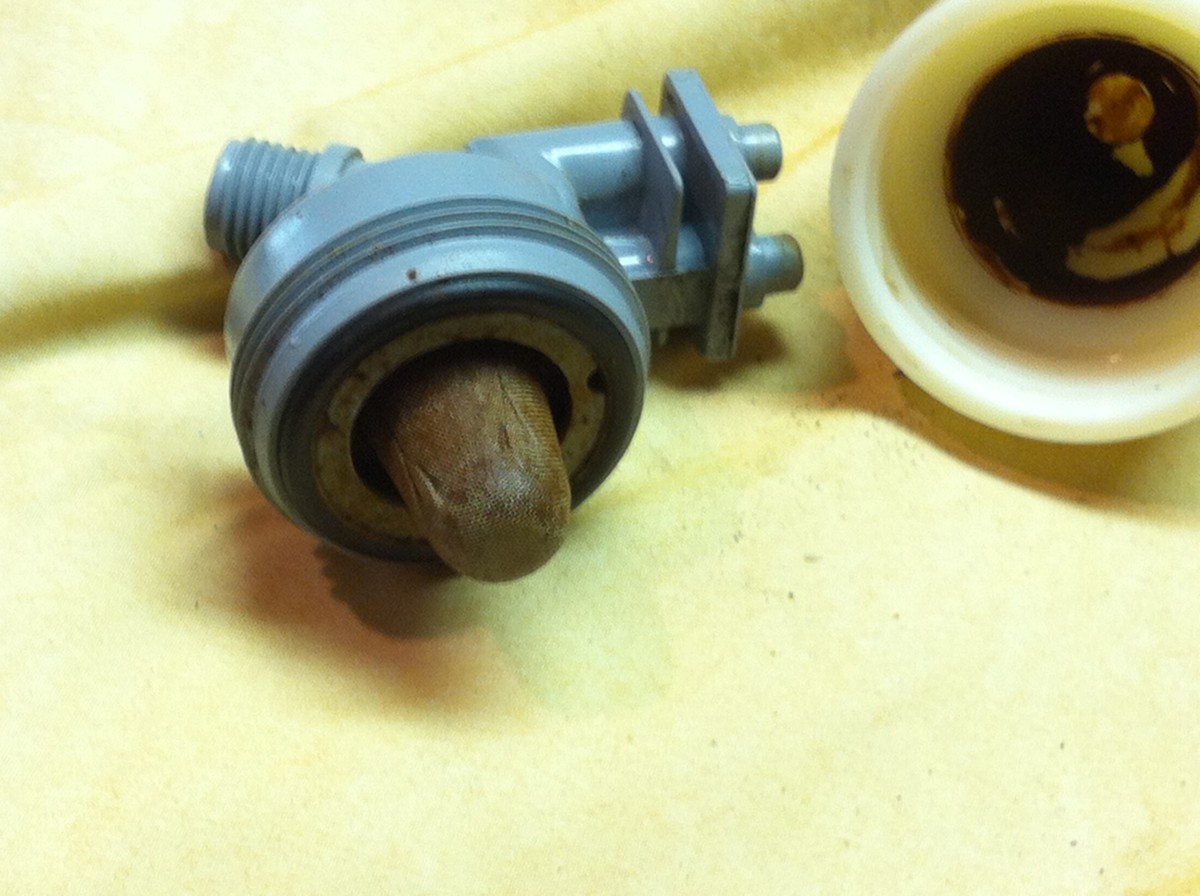
Aha! This looks like it might be the problem. I'll clean everything, put it back together and then we'll see how it works.
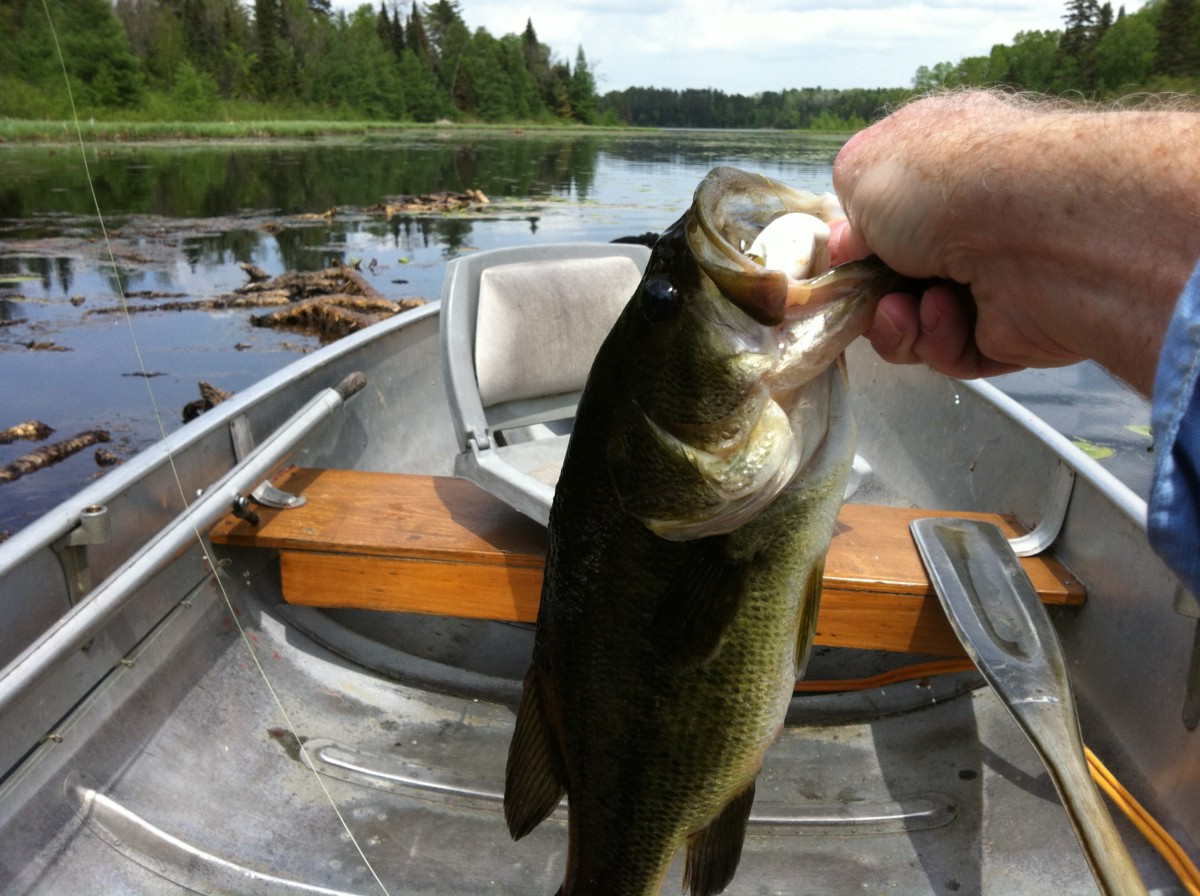
First bass of the year - 2.2 lbs. This bodes well.
Chris arrived today - 4 day drive from south Florida.
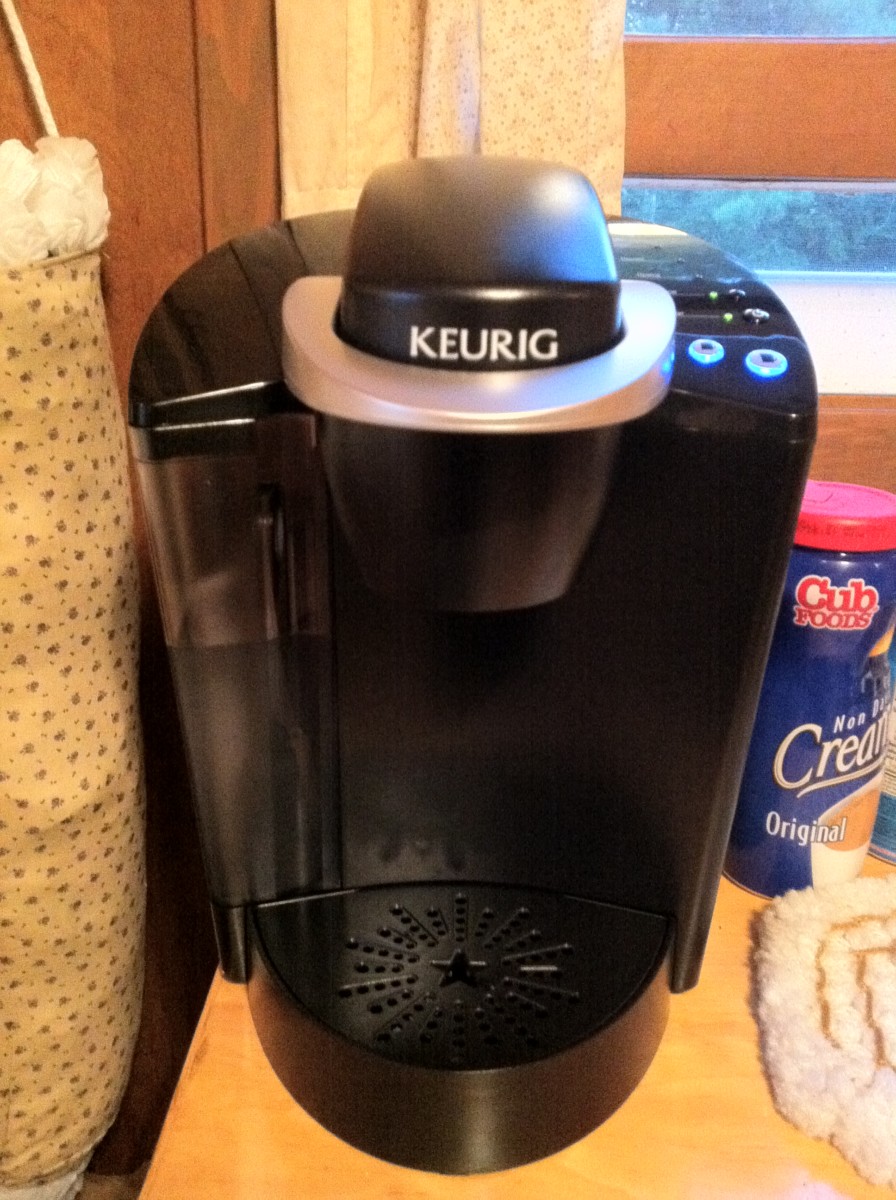
A new toy for the kitchen.

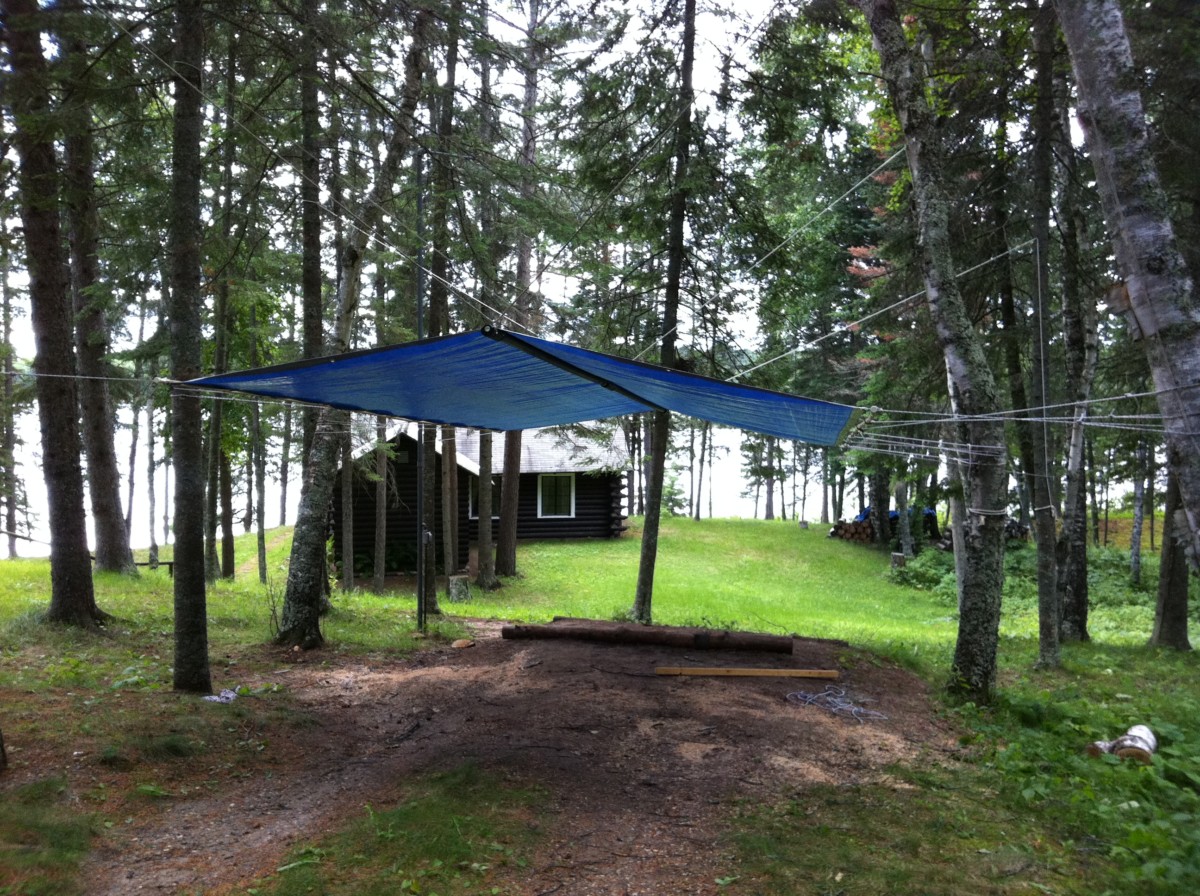
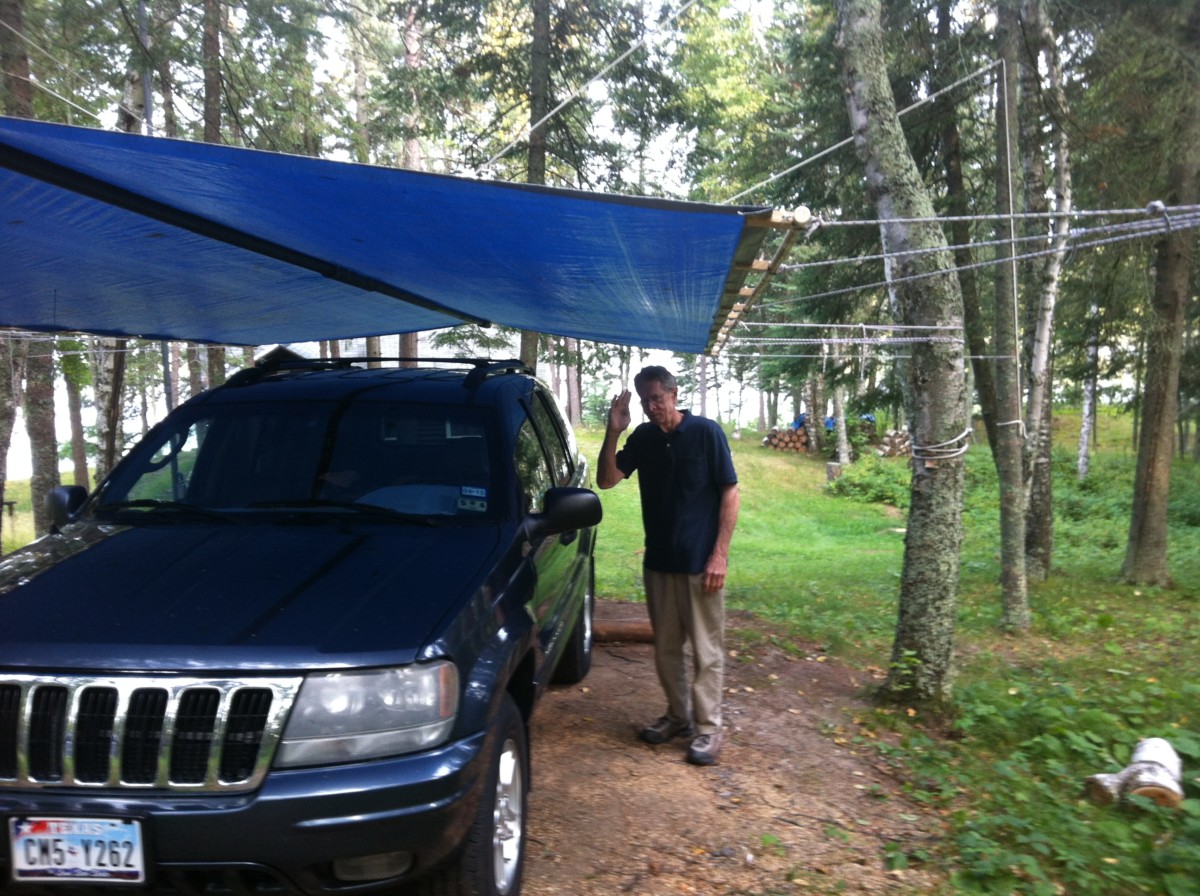
Here's the existing car port. Note the spliced 2x4 center rafter. We'd like to replace that with one made from metal conduit.

Metal conduit wrapped with foam pipe insulation. The center joint is reinforced with a 2' 3/4" dowel drive inside the conduit. Eye bolts are attached at the two ends and in the center.
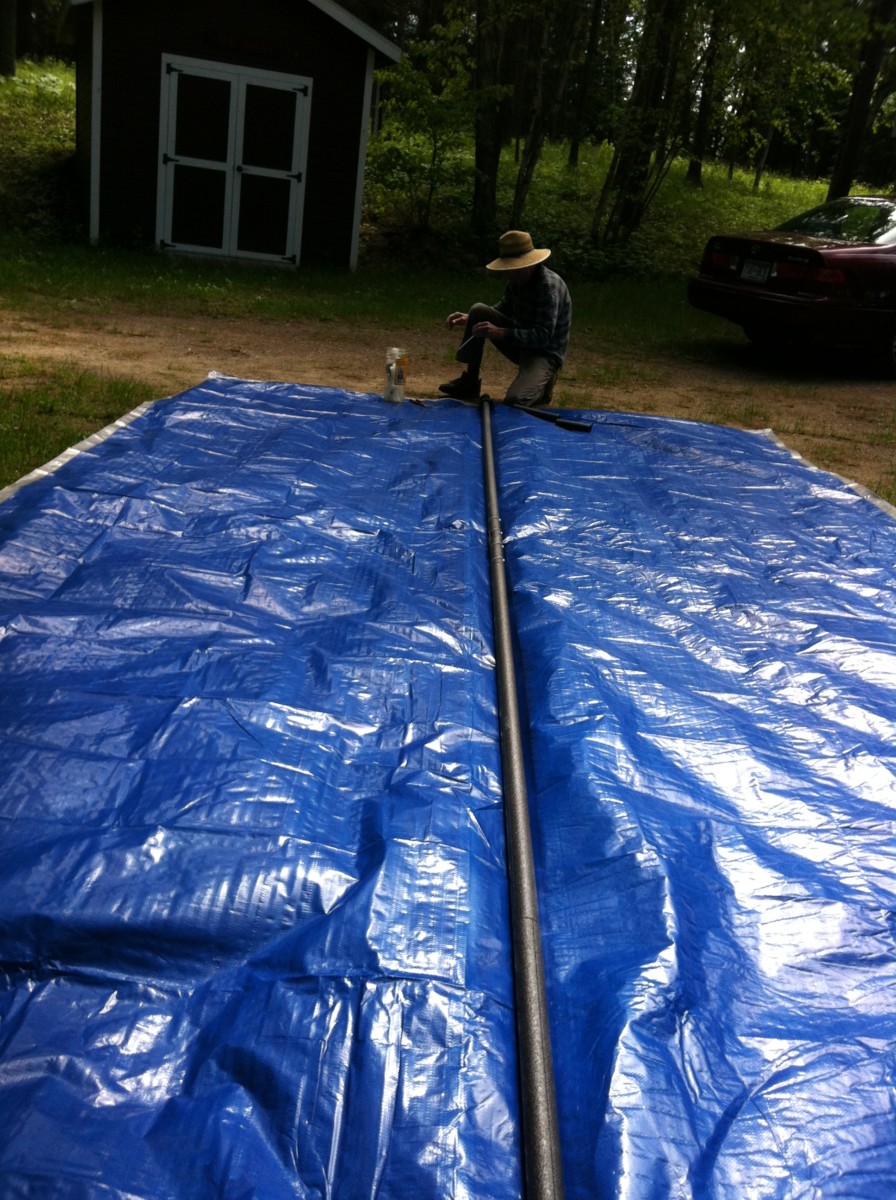
A view with the tarp upside down. The eye bolts at the end go through grommets and the center eye bolt is pushed through the tarp.

The old and new tarps side by side so we can transfer the outside PVC rails to the new car port.
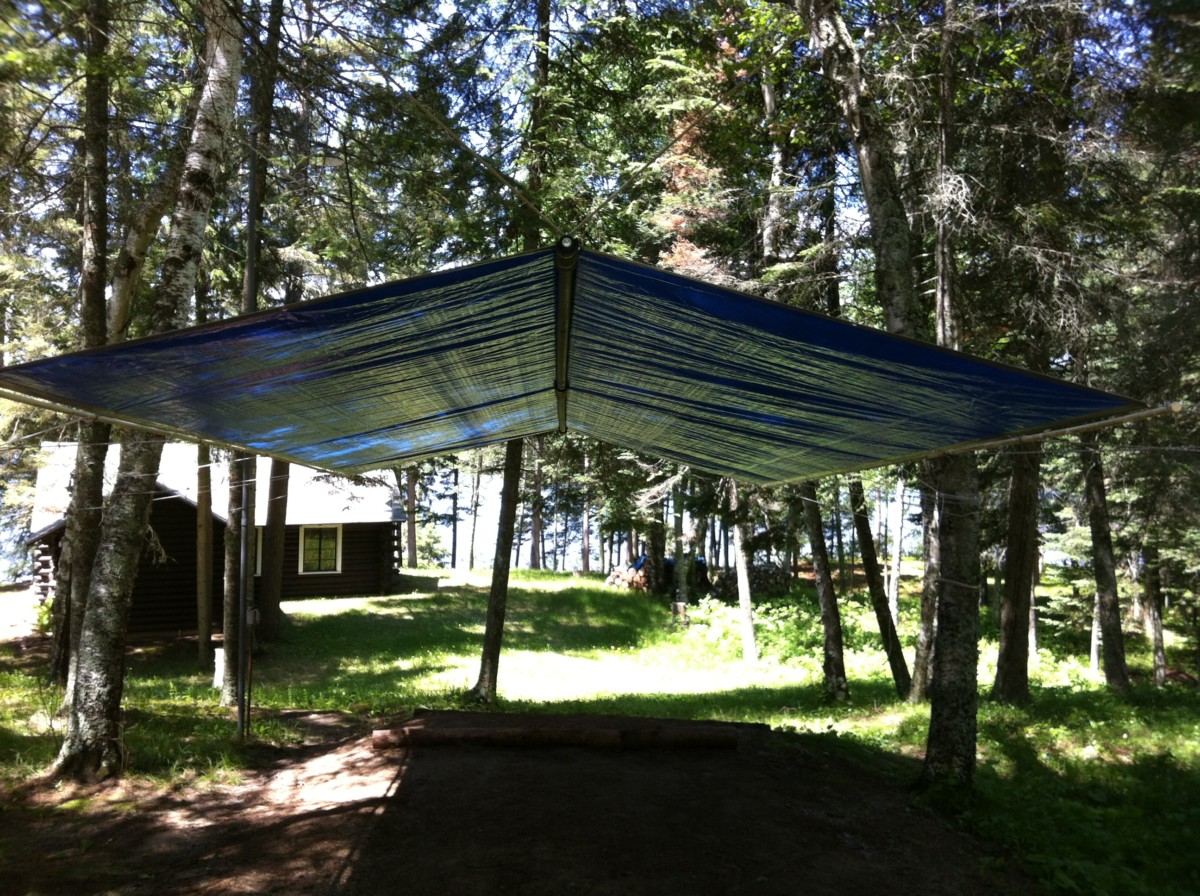
It looks pretty good.
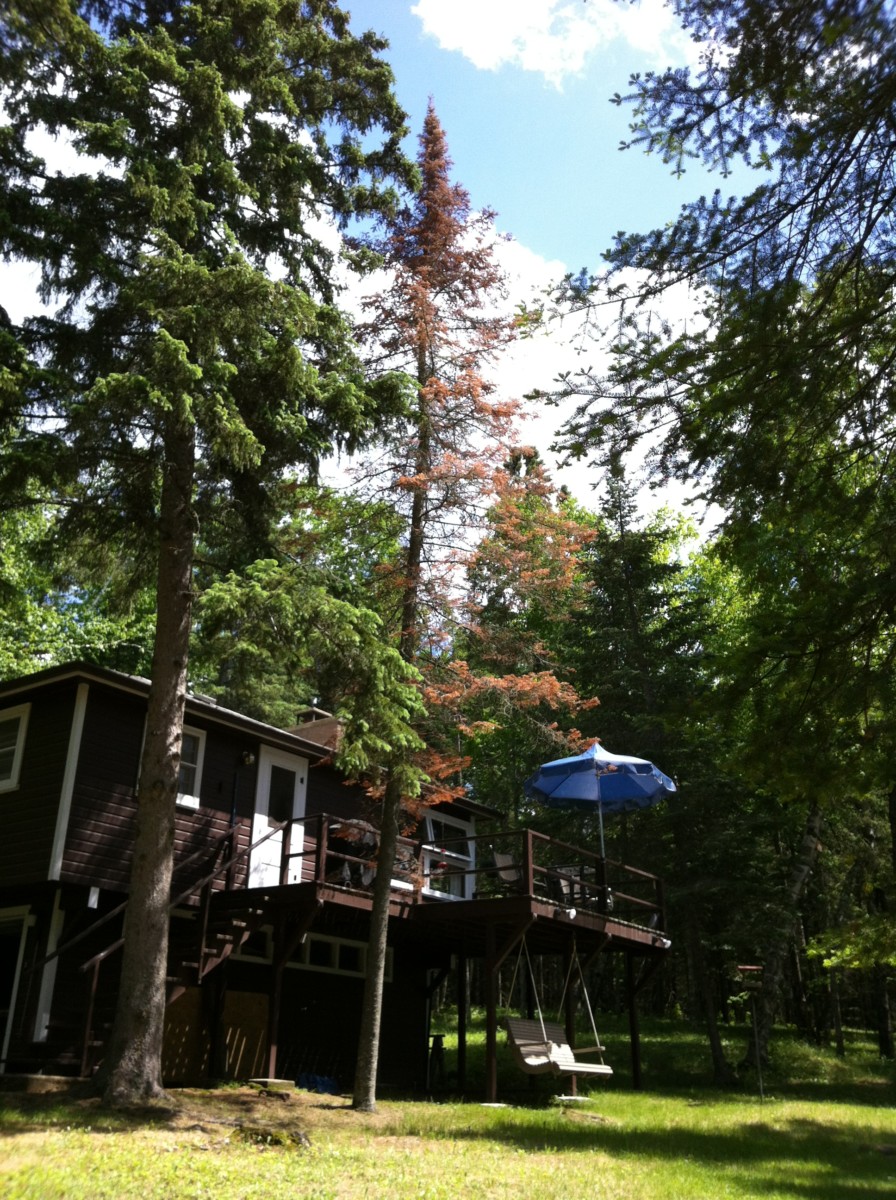
That center balsam (the smaller one) died over the winter. The needles are completely red from top to bottom.
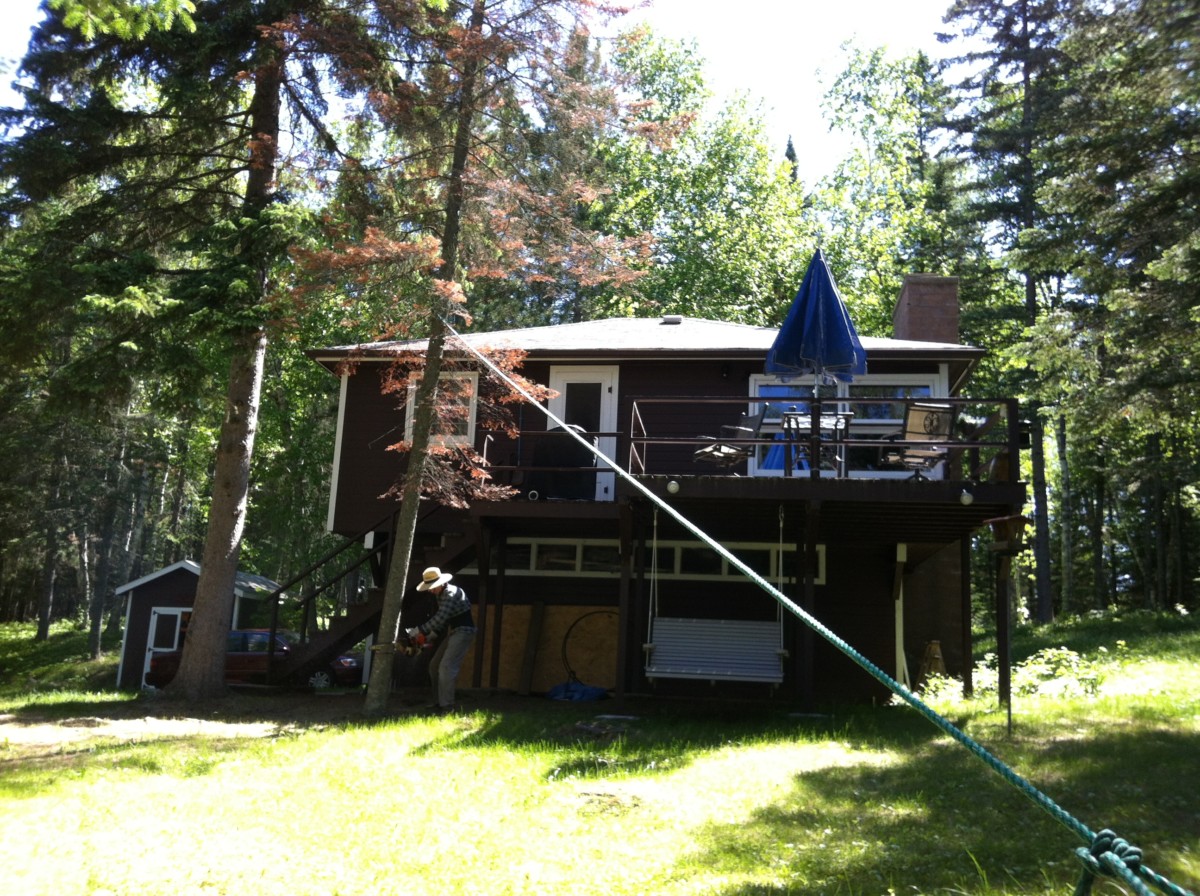
There are two imperatives here: 1. nobody dies and 2. don't hit the deck.
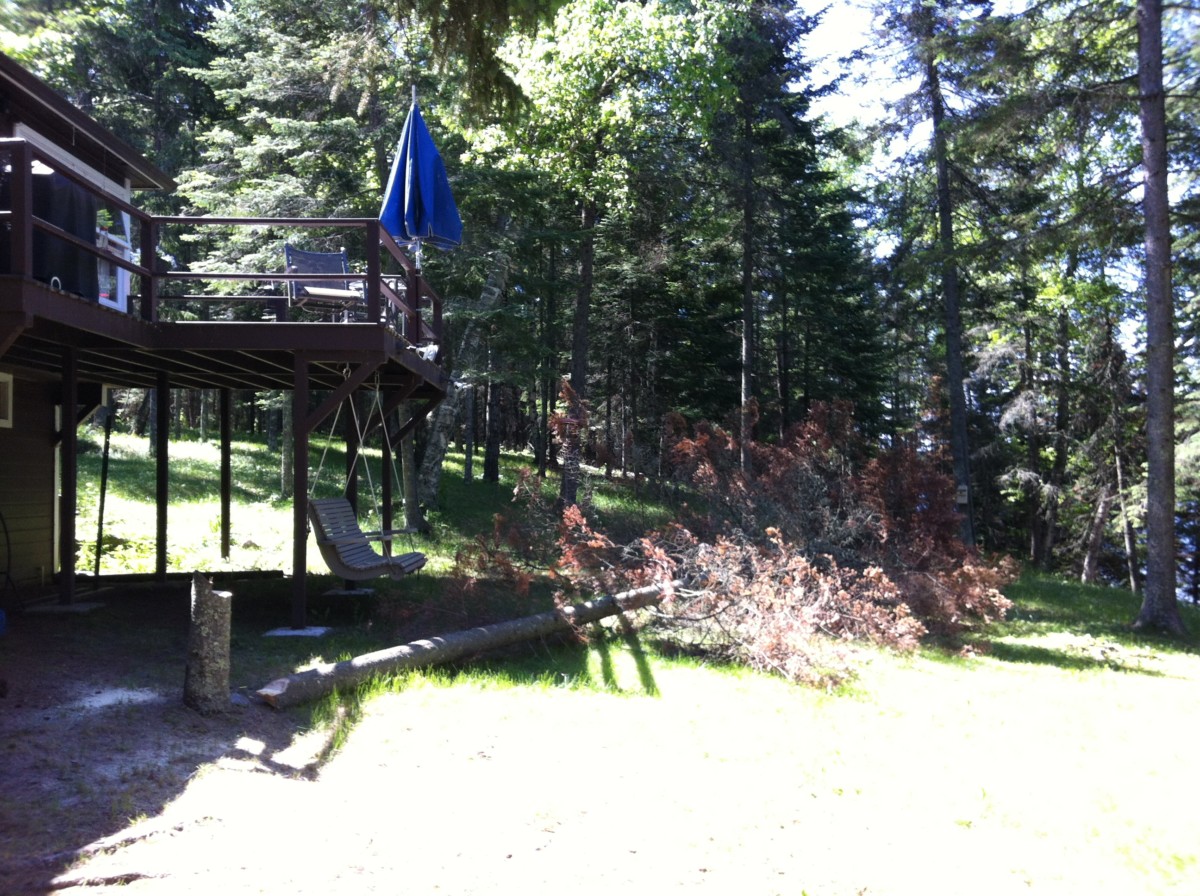
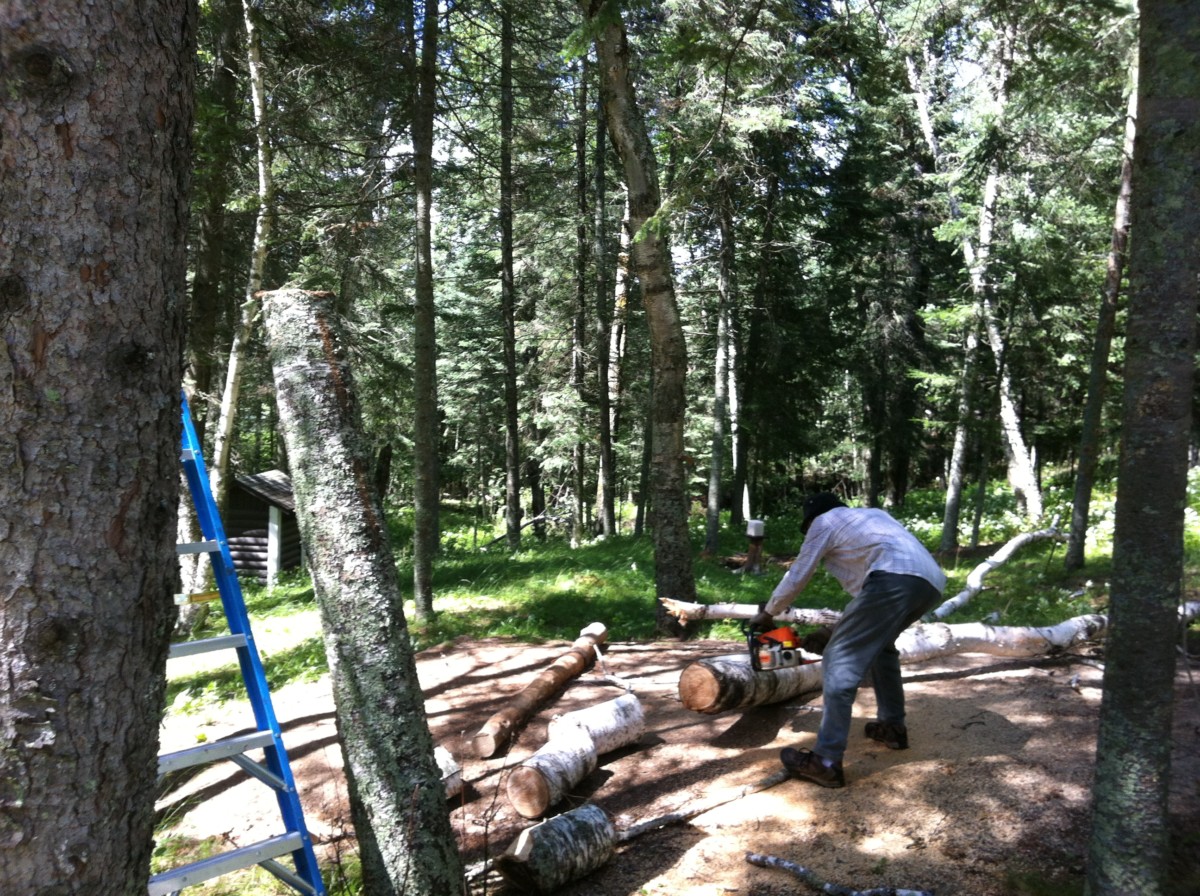
Mission accomplished. Now we just need to cut it up and haul it away.
New dish for DirecTV in order to get HD programs. This dish needs to "see" 3 satellites so I could not put it where the old one was without cutting down a dozen trees.

We only had to cut down two trees for the new dish.

No luck with bass this morning but we did find 3 abandoned ducks to add to the flock.
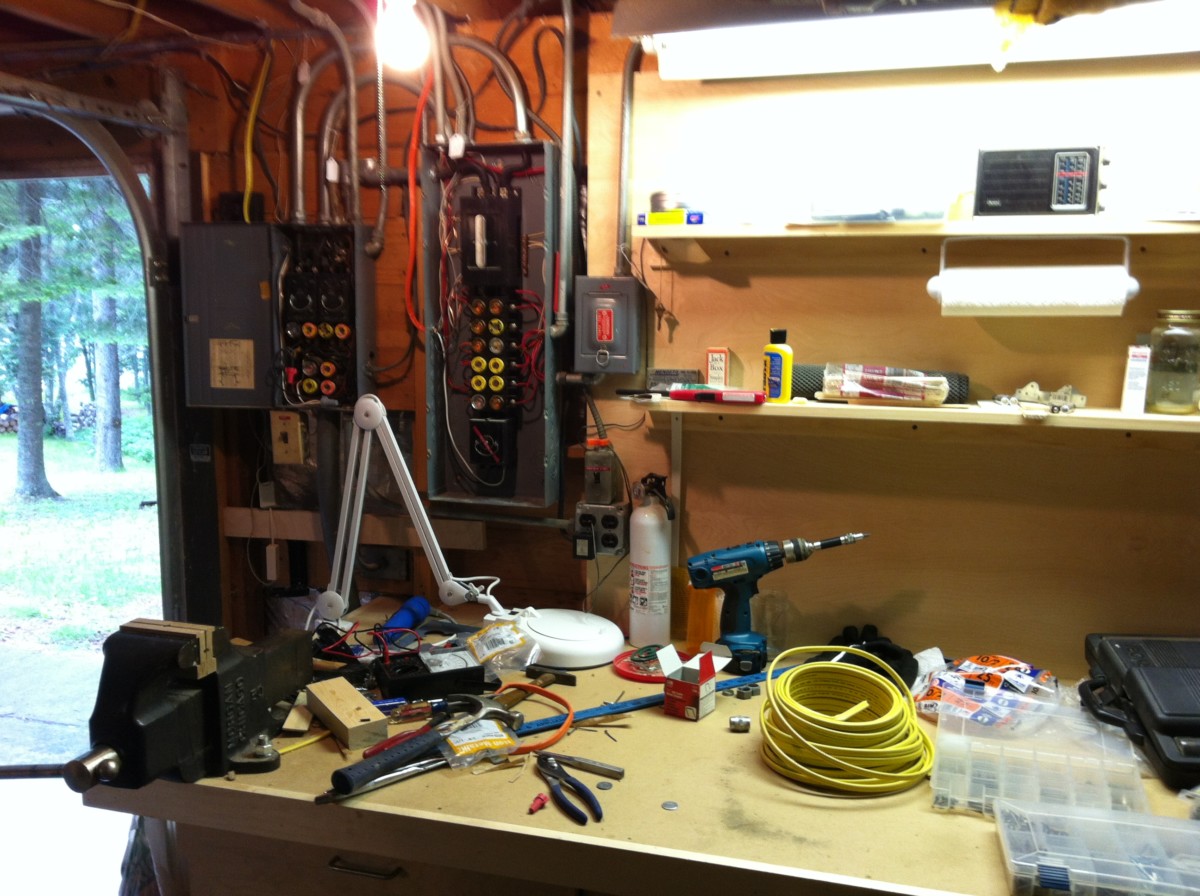
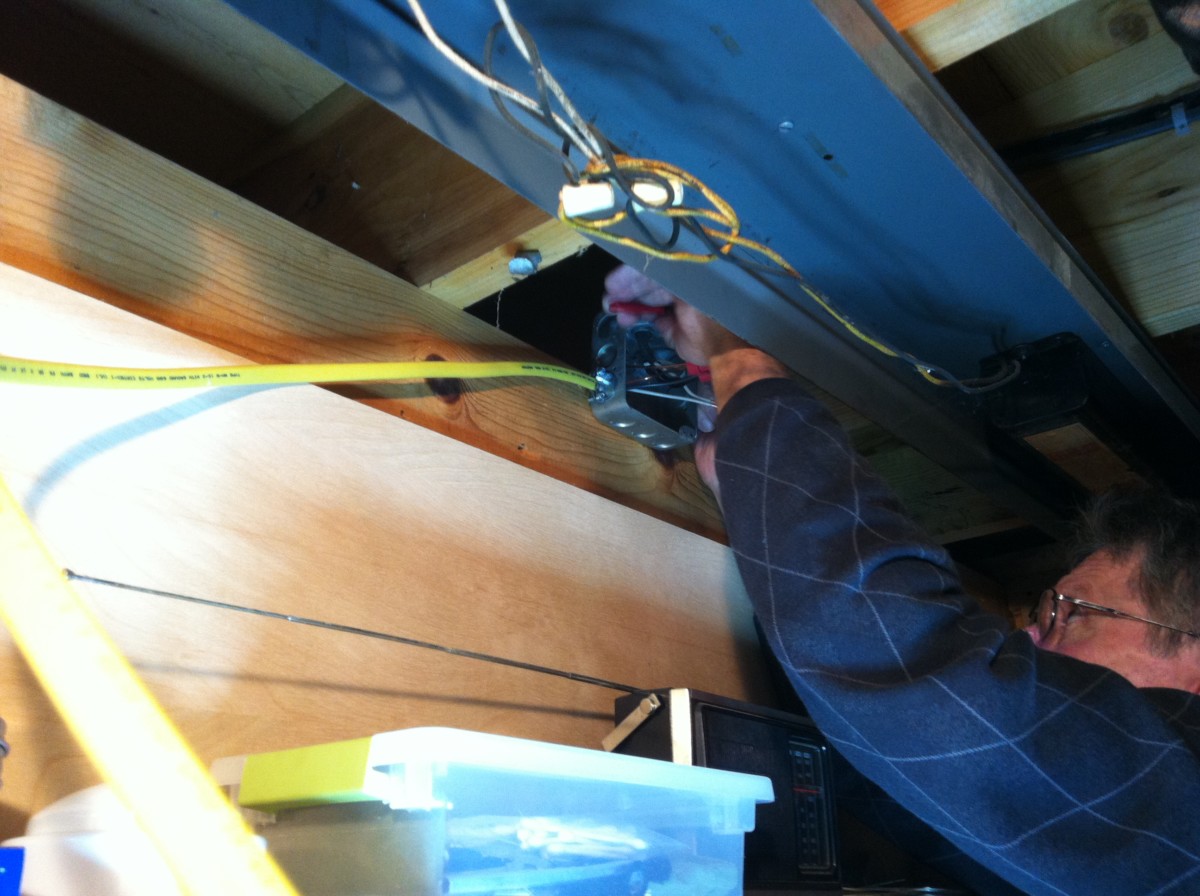
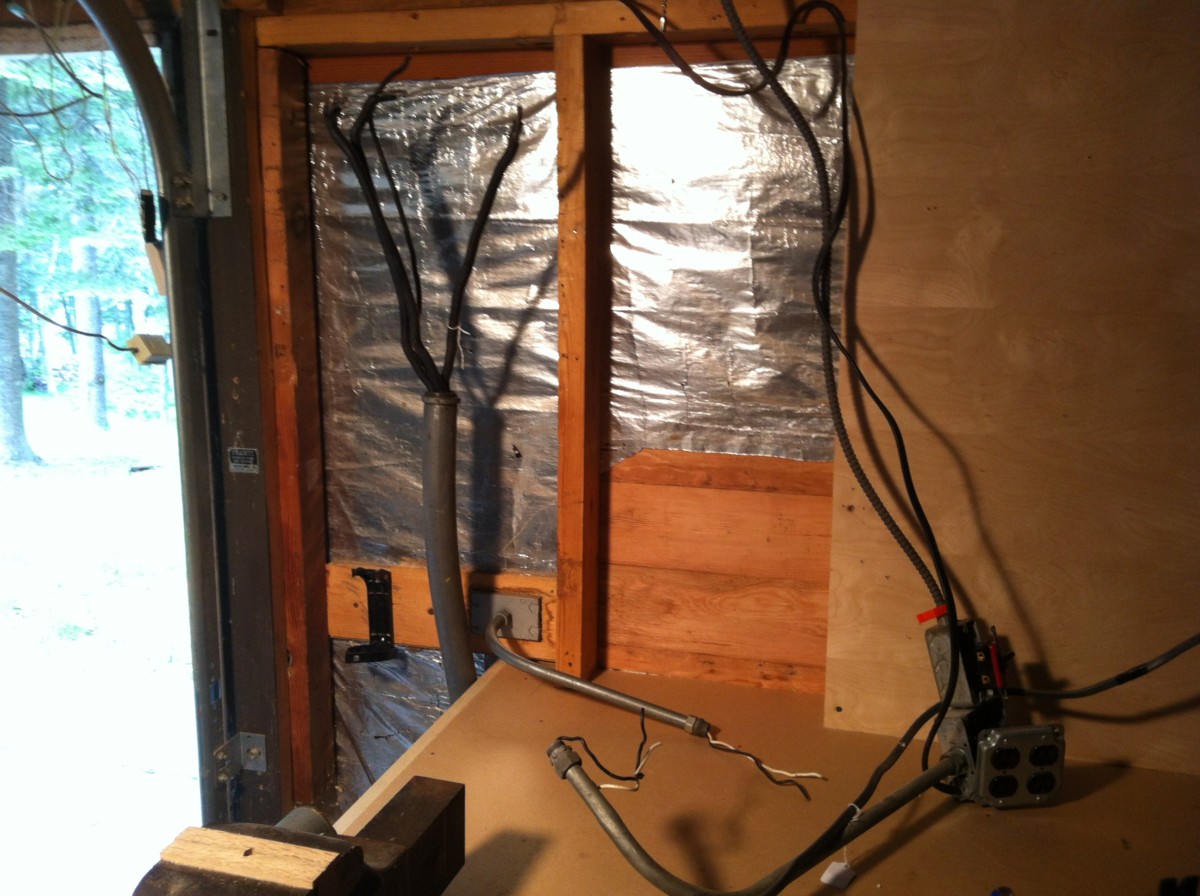
I've finally started to get ready for the new service panel with circuit breakers instead of fuses. I want to replace the conduit feeds with regular NM wire.
Here we have the 220 line into the water heater. I've removed the conduit which fed into that box and wired in 10-2 NM wire. There was 12-2 wire in the old conduit.
That's the old 30 Amp fuse on the bottom of the sub-panel with the new wire. There used to be metal conduit right to the service panel.
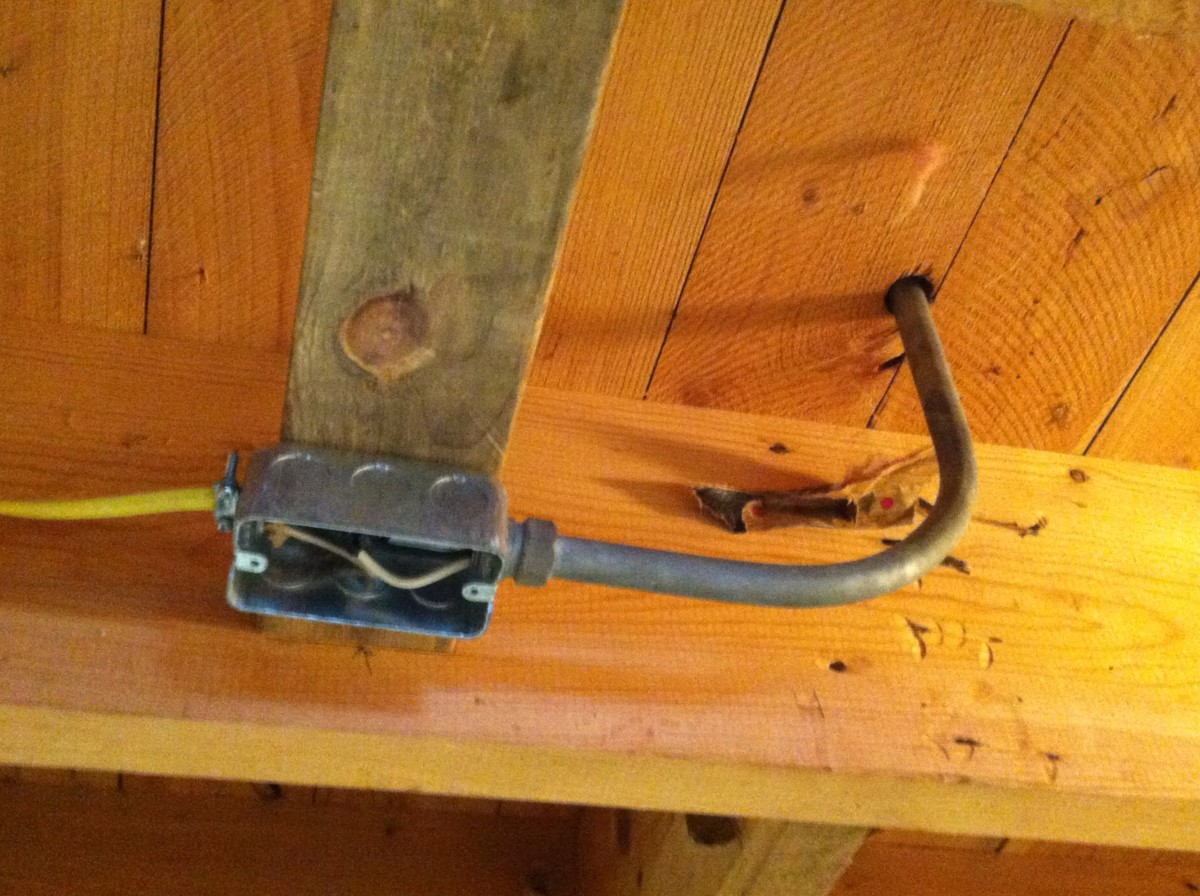
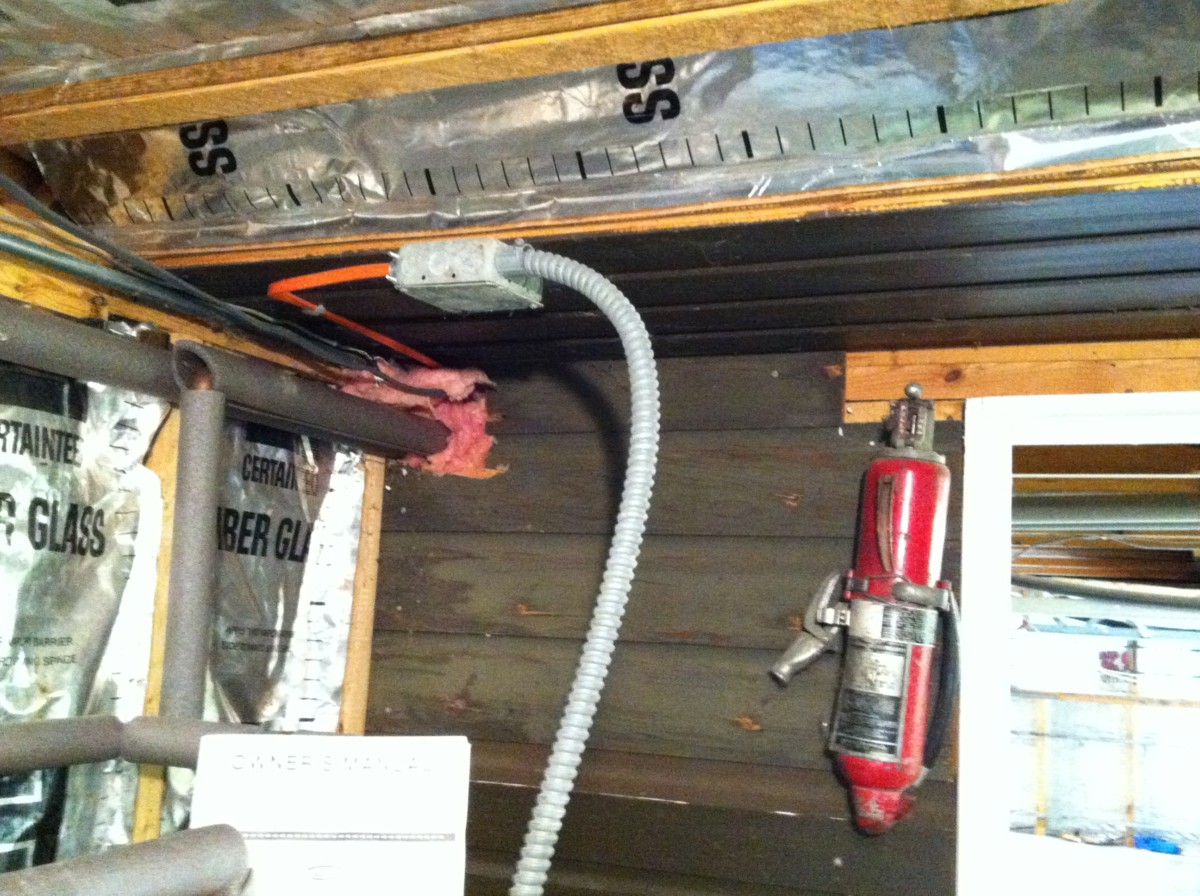
Here is conduit coming down from the kitchen. That pipe used to run all the way to the service panel but now it goes into that junction box and new NM wire is spliced onto the old.

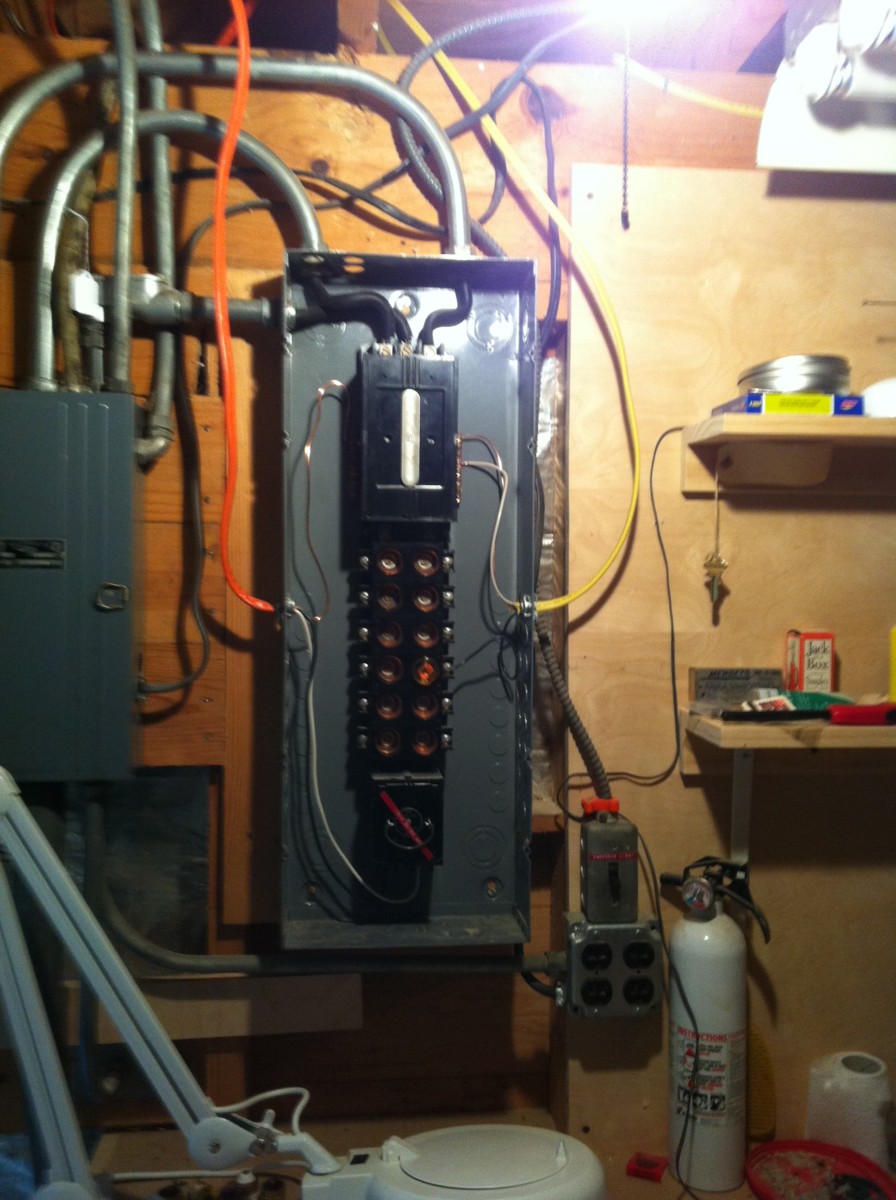
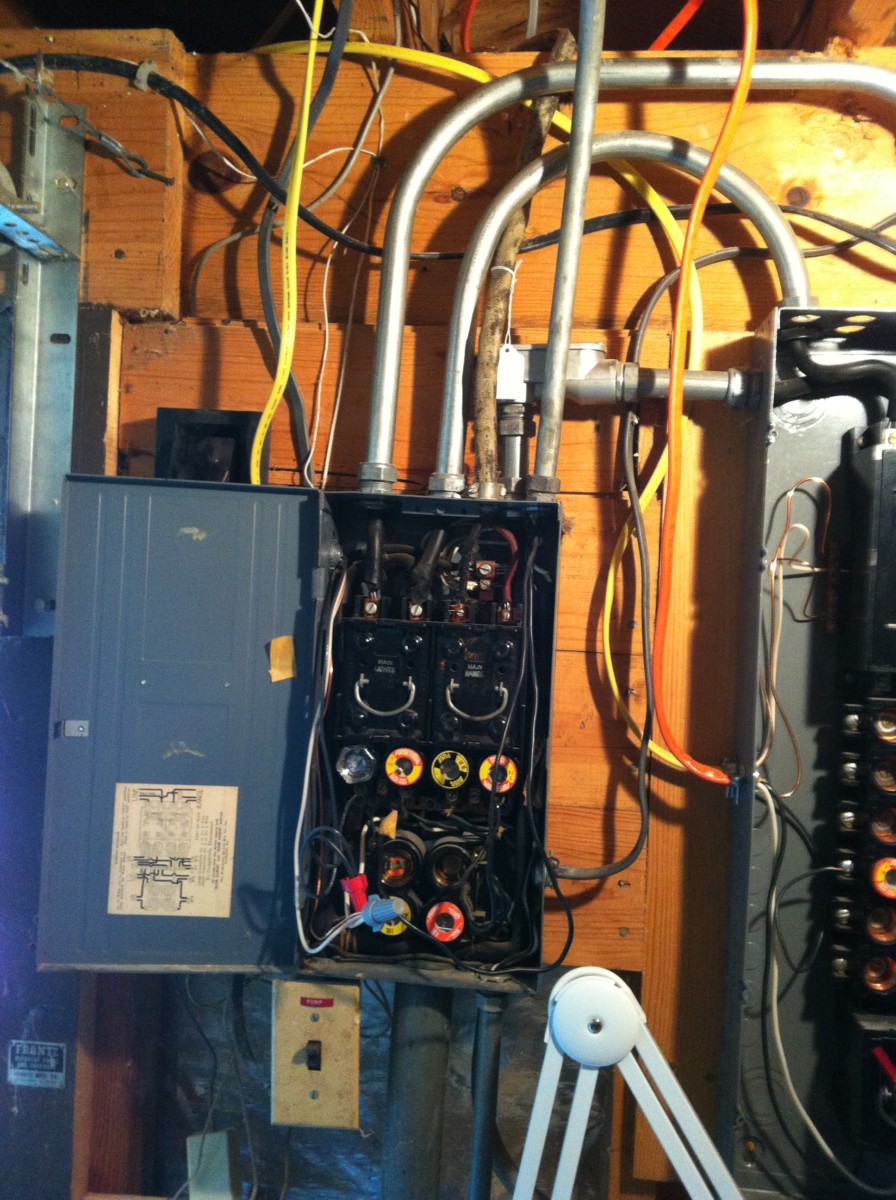
This mess is the original service panel where the kitchen circuit goes to. This only has hot and neutral - no separate ground.
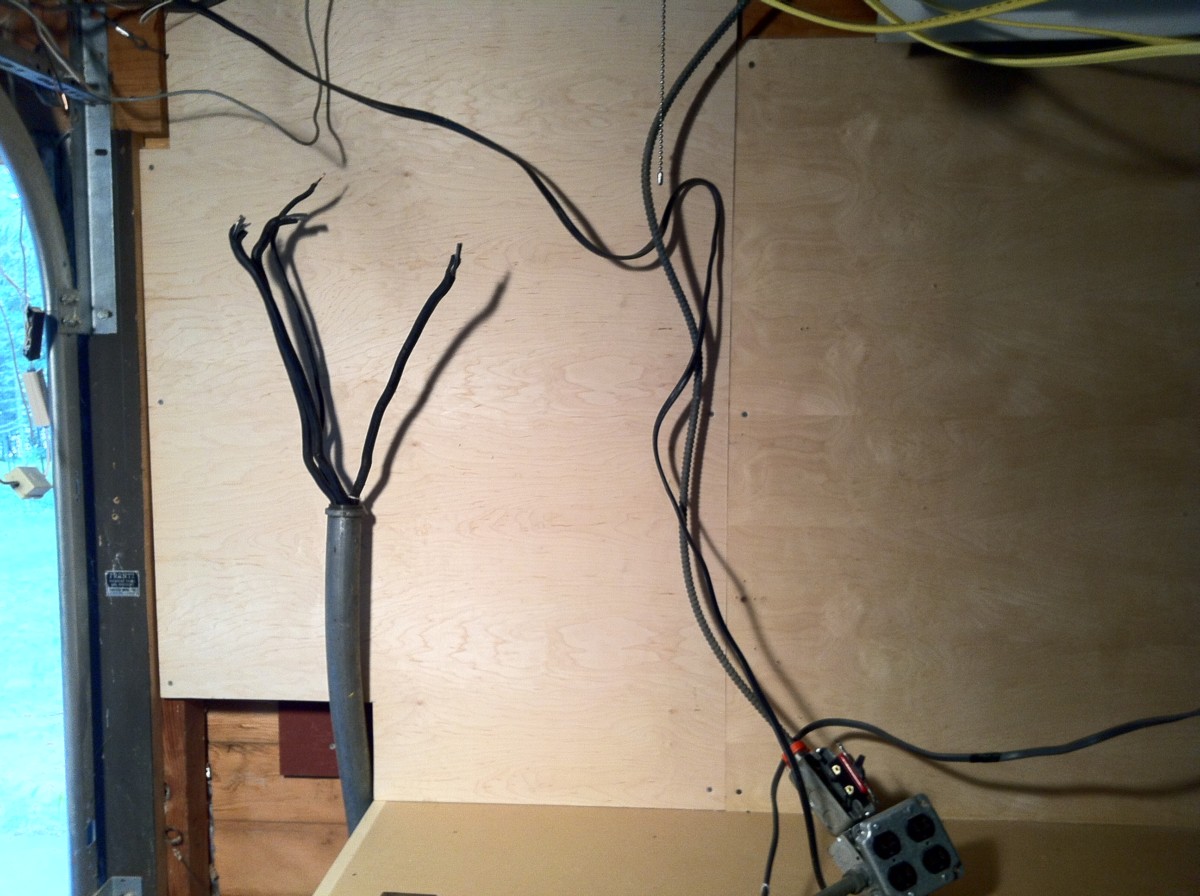
Still working on consolidating some circuits.
Most of these circuits are for baseboard heaters. The conduit is gone and I can run wires to the new panel later. It's looking a lot better.
I don't expect anyone to notice but there is only 1 conduit out of this box (upper right in front) that still feeds power to the house. Maybe I can remove it tomorrow.
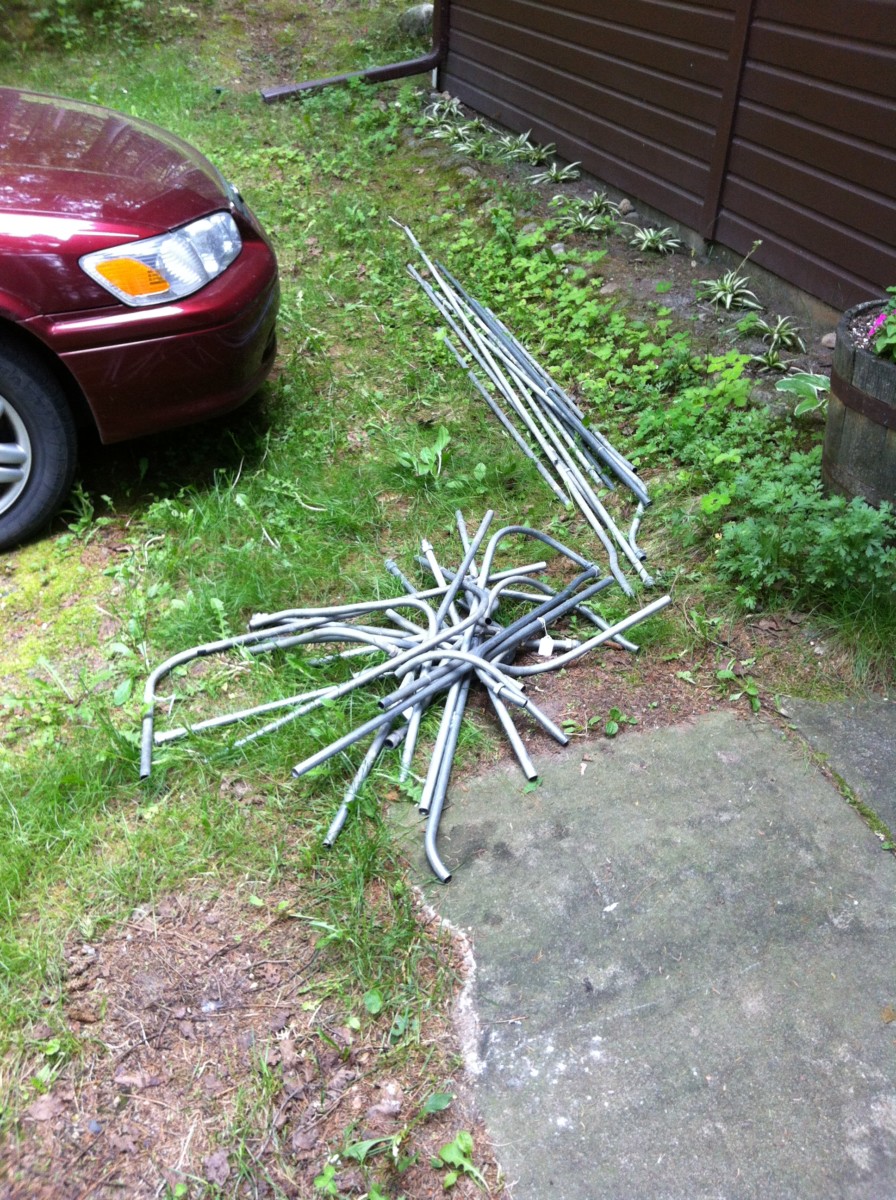
Not a lot of pictures to post but we have been busy. Here is some of the conduit we've pulled out.

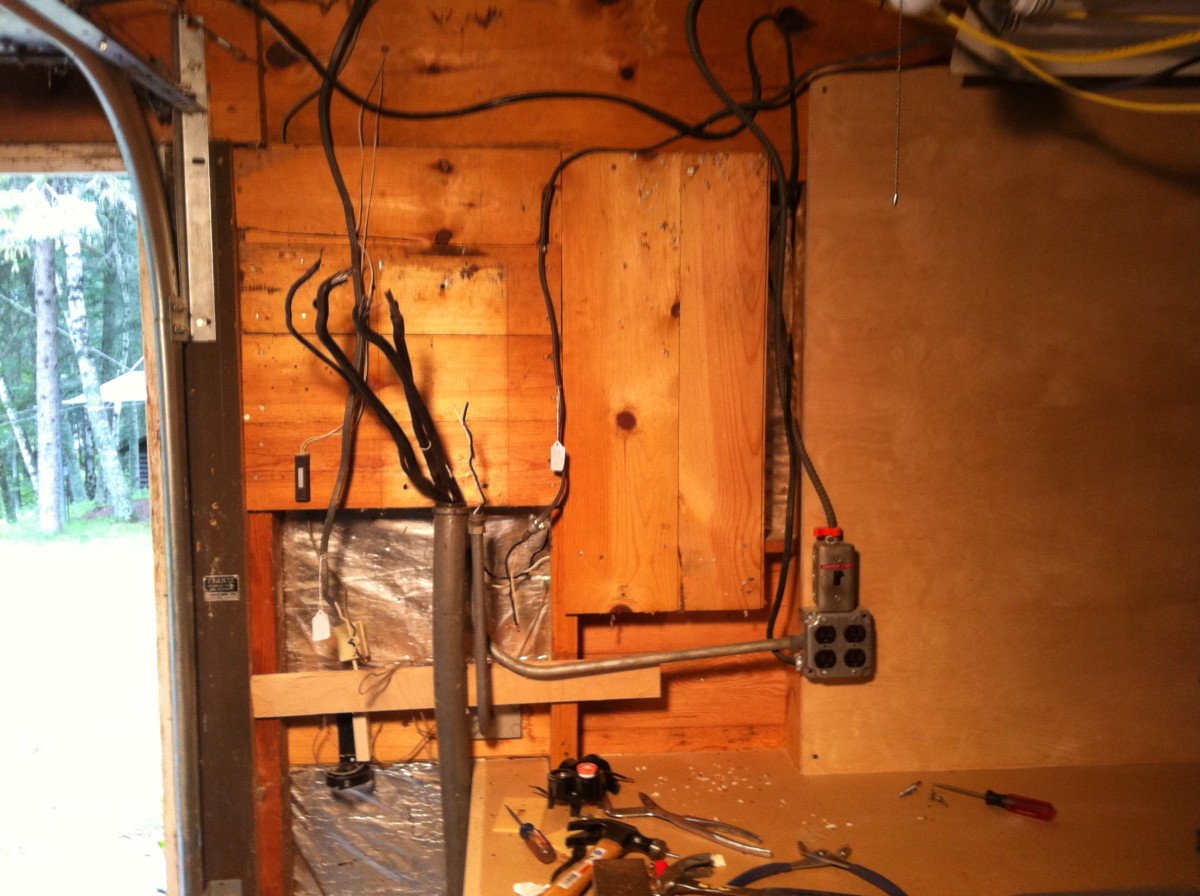
I put a new, brighter, florescent light above the woodworkers bench and replace the incandescent light with an outlet.

On the east side I did much the same thing: replaced the incandescent light with an outlet and moved the old florescent light fixture here.

I still have more to do.

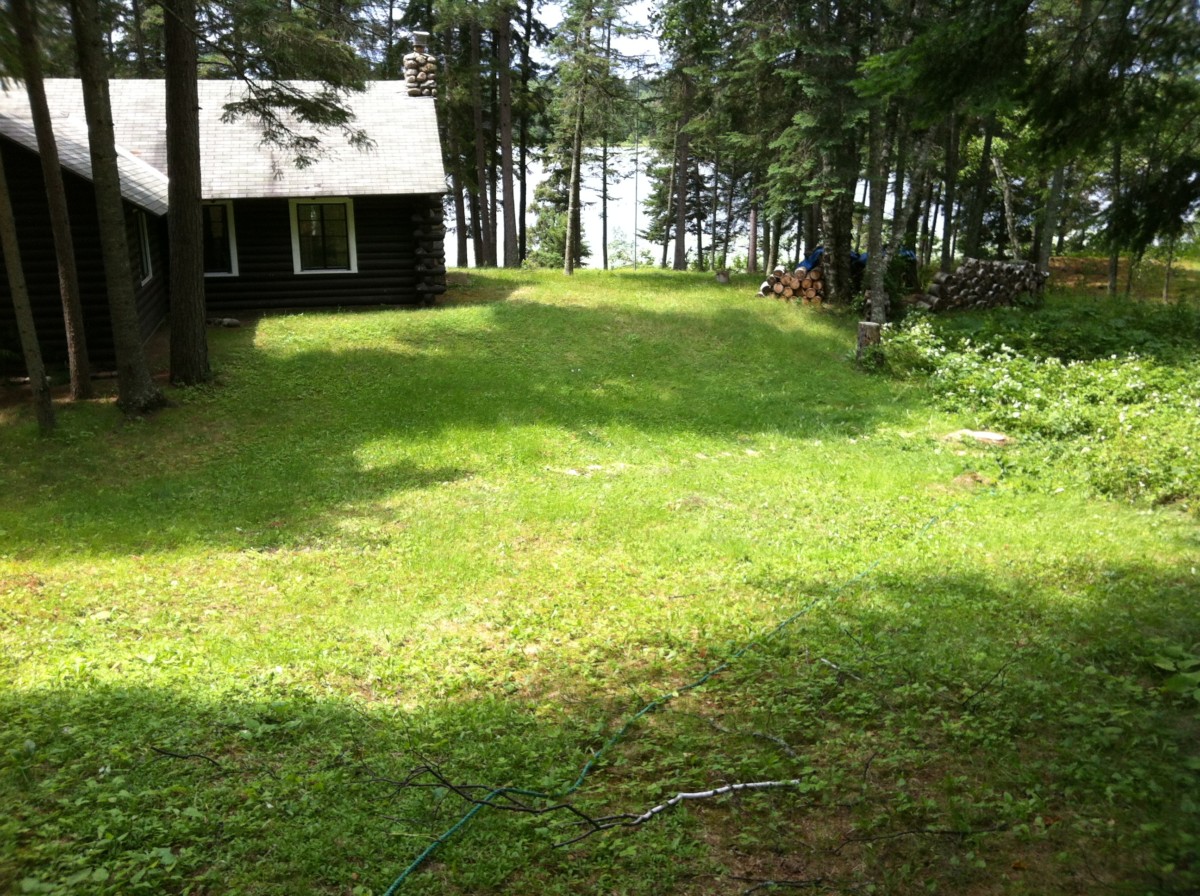
Since the ferns we planted last year on the south side did so well Chris thought we should try some on the east side too.

Today's the day. Power is off and the old panels are coming down.
Well, now this better work.
The back panels are gone.
And a new plywood back panel is in place.

And here we have the new service panel mounted with most of the circuits wired in. There are still 5 more 220v 20A breakers to go in at the top. They're for the baseboard heaters.
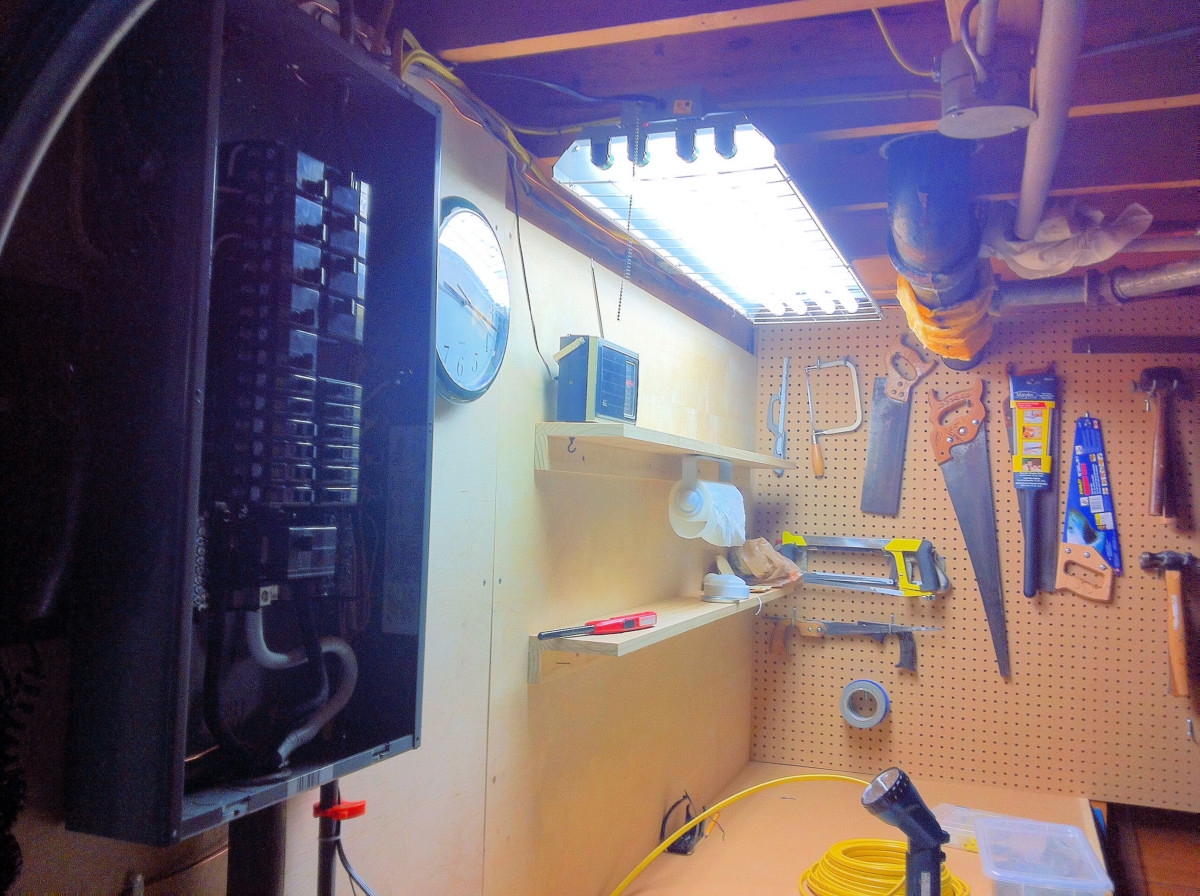
I liked the new 4 bulb light above the woodworkers bench so much I got another one for above the other bench.
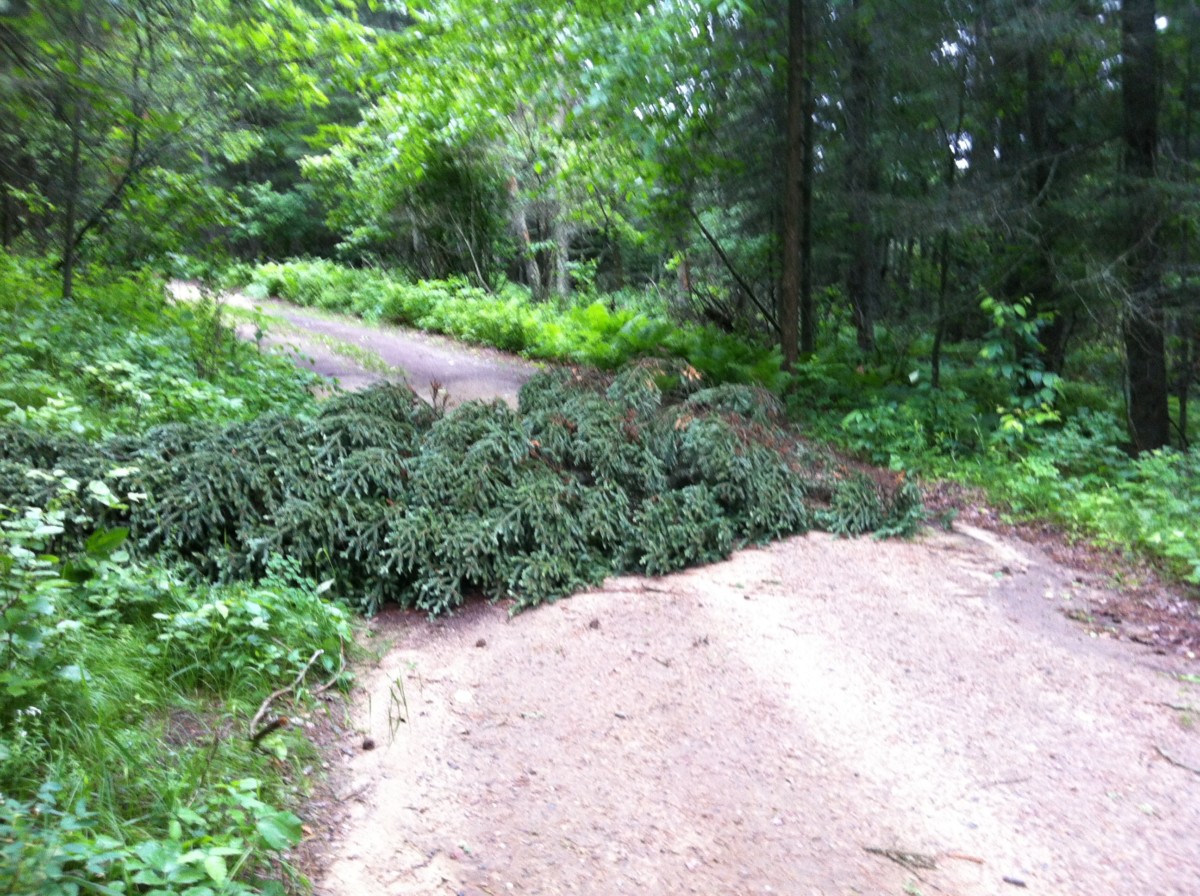
Wind and rain yesterday so there were 3 trees across the road this morning. Still, it hasn't been too bad so far this year.

All circuits are wired in now. Against all odds we never had anything spark.
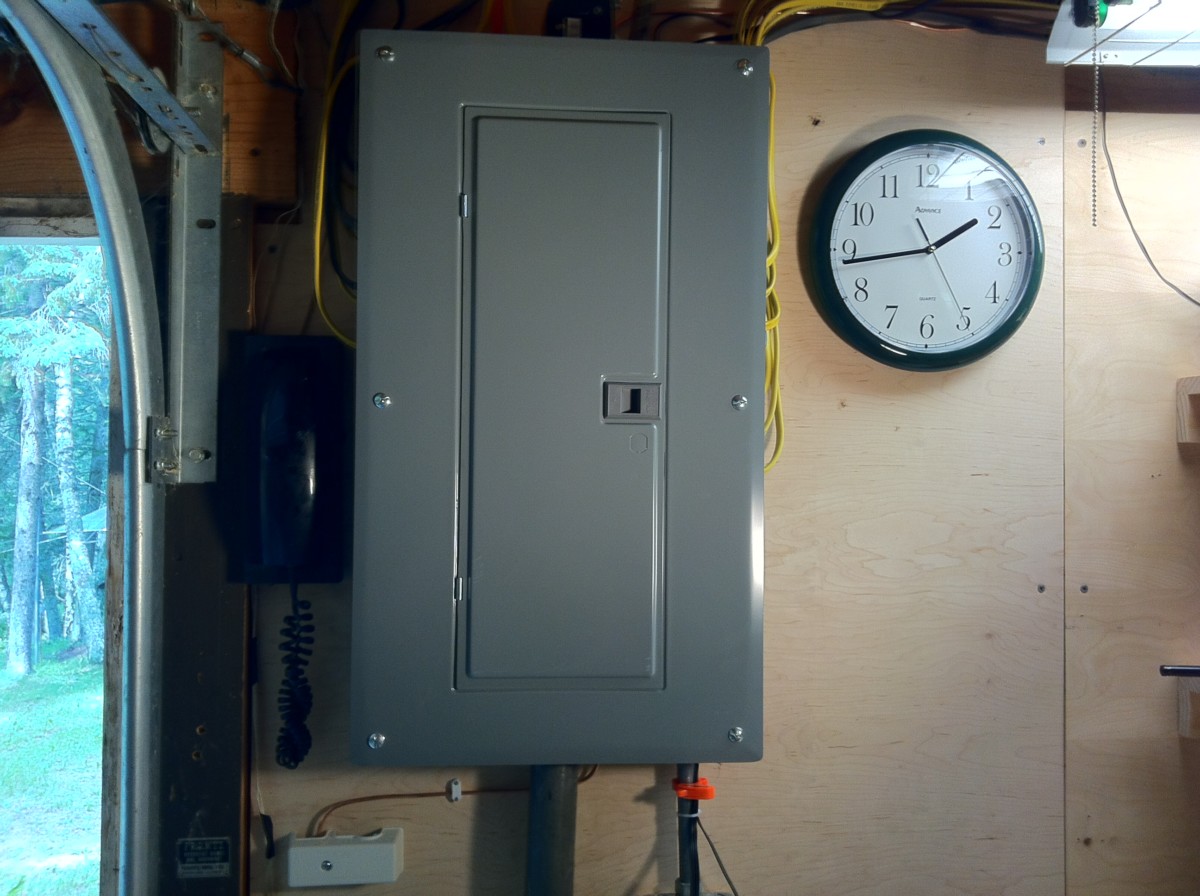
All buttoned up. This project is done.

Today is REALLY windy. The poor car port is gone with the wind.
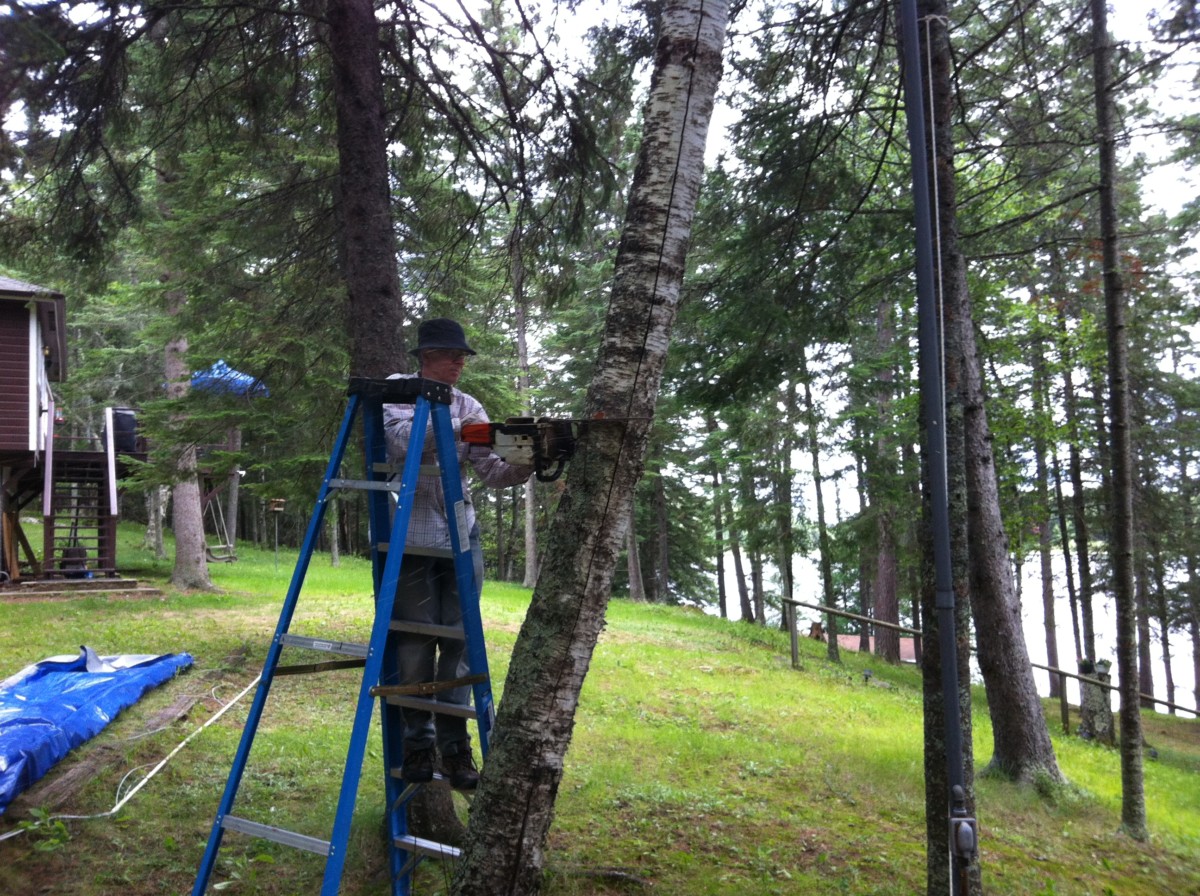
One of the support trees was dead so this is a chance to take it down. We still need about 6' or 7' of the trunk to tie support lines to. What is that saying about chain saws and ladders?
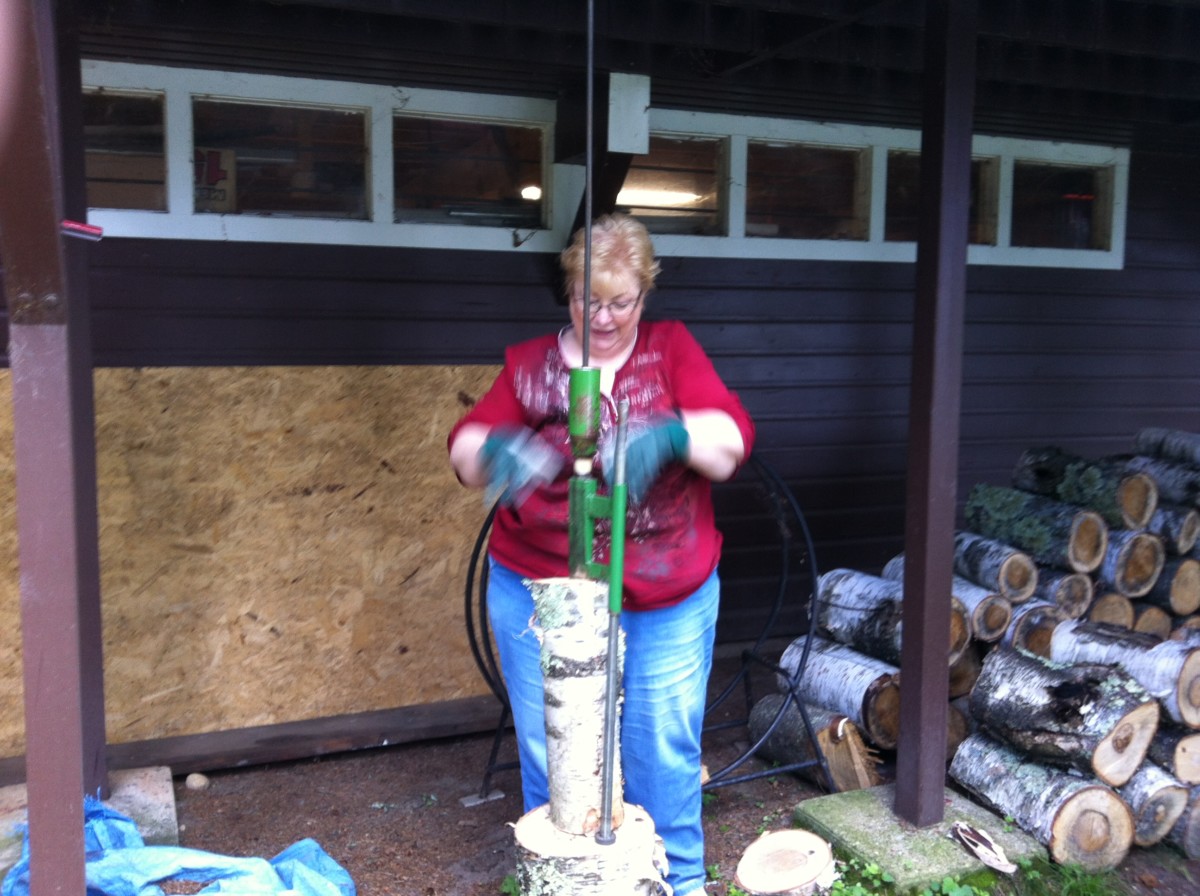
No one died. I have a lot of firewood to split later.
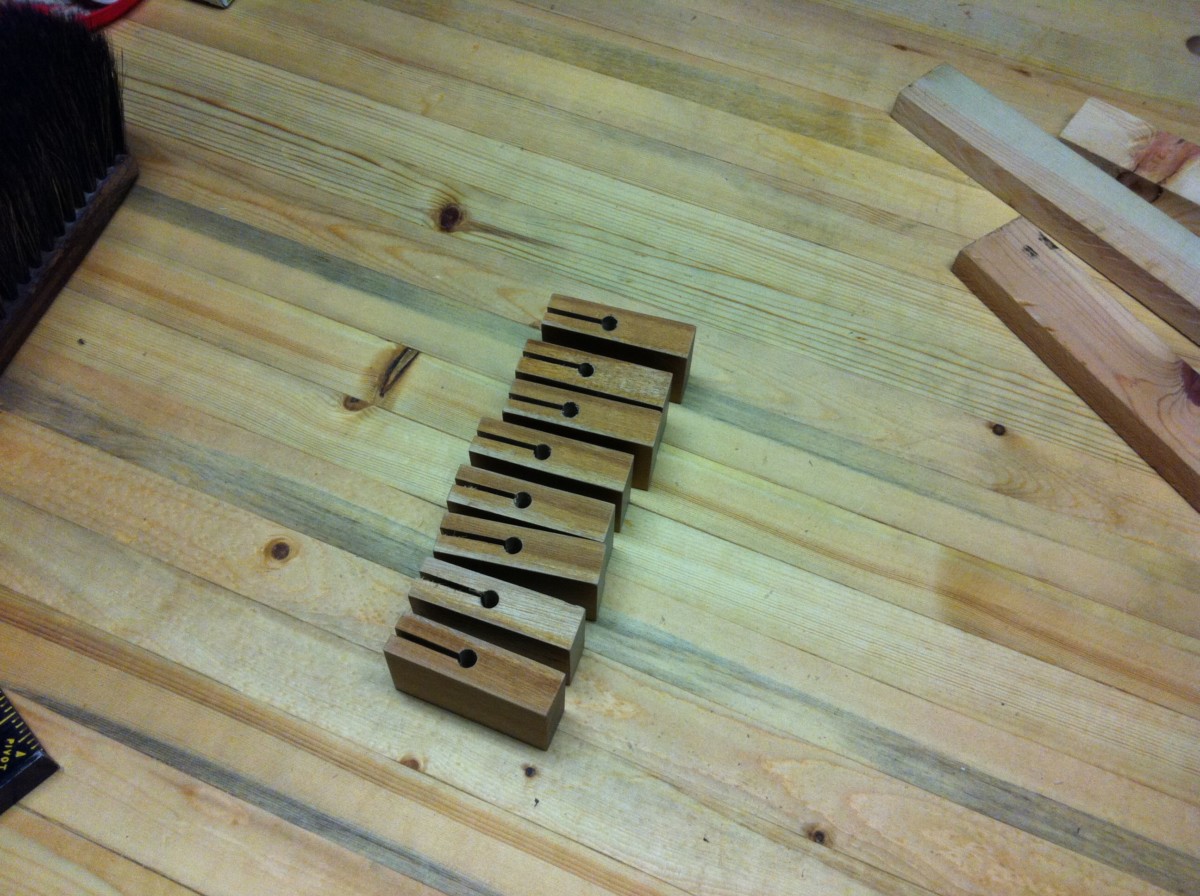
We're making a bunch of these. Some of you may know what these are.

This is how those weird wooden clips we make are used.

The tarp gets folded over, slipped into the clip and then a 1/4" dowel gets pushed into hols at the end of the slot. This makes a very strong grip.

A clip about every 2' along the the 20' edge that broke free in the wind storm.
And, like the Phoenix, the car port rises again.

Big dead balsam just north of the cabin. We'll need take some care here because this one is within striking distance of the cabin.

Another perfectly placed fall.
And just like that! No one will ever know it was there.
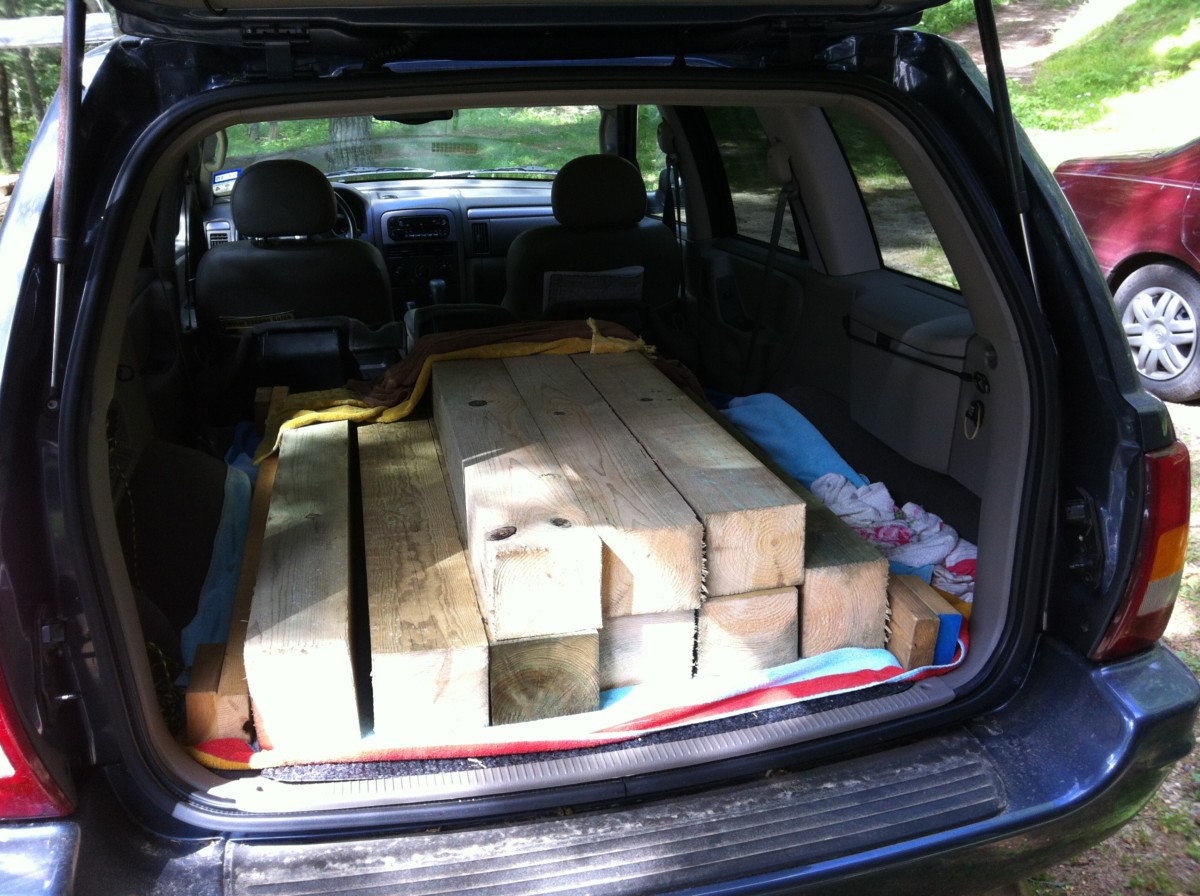
A bunch of 4' PT 6 x 5s. Oh boy oh boy.
This is us making sure the 6 x 5s are exactly 4' long and the ends are perfectly square.

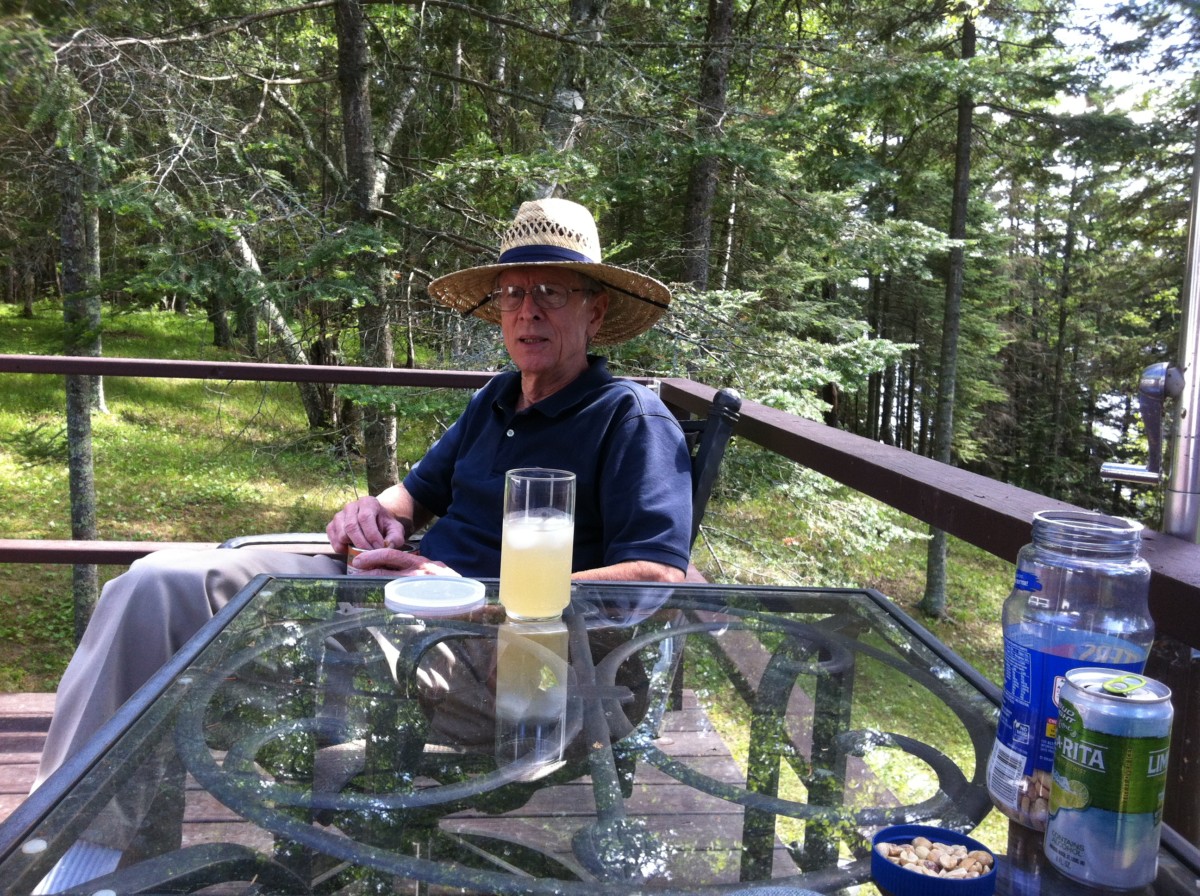
Hot sunny day today. What's better than a day of fishing and then ice cold Lime-a-ritas and watermelon.
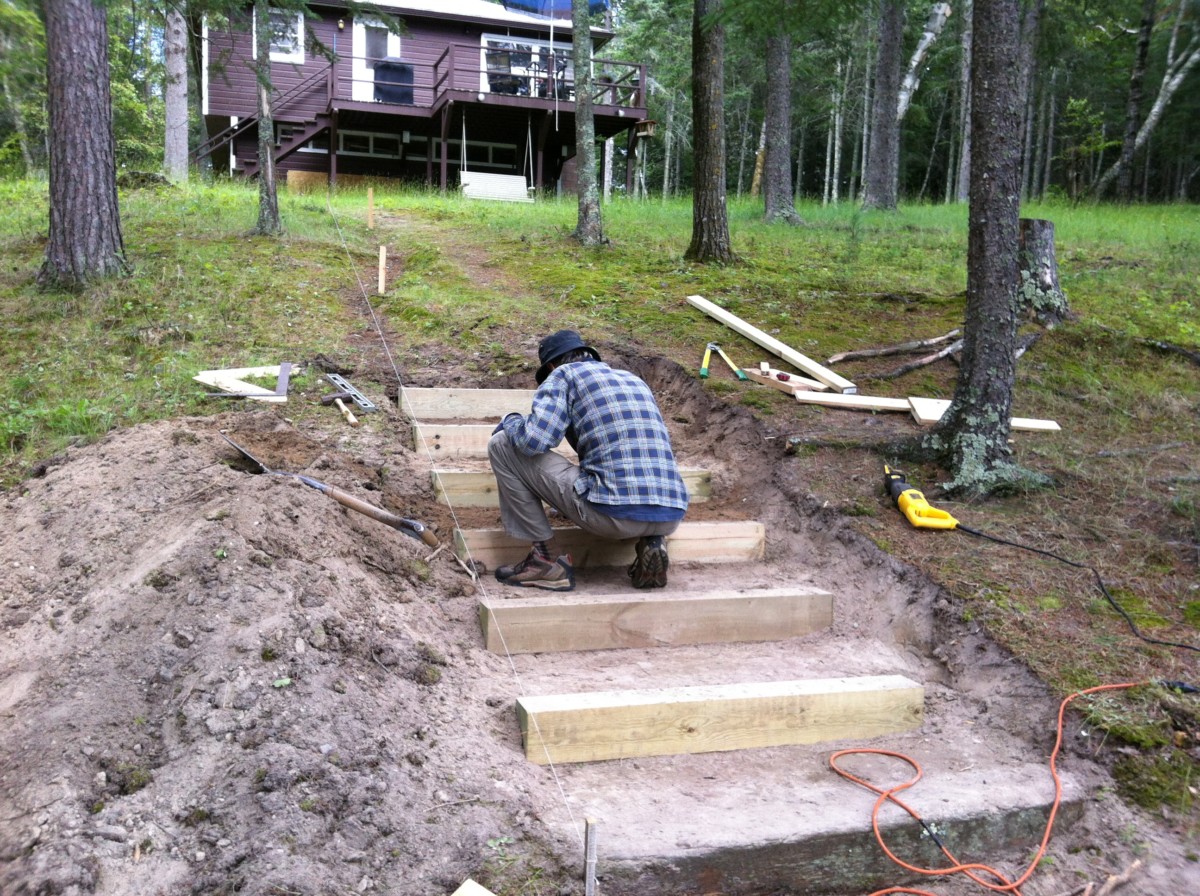
Making progress on the steps.

Chris and I got our new lucky fishing T-shirts from Dorothy. Now the bass don't have a chance.

We're making progress (dare I say it) step by step
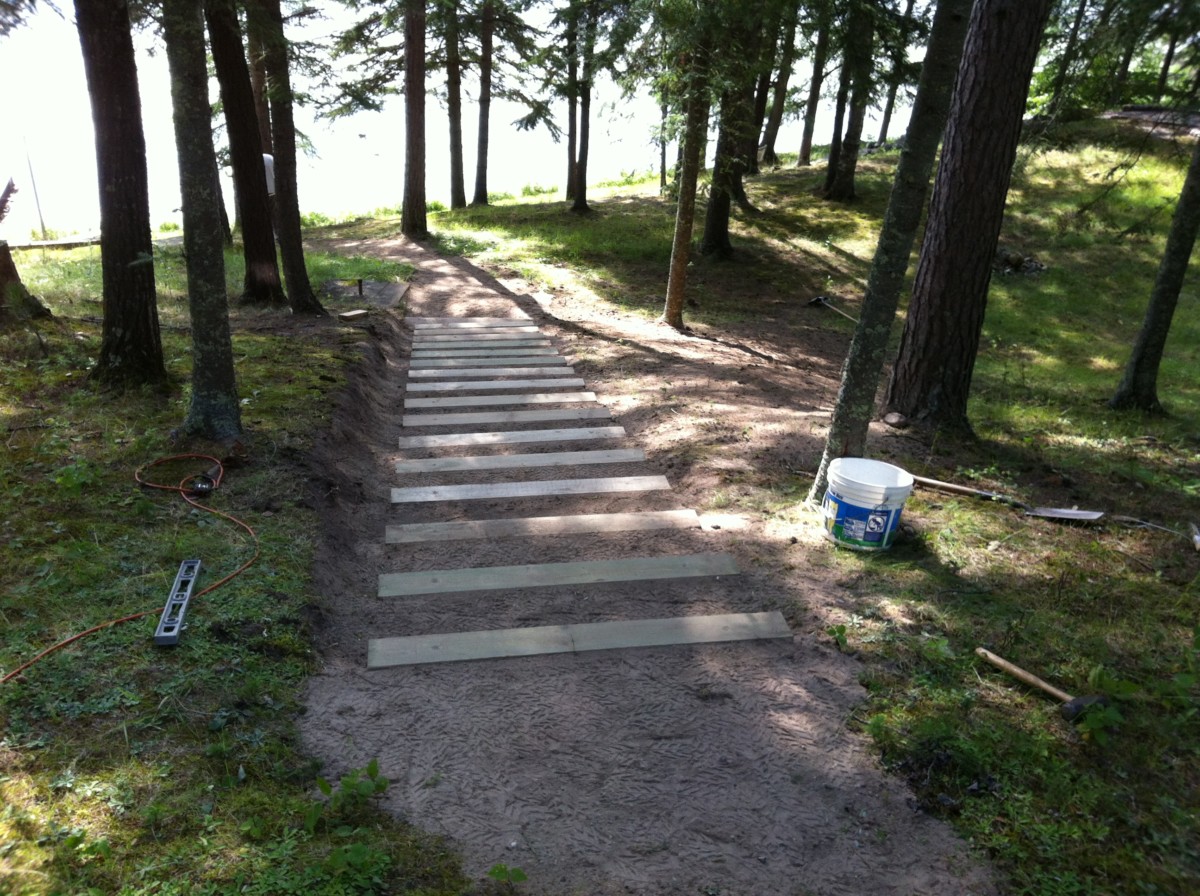
The steps are done.

Us old people need a handrail. We got the verticals in but it was just too hot finish.
We had a bad windstorm last night. This is proving to be a tough year for car ports.
A tree in the front of the hill house blew down last night along with another one behind the house.

Also there were 4 trees across the road - this was the biggest one, the others were just little.

We spent the morning clearing up downed balsams. This afternoon there was just enough time to finish the handrail.

OK, I'll resurrect this carport one more time.

Bill 47.6 (22)
Chris 59.9 (29)
Final score!
Congratulations Chris.
Biggest bass of the year: 5.2 lbs.
Chris takes his leave. As always, thanks for all the help with our little projects.
Rob, Terri et al arrived in the middle of the night after driving straight through from Denver towing this.

And here are Rob, Terri, Andrew, Brandon, Kait and Bandit (down there at the bottom looking confused).

Here is some new wood for a new mini project. Can you tell what it is yet?
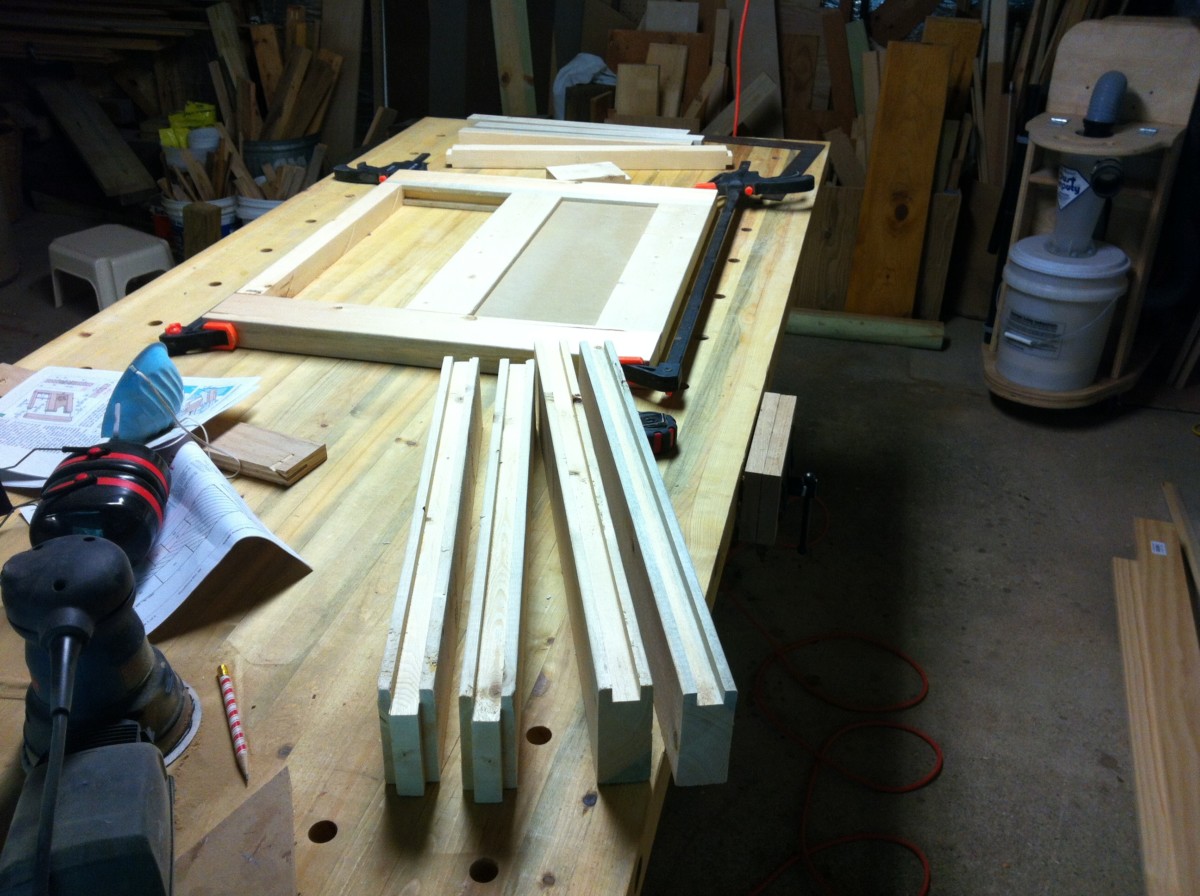
Stiles and rails: here's one panel mocked up and another ready to go.
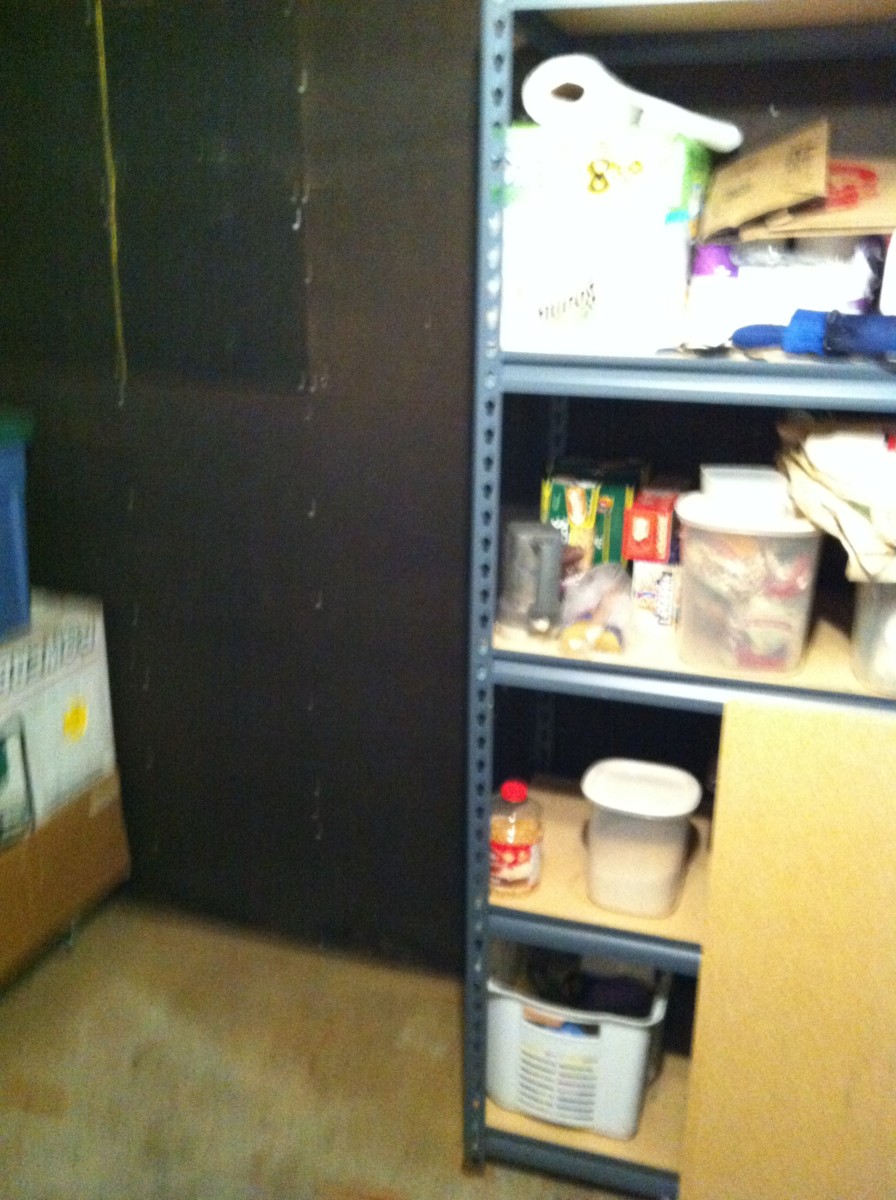
This is the storage room. That empty space used to have a small freezer in it. I never used it so I gave it away.
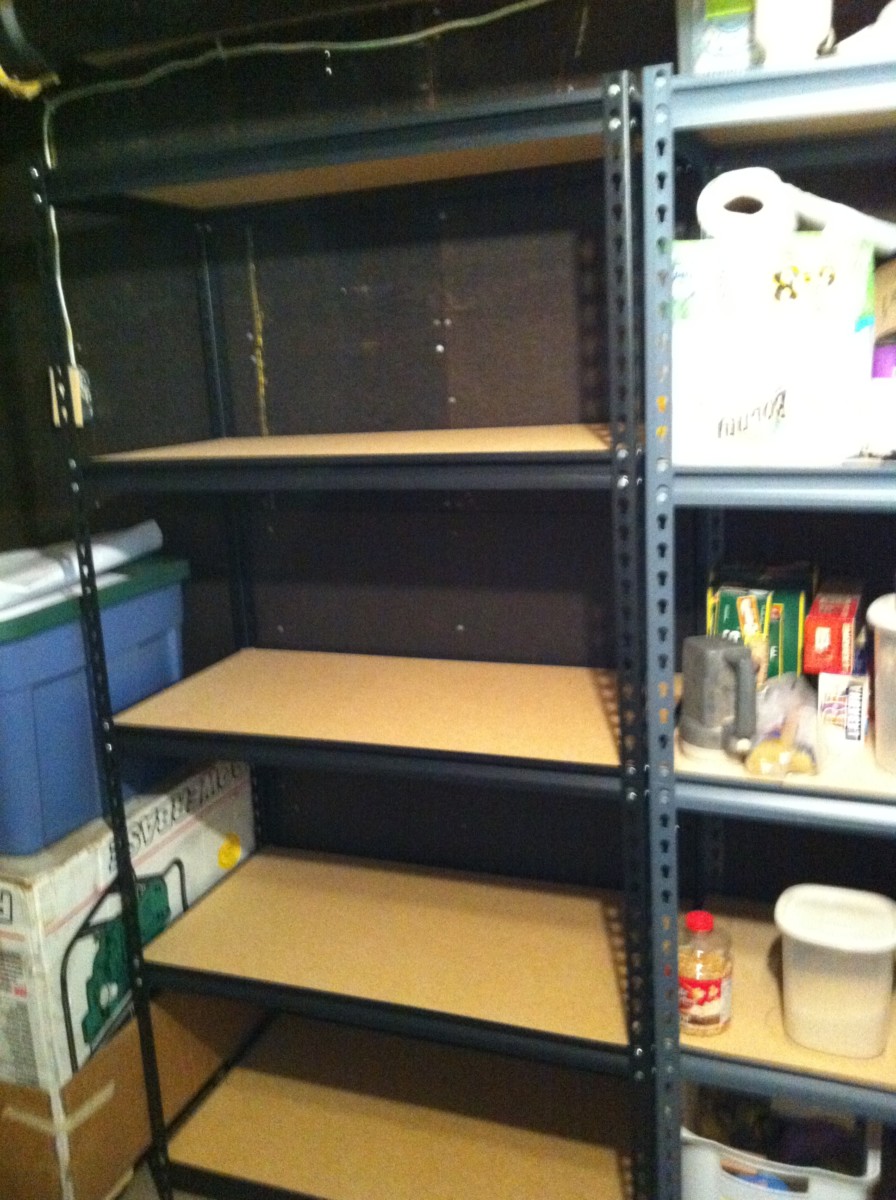
You can never have too much storage space, right?
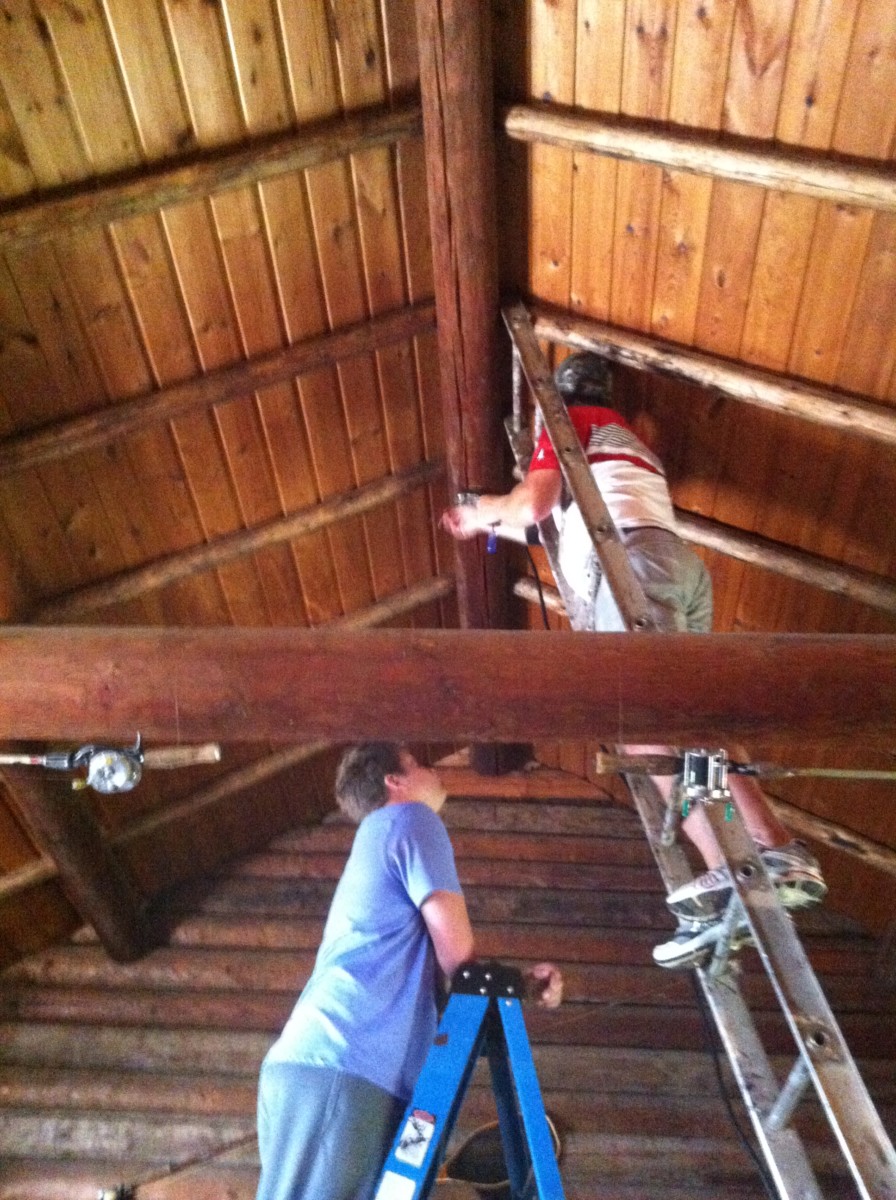
Rob decided that we needed a ceiling fan in the log cabin. It was a little tricking finding the right (safest) way to get up there at the peak.
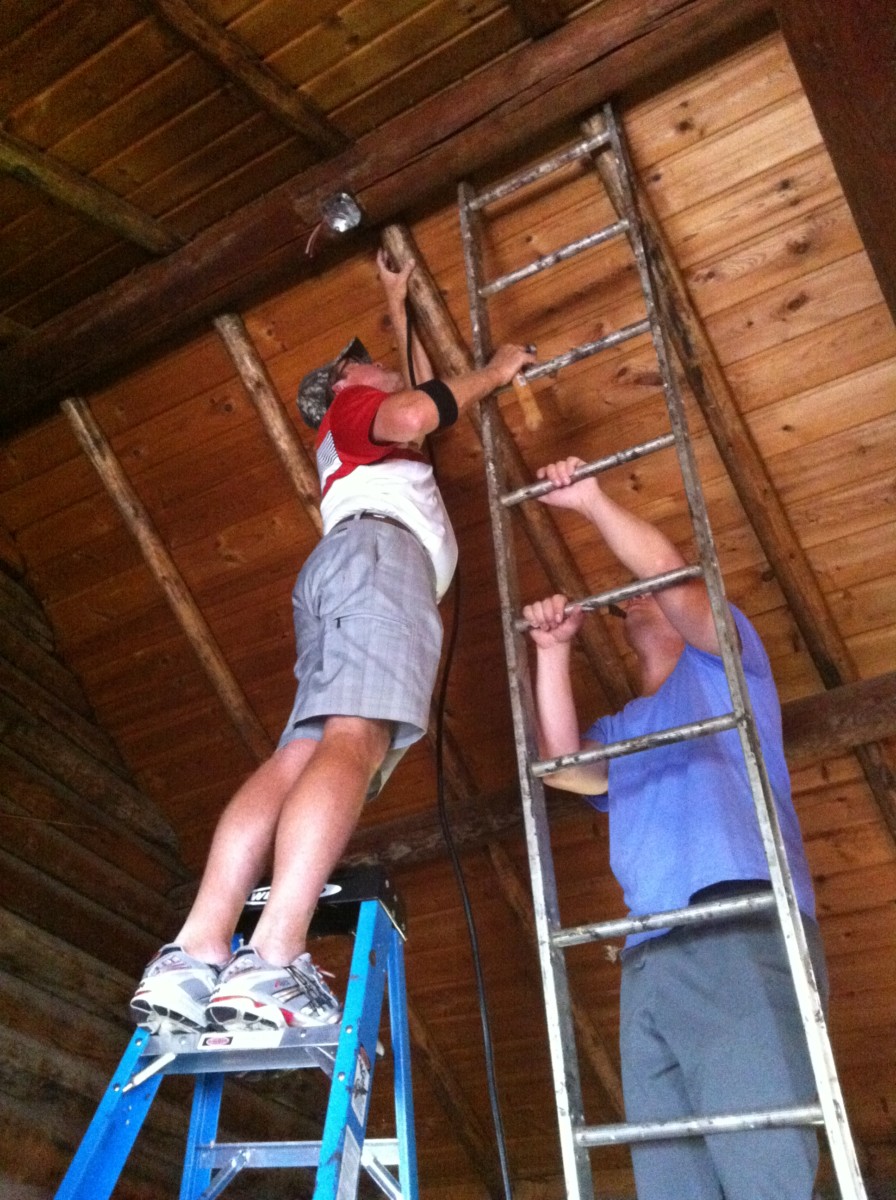
He's hiding the electrical wires up above the rafters.

He had to get creative at one point.
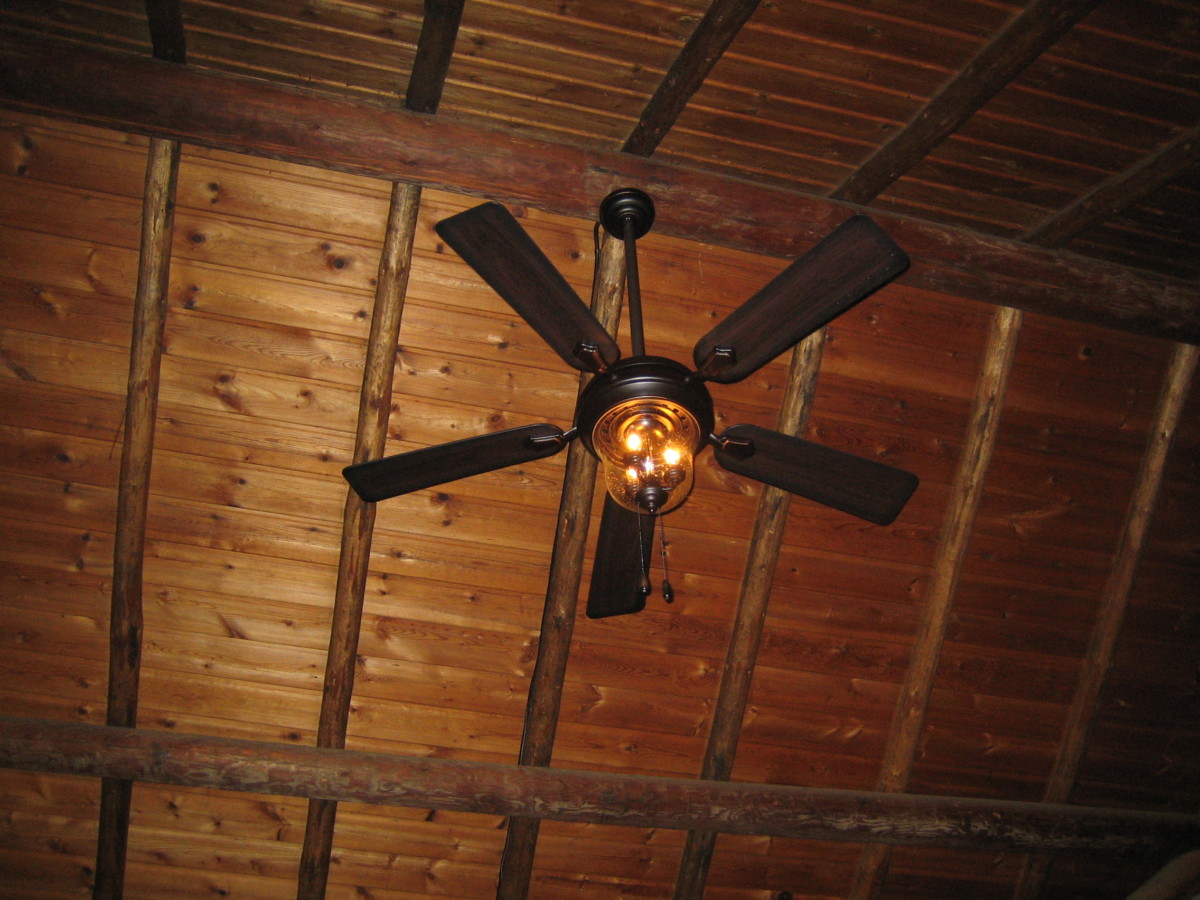
And it's done. The fan and the light are both adjustable. What a difference this makes - noticeably cooler right away.

Here's an early mock-up of that mini-project I start a couple of days ago. You all knew that it was a shop cart right?
Here's a view from the back. I didn't post any construction pictures because it was just too boring. Maybe the next project will be more interesting.

Rob, Terri and Andrew (Brandon and Kait are still sleeping) ready for an early departure. I'll take Andrew to the airport and the rest are driving straight through to Denver.

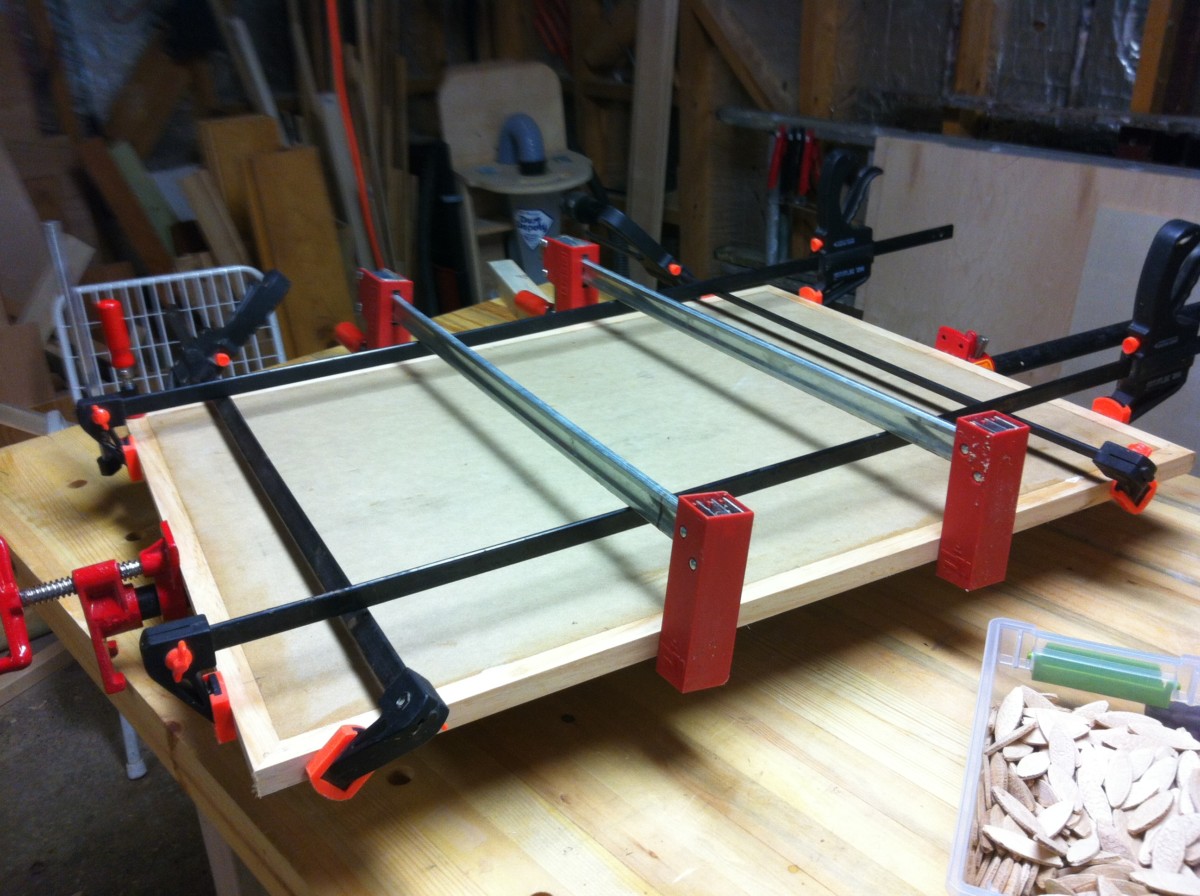
I need to glue 3/4" edge banding to the MDF.

The glue-up of the carcass. Slow set glue and lots of clamps.

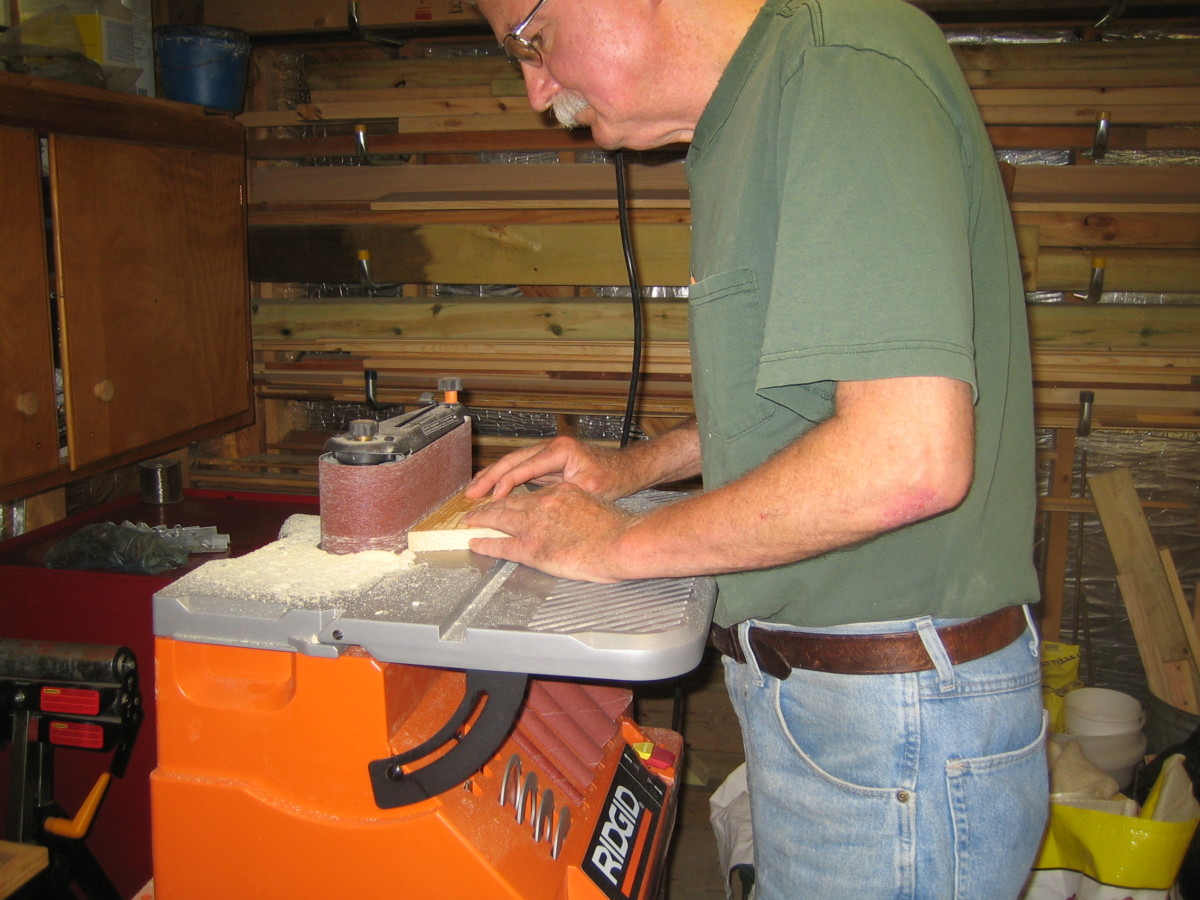
Using my new oscillating belt/spindle sander to remove the saw marks from the edge banding.

Using the biscuit joiner to align the edge banding.
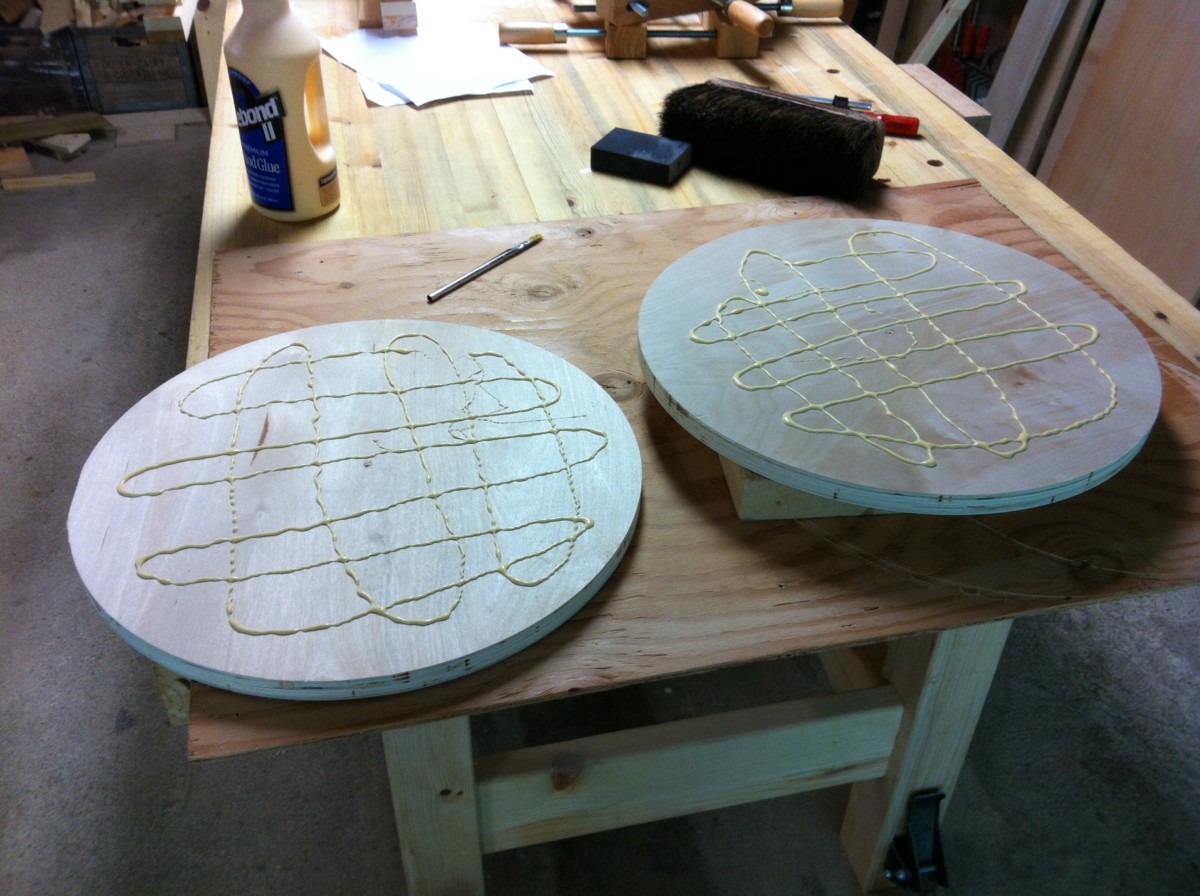
Even little glue-ups like this are stressful.
Getting close now. I need to make some drawers and then apply some sort of finish.
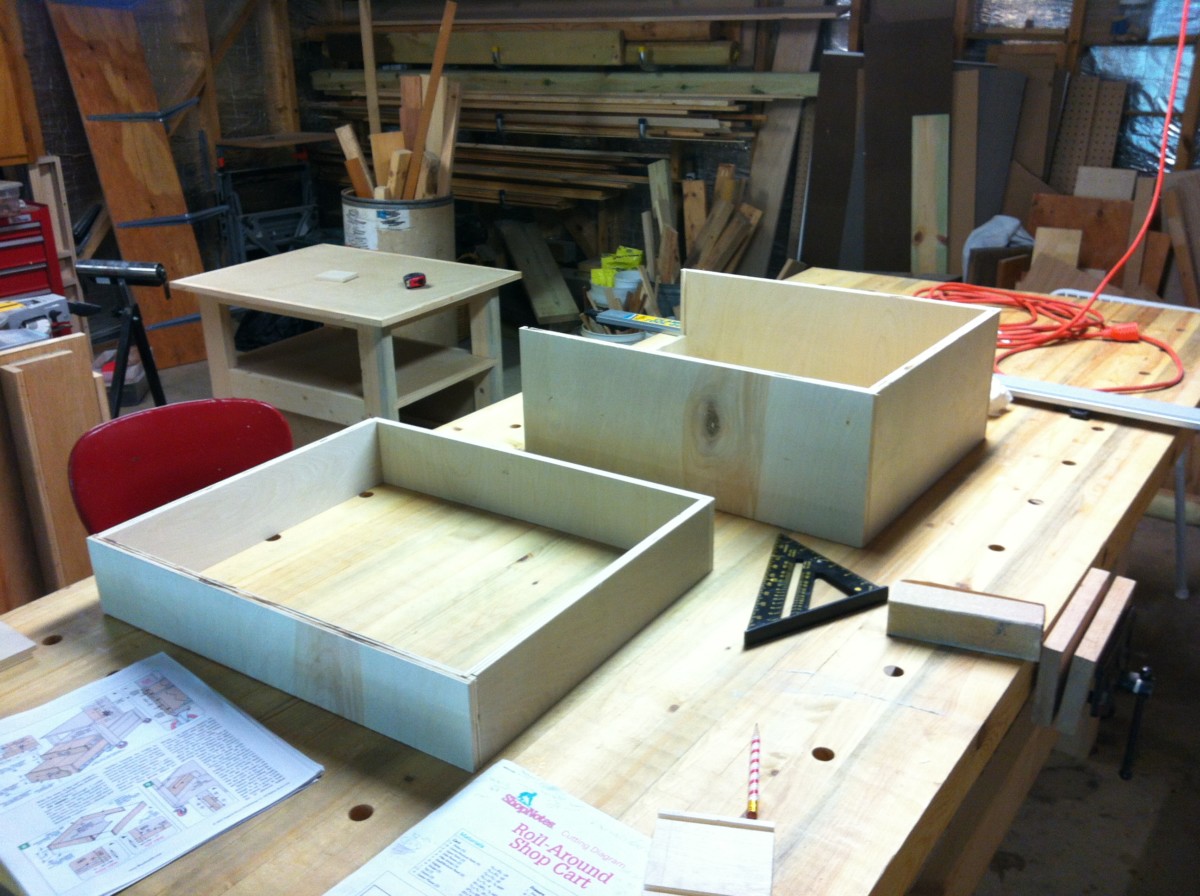
I worked a bit on the drawers today. They're close but still need a little tweaking.

Here I am struggling to put the drawer slides inside the cart.
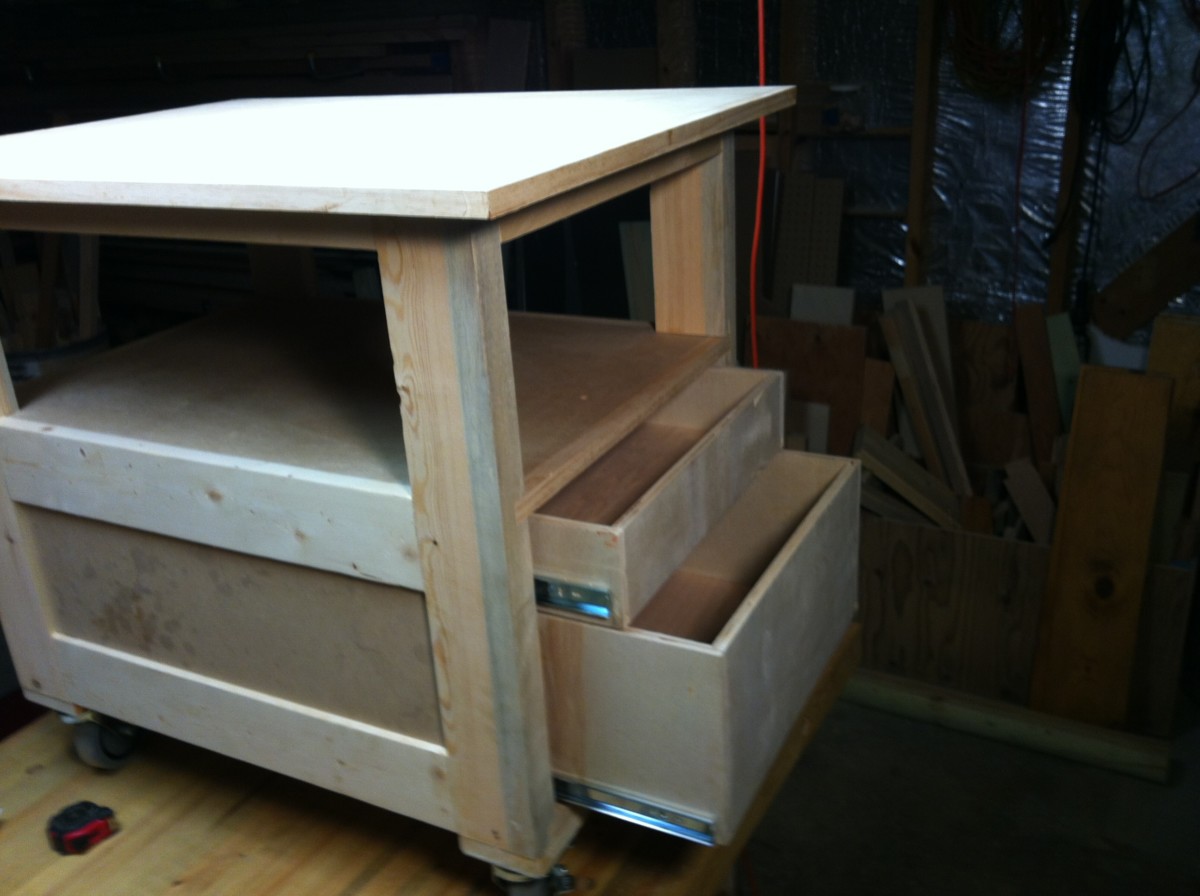
The drawers work. Now I need two false fronts.
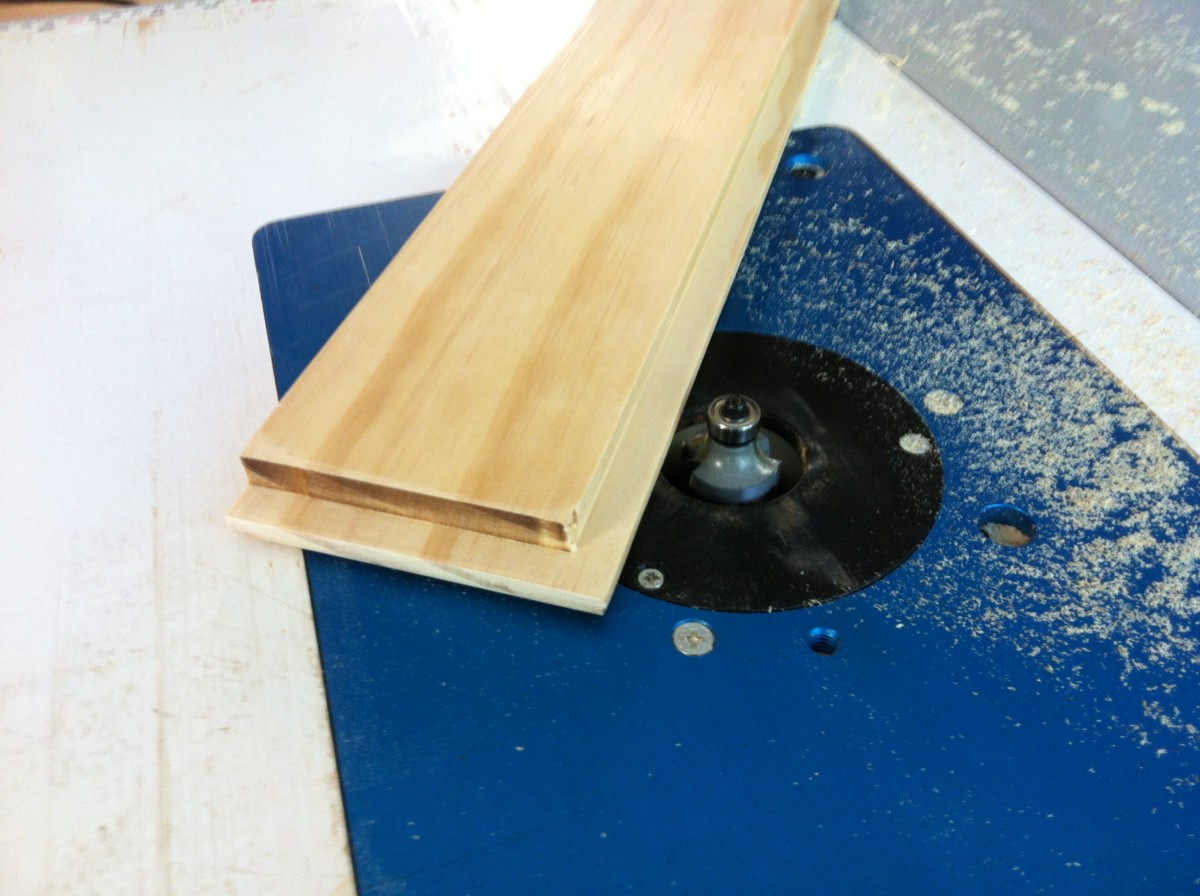
Here's one of the drawer fronts. I used the router to put a rabbit around three sides so the drawer will inset into the opening. Also I put a 1/4" round over profile on the front.

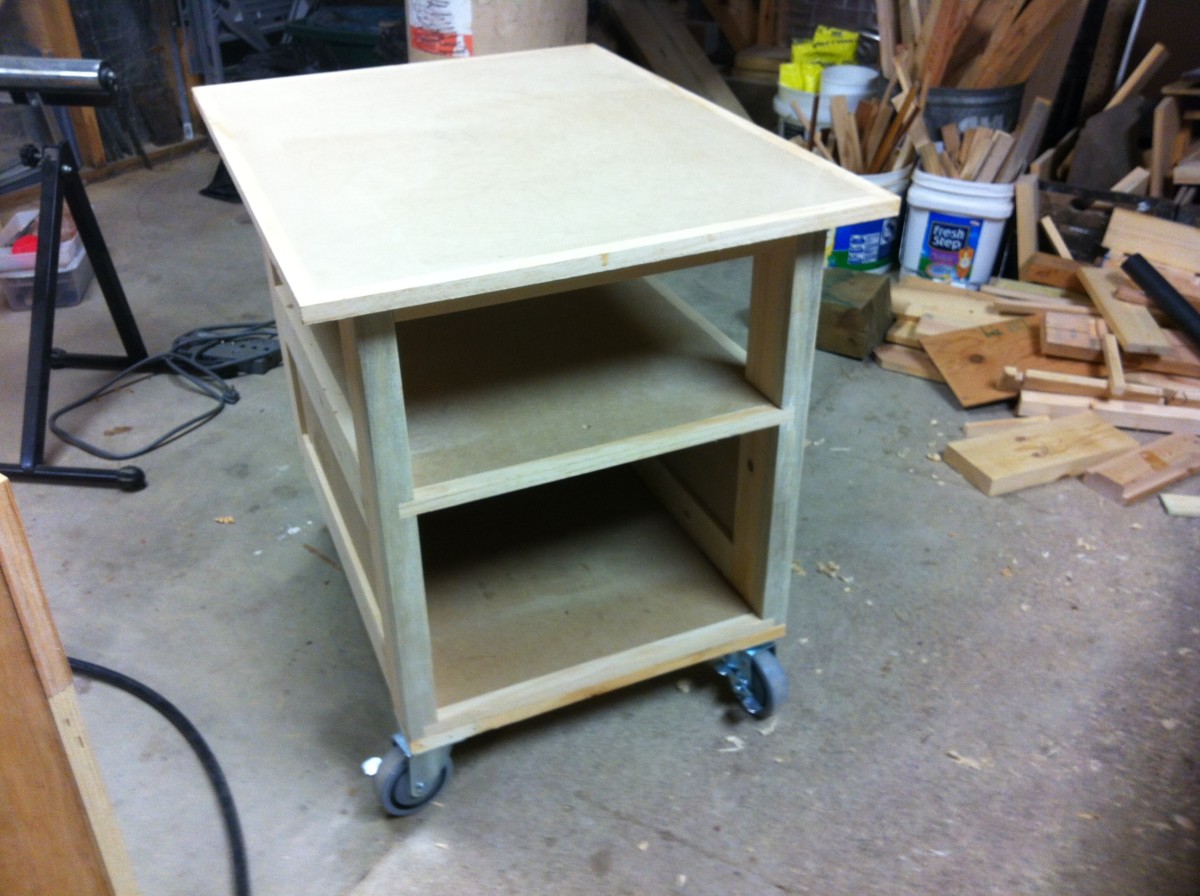
Pretty much done. I need to get some drawer pulls and put some shellac on it.

A view from the back. That little cubby in the back is suppose to hold ... something - I'm not sure what.
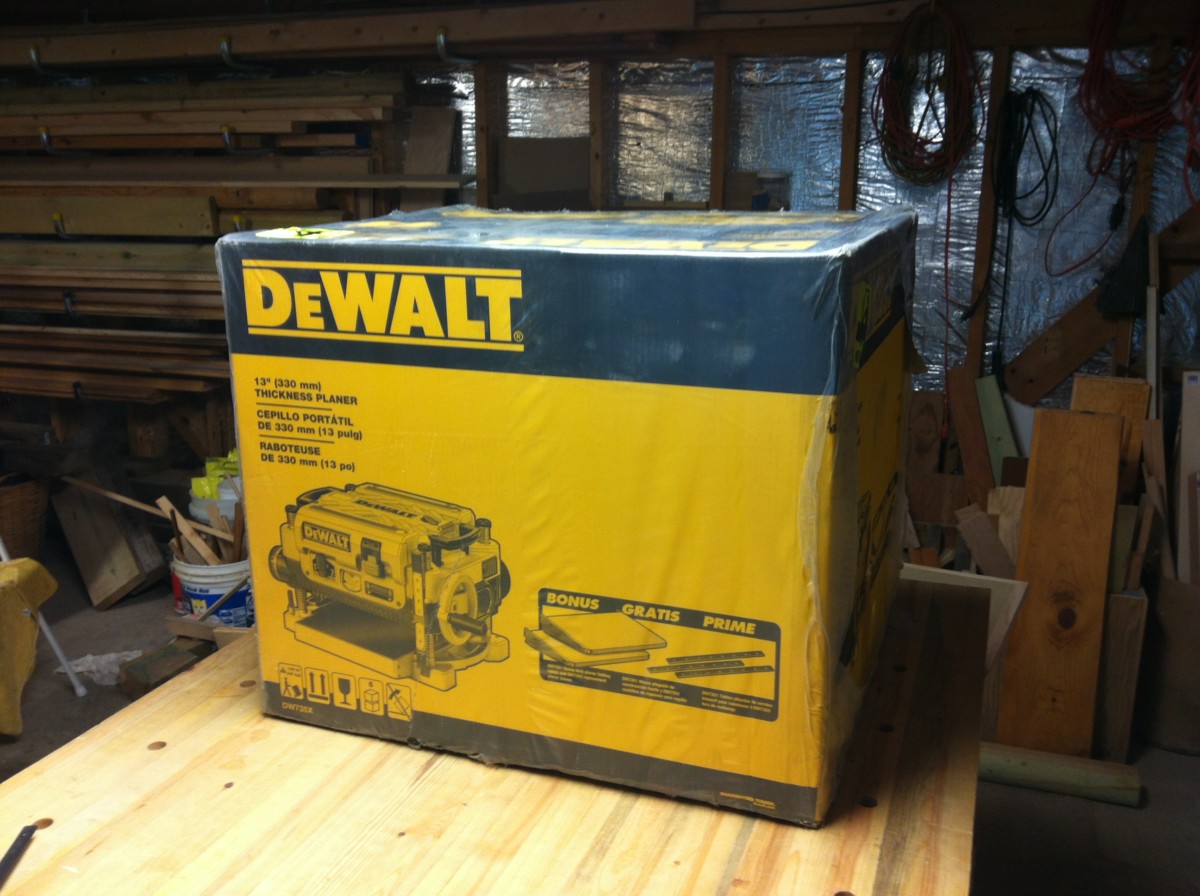
Here we have a new tool - oh boy, oh boy!

And this is what the new cart is for. That things weighs 100 pounds
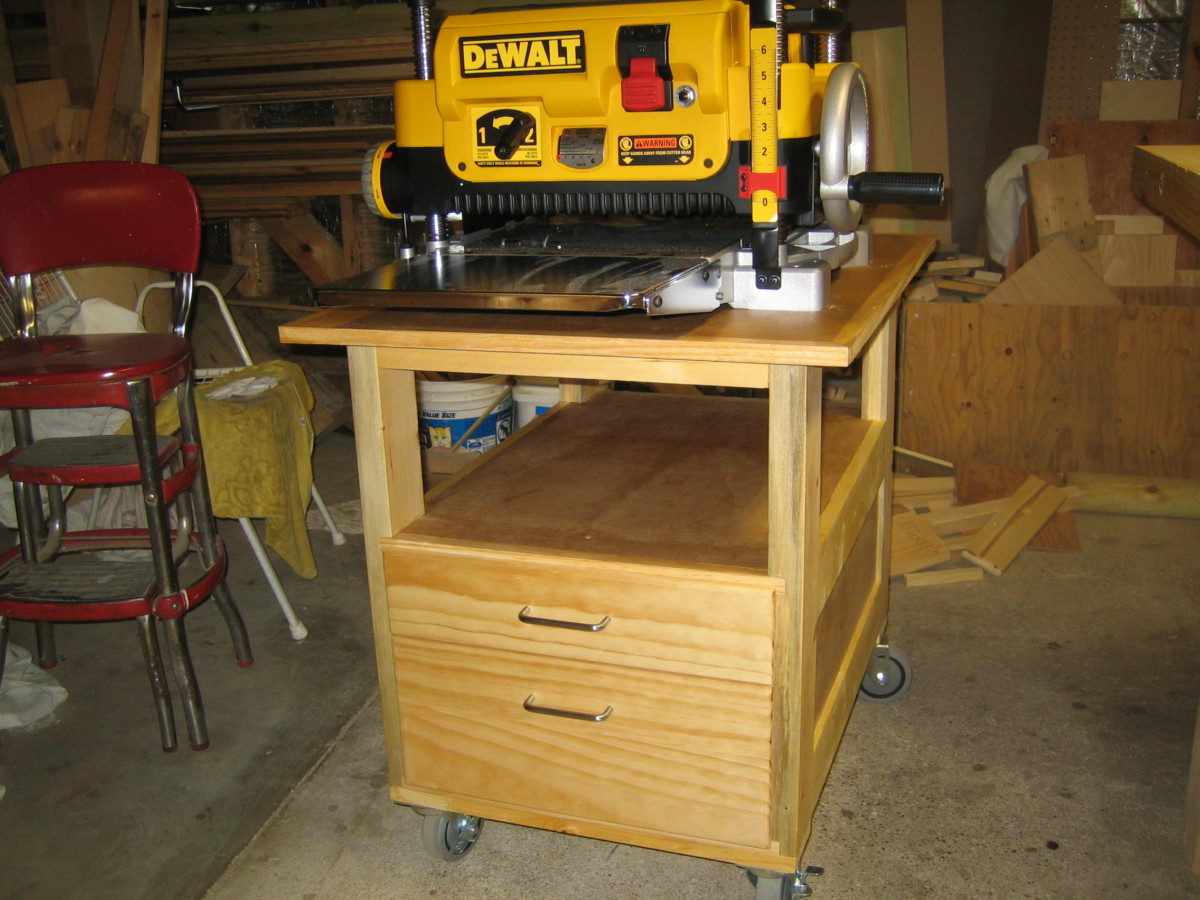
Two coats of shellac, drawer pulls and now the new planer cart is done.
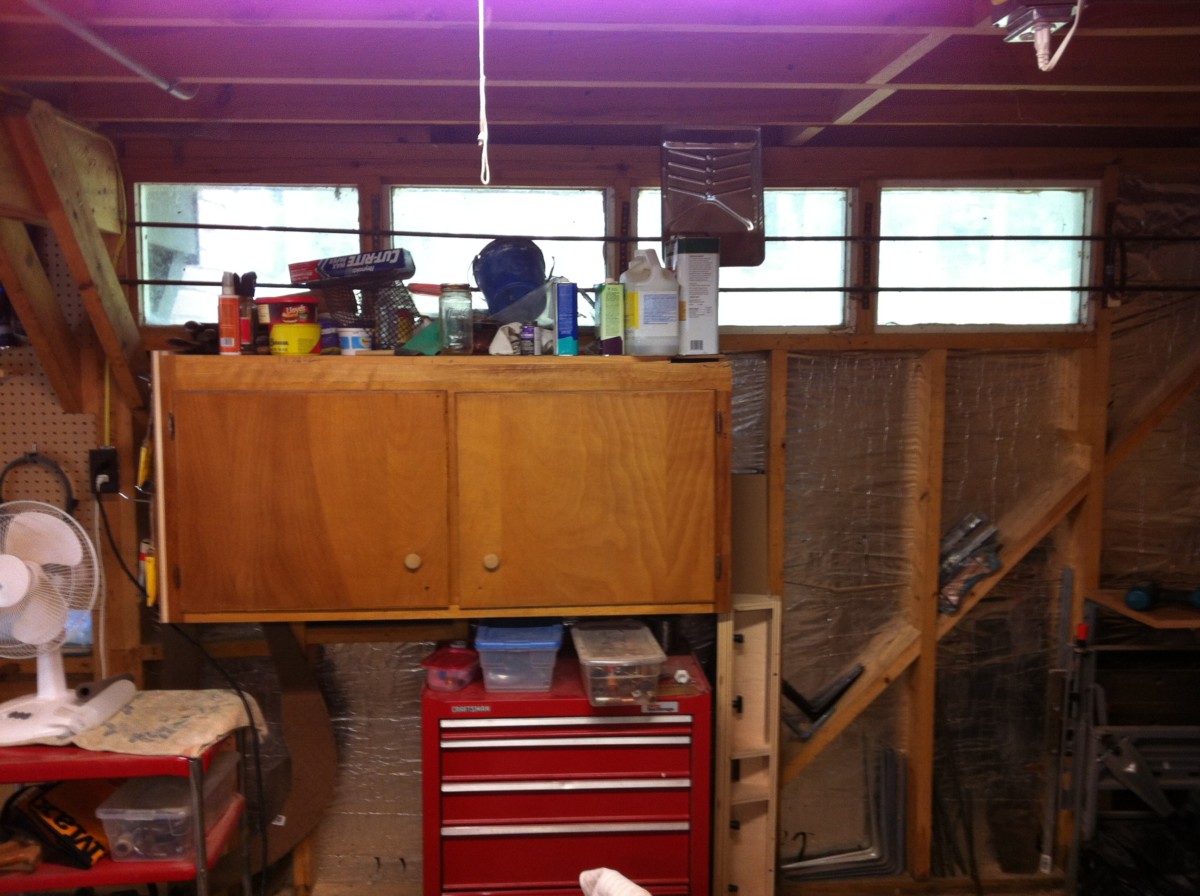
This was the east side of the garage this morning. I think I'll try moving that paint cabinet.
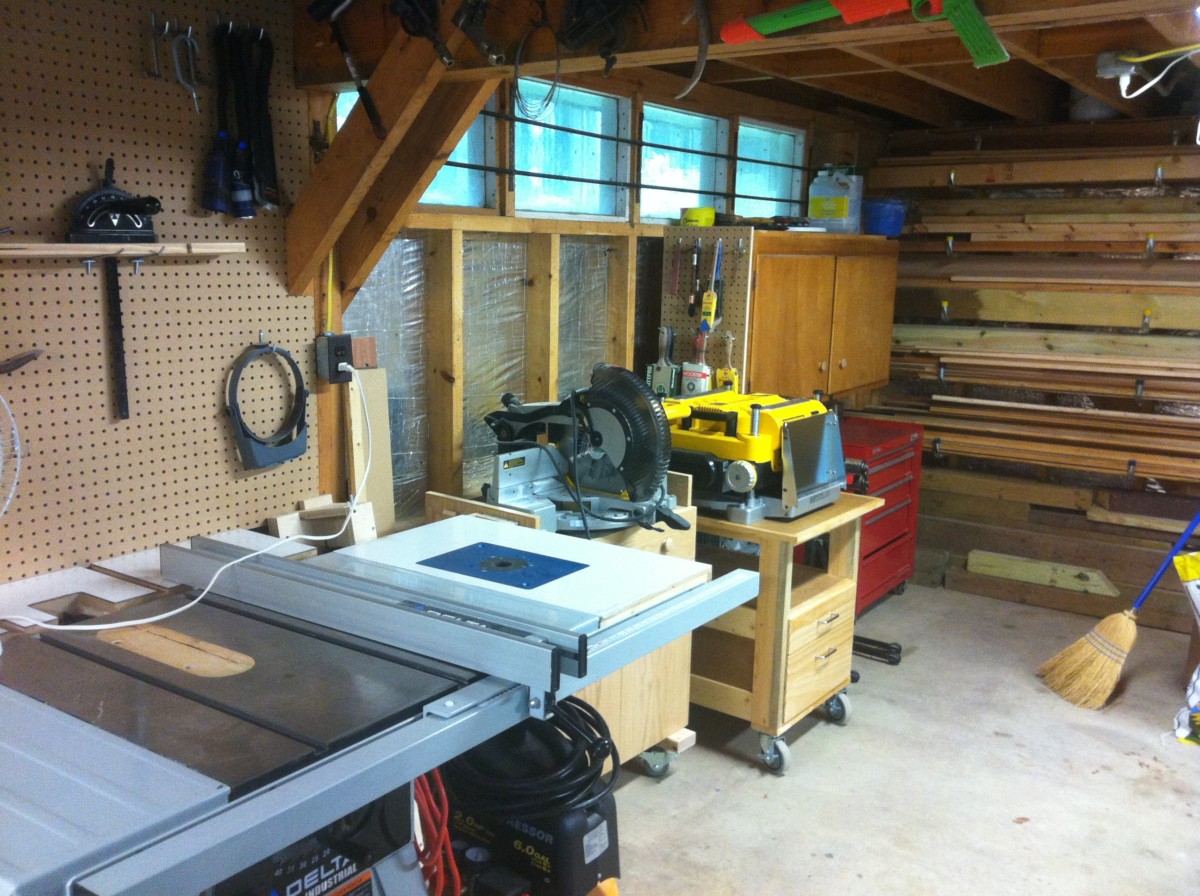
We'll see how this layout works. The garage is pretty clean (not Chris-clean but clean enough) so now it's time to build something

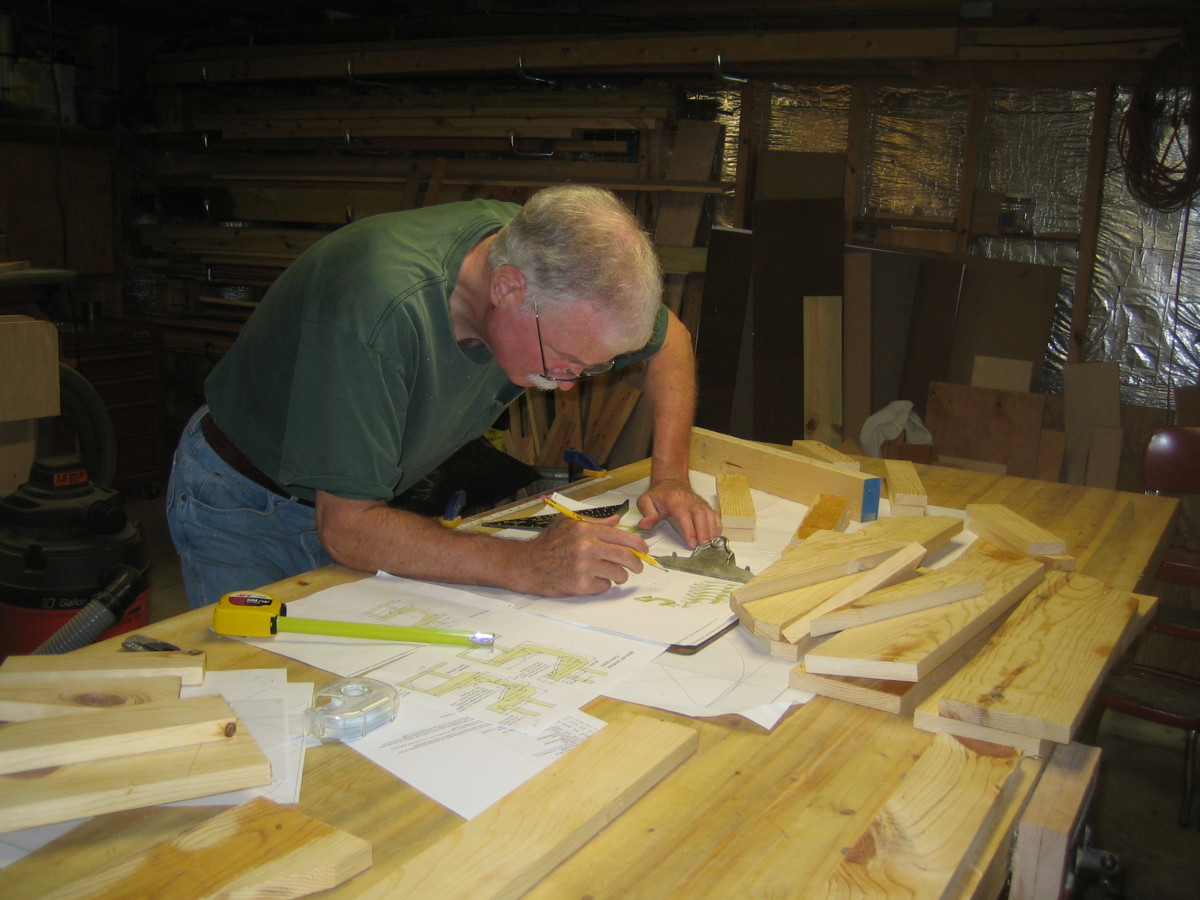
These are some of the plans for the new project. These came from Canada so all dimensions are metric just to make it a bit more of a challenge.

I'm reusing some old shelf boards. With the new planner I can make the boards exactly 19mm thick while removing the stain that was on them.
Some of the boards before and after.
The table saw will put a clean edge on them while ripping them to the proper width (this one is 10cm)
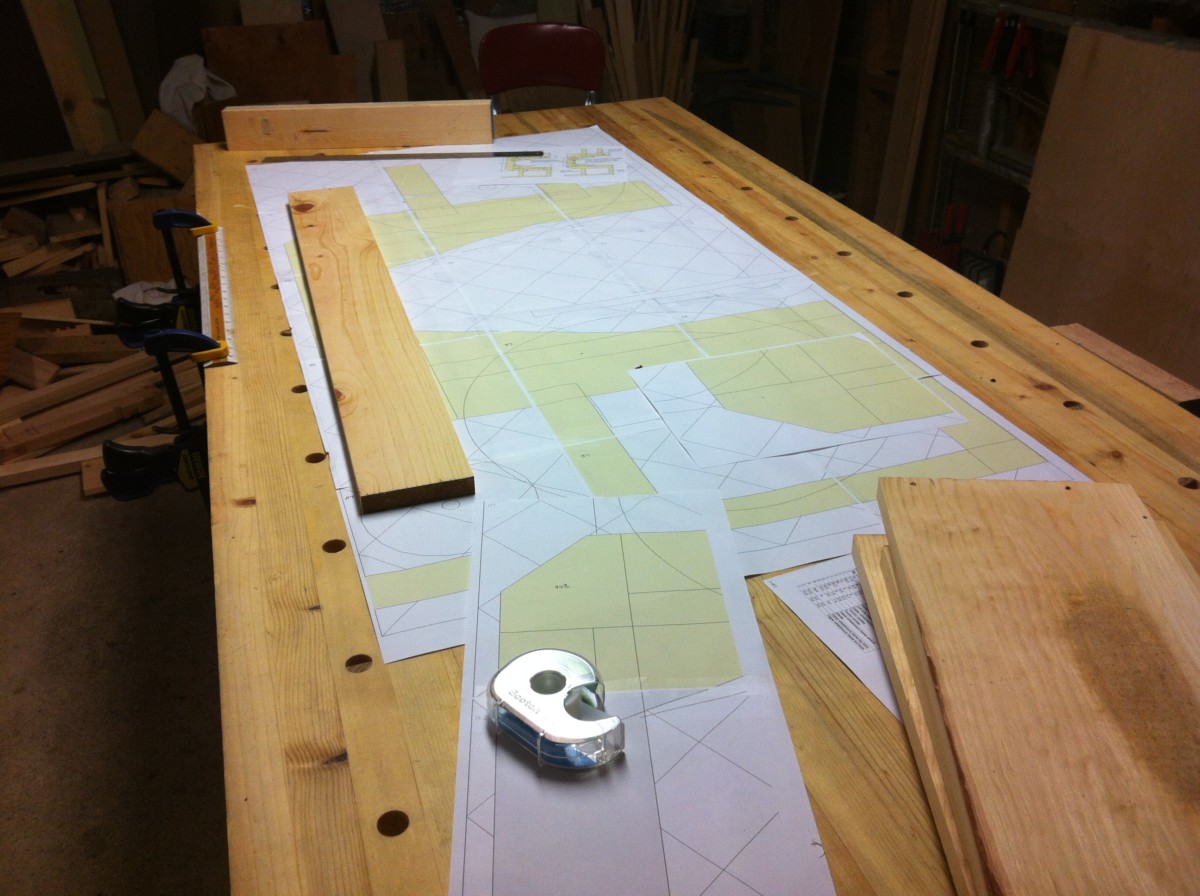
A rocky start. The templates printed out too big. I had to reprint them at 95% and then scotch tape the pages together again.
Here is the first piece. At this rate I should finish by October 2016.
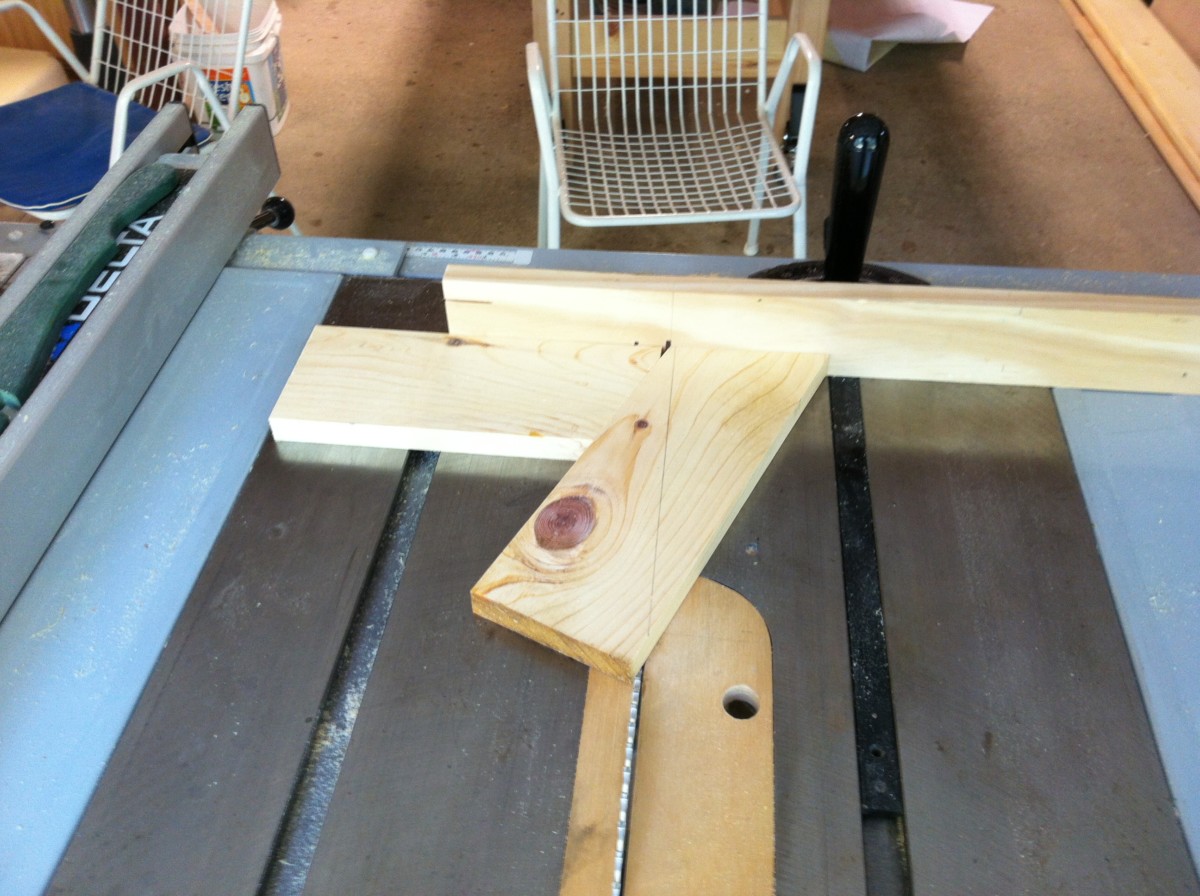
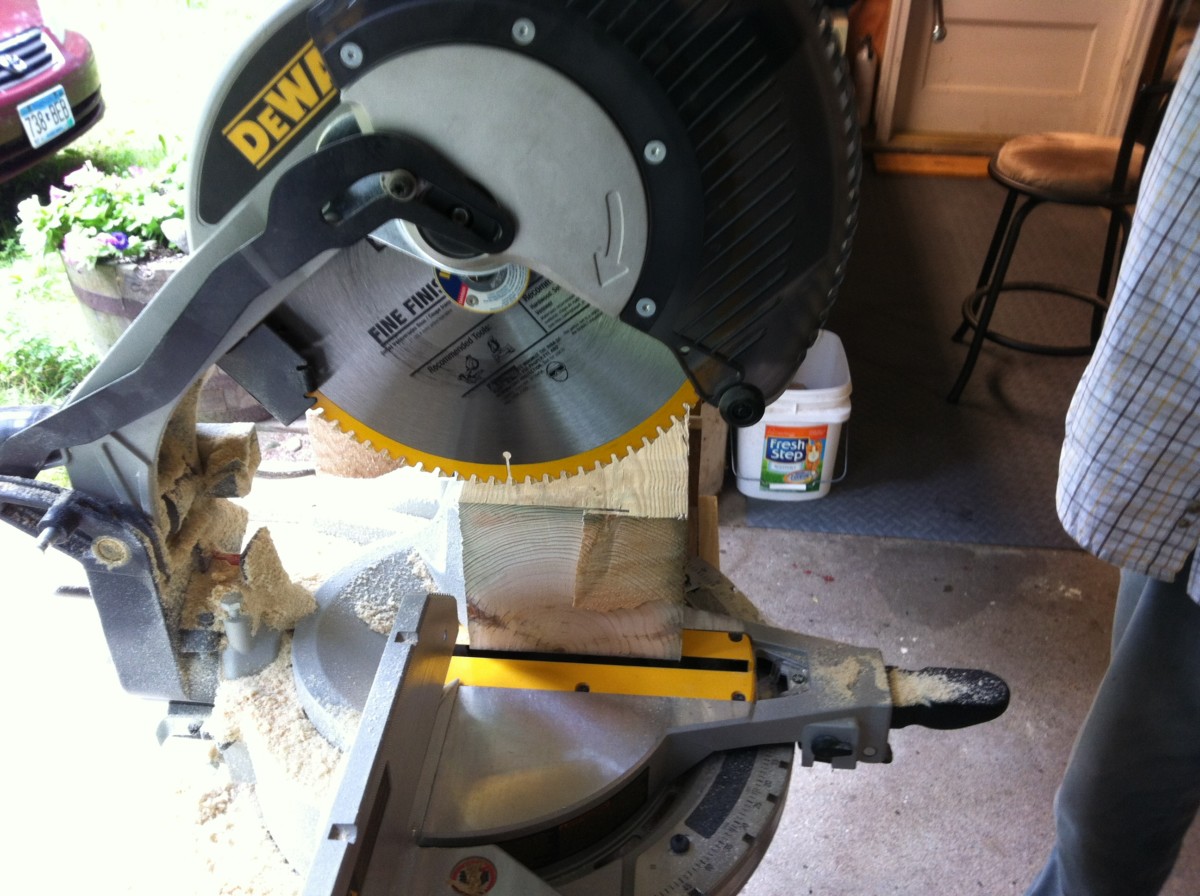
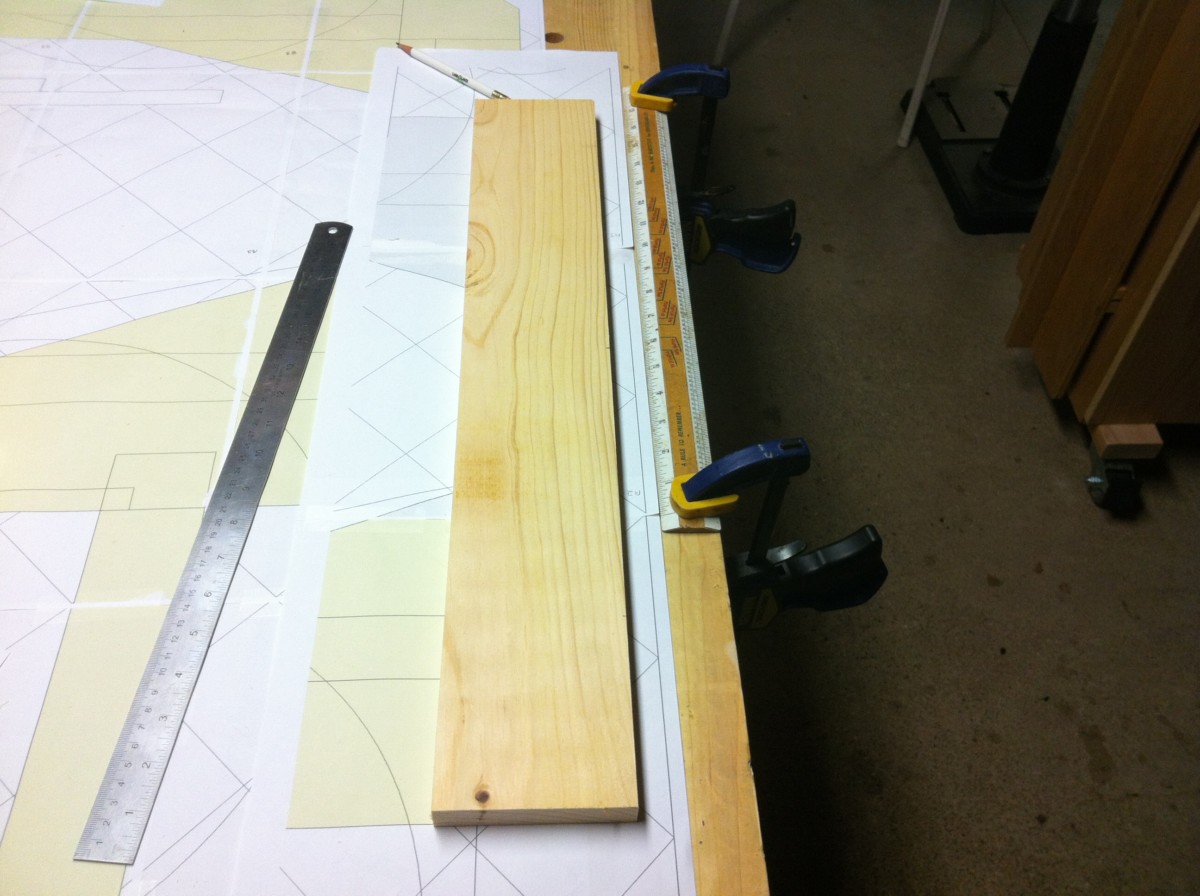
Some of the pieces require a tricky 22.5° cut lengthwise.
Some of the smaller pieces needed a little fine tuning to make them exactly the same size.

I used the miter saw a lot because there are a lot of separate pieces.
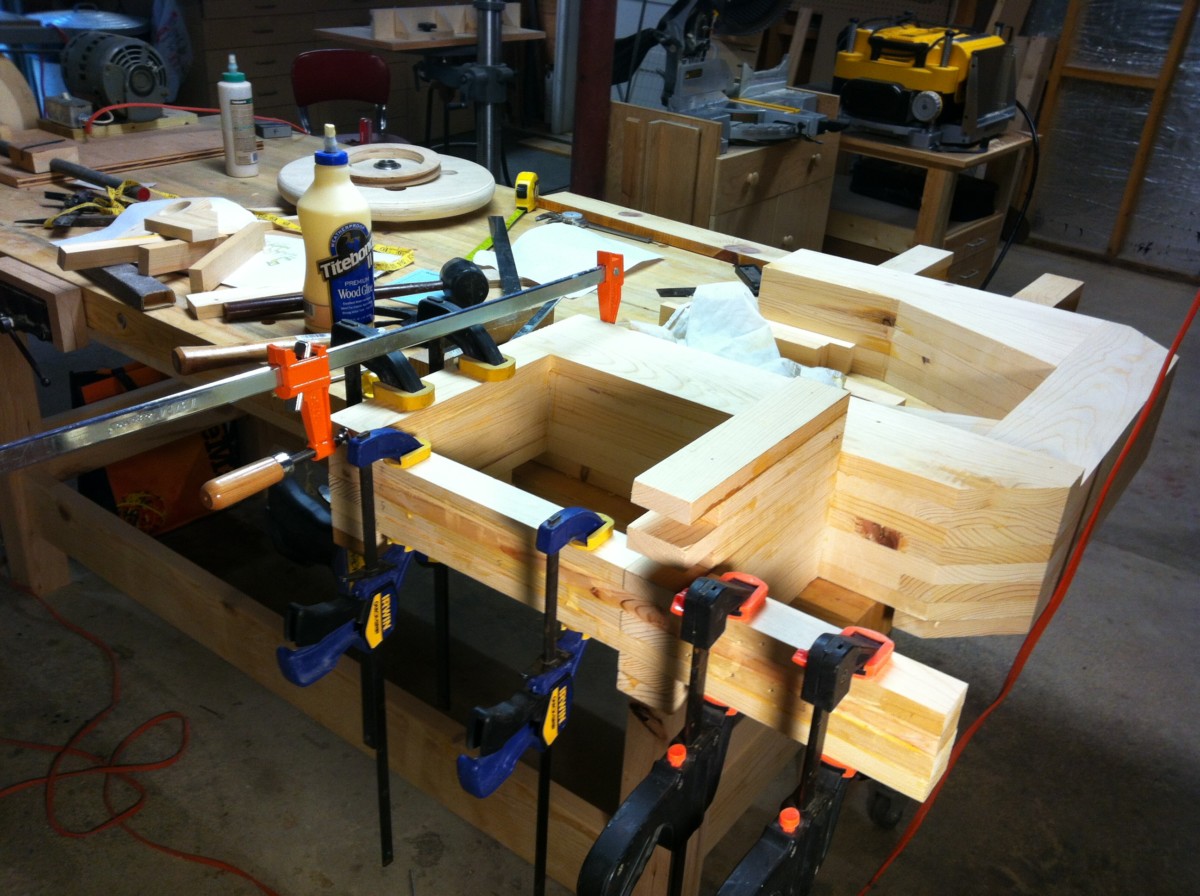
The base portion of this thing requires 72 separate pieces of wood. I've got 19 of them done so far.
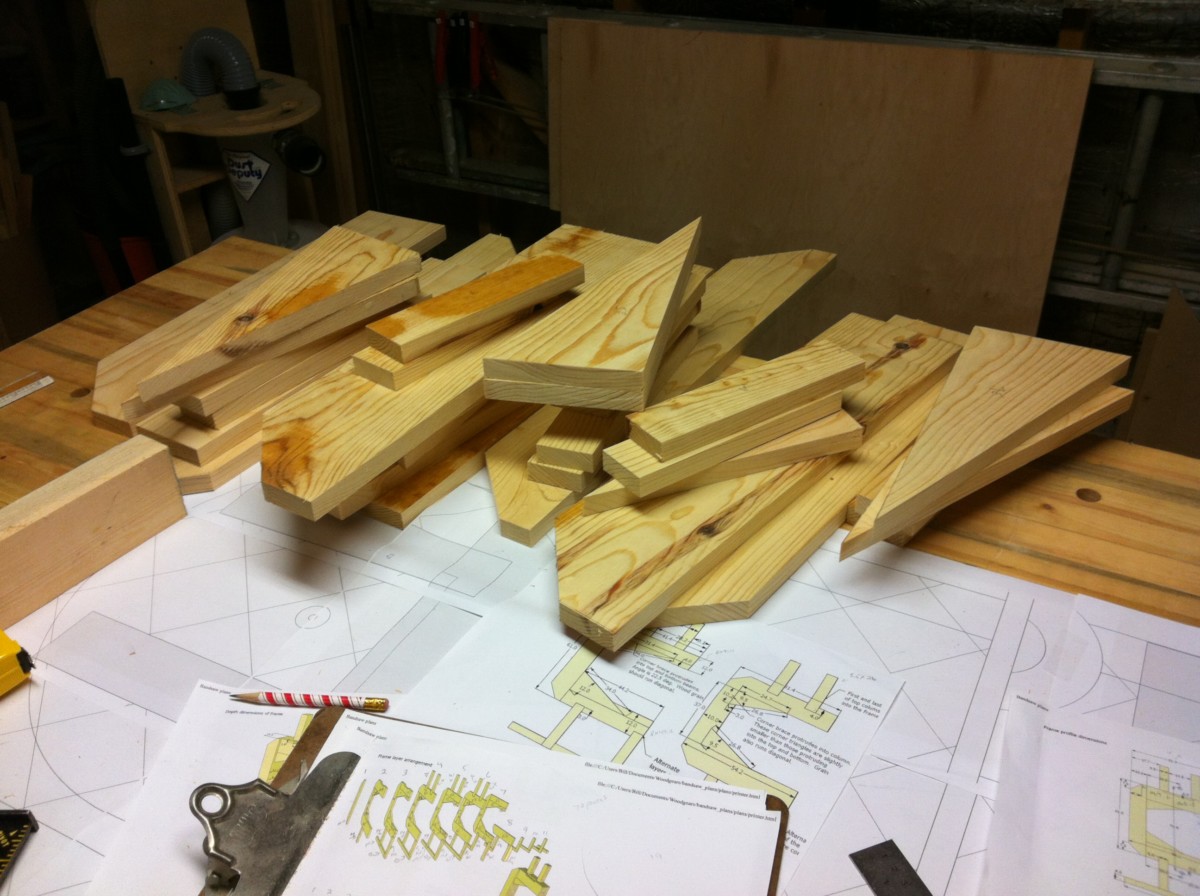
Not much new to show today (but it was a beautiful day for fishing). I've now got 30 pieces ready for glue up.

I've got 44 pieces cut now. There are enough pieces to lay out one wafer. There are 11 wafers but not all are like this - several of them are composed of just a couple of segments.
Cousin Dorothy flew into Bemidji today to spend a week here at the lake. I'll bet she thinks she's just going to lie around and read.
To assemble these things I've nailed some guide blocks onto a piece of plywood which will (hopefully) trap the pieces in the exact orientation.
I needed to make some more 19mm boards because I screwed up and cut a notch 1mm too wide in a couple of pieces.
I'm putting wax on the jig which I hope will prevent the pieces from gluing themselves to it.
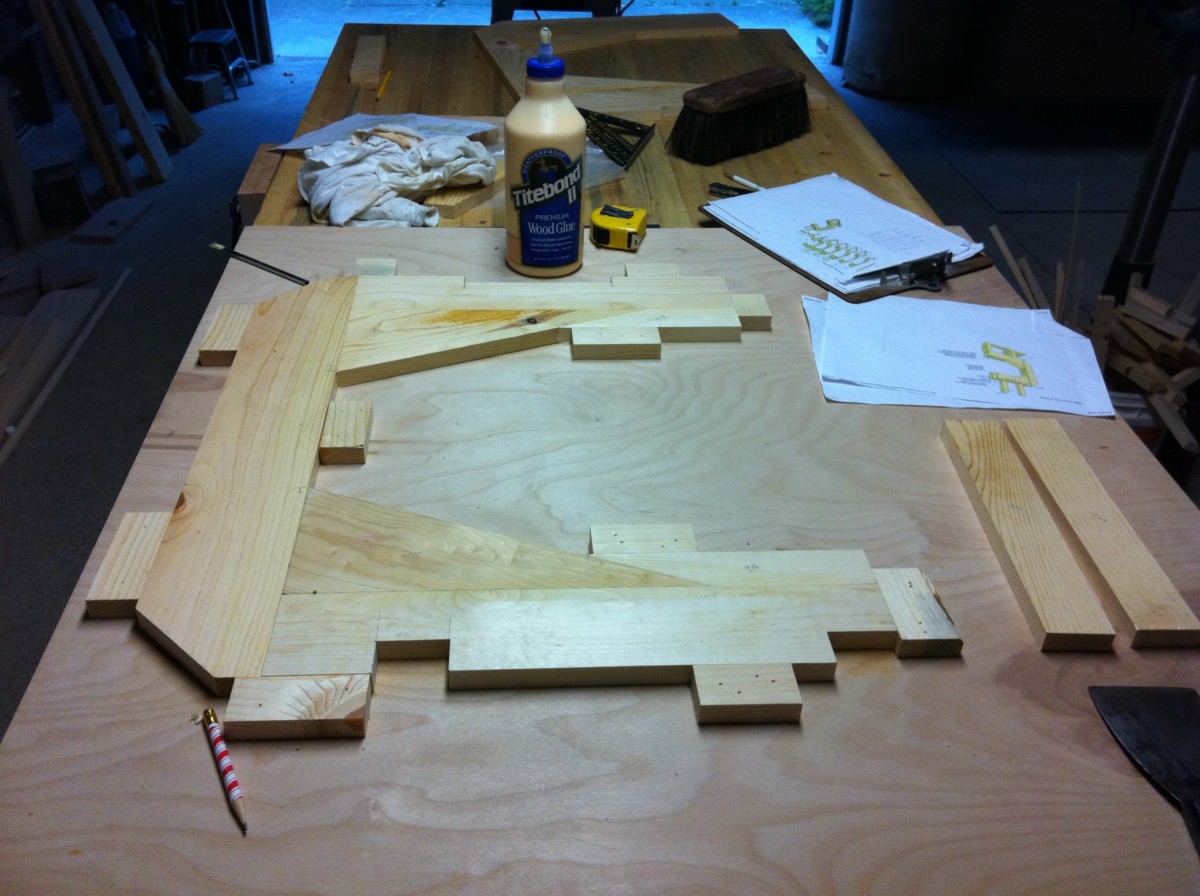
Here is the first wafer (buried under all that stuff) being glued up. This is wafer #2.
Here is wafer #2 after the glue up.
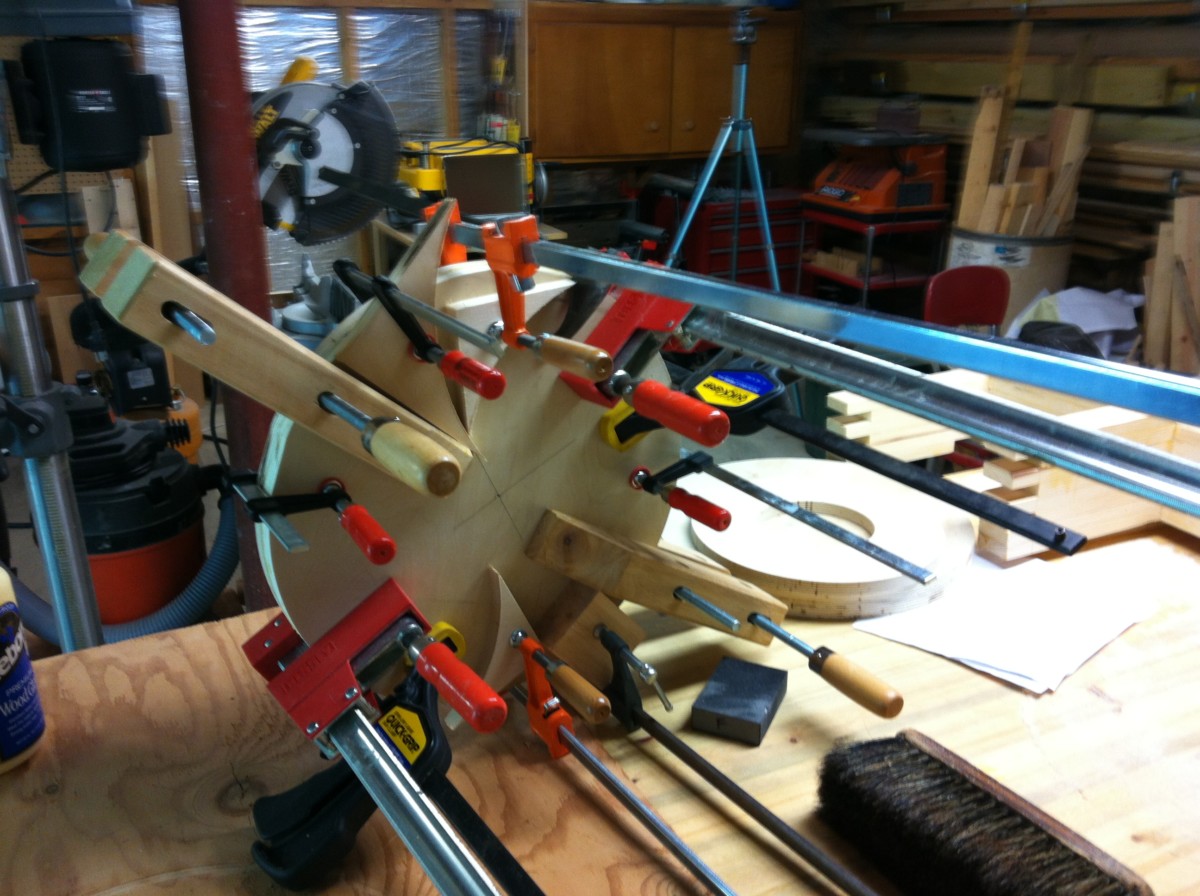
Here is wafer #3 glued up (before the cauls are put on). The careful observer will see a subtle difference between the wafers.
I used the chain saw to square up both ends of a large-ish log so I could start to split some wood. Dorothy couldn't wait to get started.

Wafers 1 - 7 are glued up. I'm afraid I'll need to do a lot of work on them before I can glue the wafers together into the big "C".

I'm going to try clamping the wafers together and then use a block plane, wood surfer, belt sander, whatever works to get the outside edges smooth and at a right angle to the face.
I've started to glue the wafers together: here we have #2 & #3. That's almost all of the clamps that I have.

Using a flush trim bit in the router seems to work well correcting the unevenness in the wafers after they're glued together.

Here we have the feet for wafer #4 being glued on. I'm doing this one differently. I want to keep the frame flat on the table to prevent any twisting.
Gluing wafer #4. I used a caul at the far end and a couple of Bessey clamps at the near end. Those are the feet at the near side and the wheel mounts at the far end.

We did find some time to go fishing. That's a 4.2 pound bass there.

This is the last full wafer glued on to the frame. I think we're all probably tired of looking at these.

Dorothy is on her way back to Detroit. But wait, all the wood isn't split yet.
It's going to take a lot of sanding to get this the way I want it. I think I'll need to break up the sanding with other parts of the project.
That little part I'm gluing on is actually wafer #1. There are a few other small sticks that need to be glued on too.
And now for something completely different. I need to make some wheels.
I had this circle/arc jig left over from the bookcase project. I just needed to drill a new center pivot to cut a circle with a 20cm radius.

And there you go. This works just as well with metric units as it does with imperial units.

No more ice cream at the Dorset House. No more Dorset house. Evidently caused by a lightening strike last night.
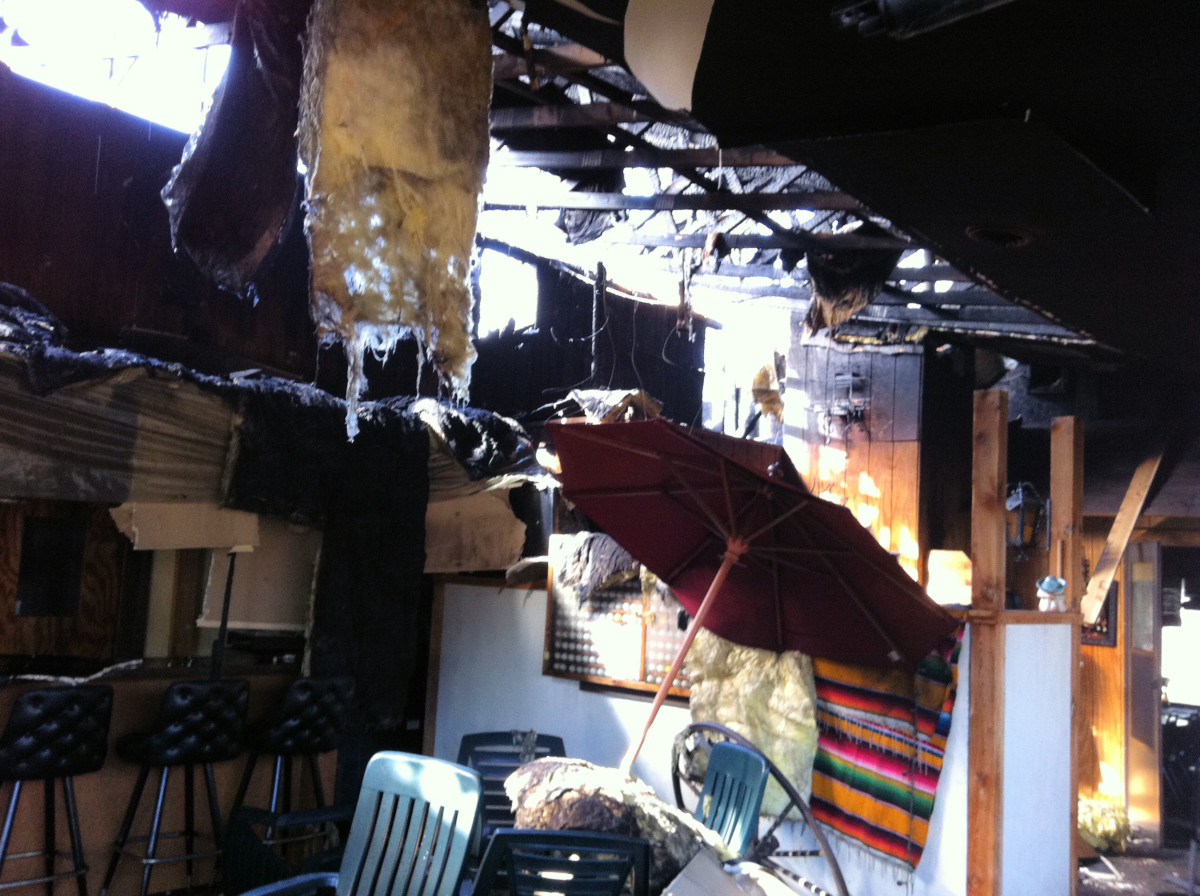
No more Mexican food either. Companeros is completely gutted - it's a tear down.
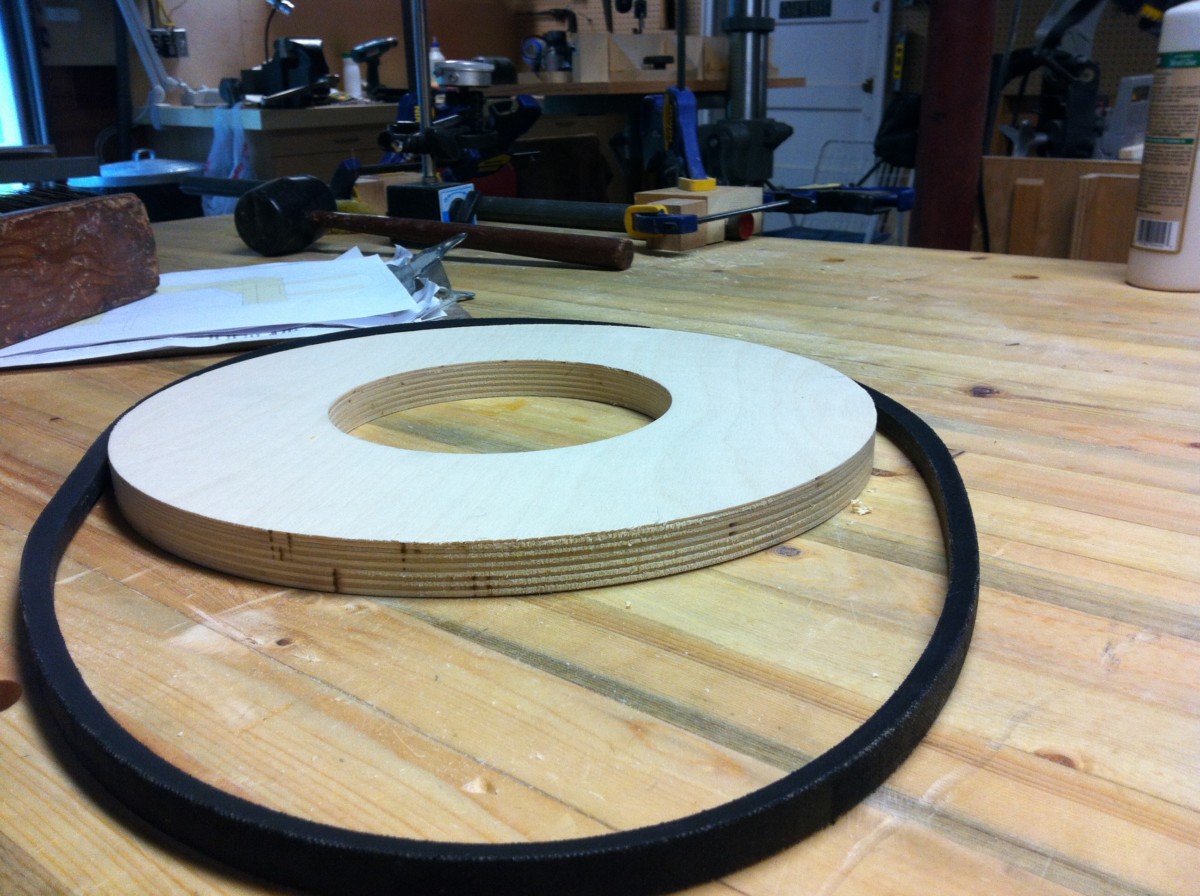
I need a smaller disk (30cm diameter) to make a donut shaped piece.

I clamped the disk in the right position and slowly raised the router bit while I rotated it. To my surprise it worked.
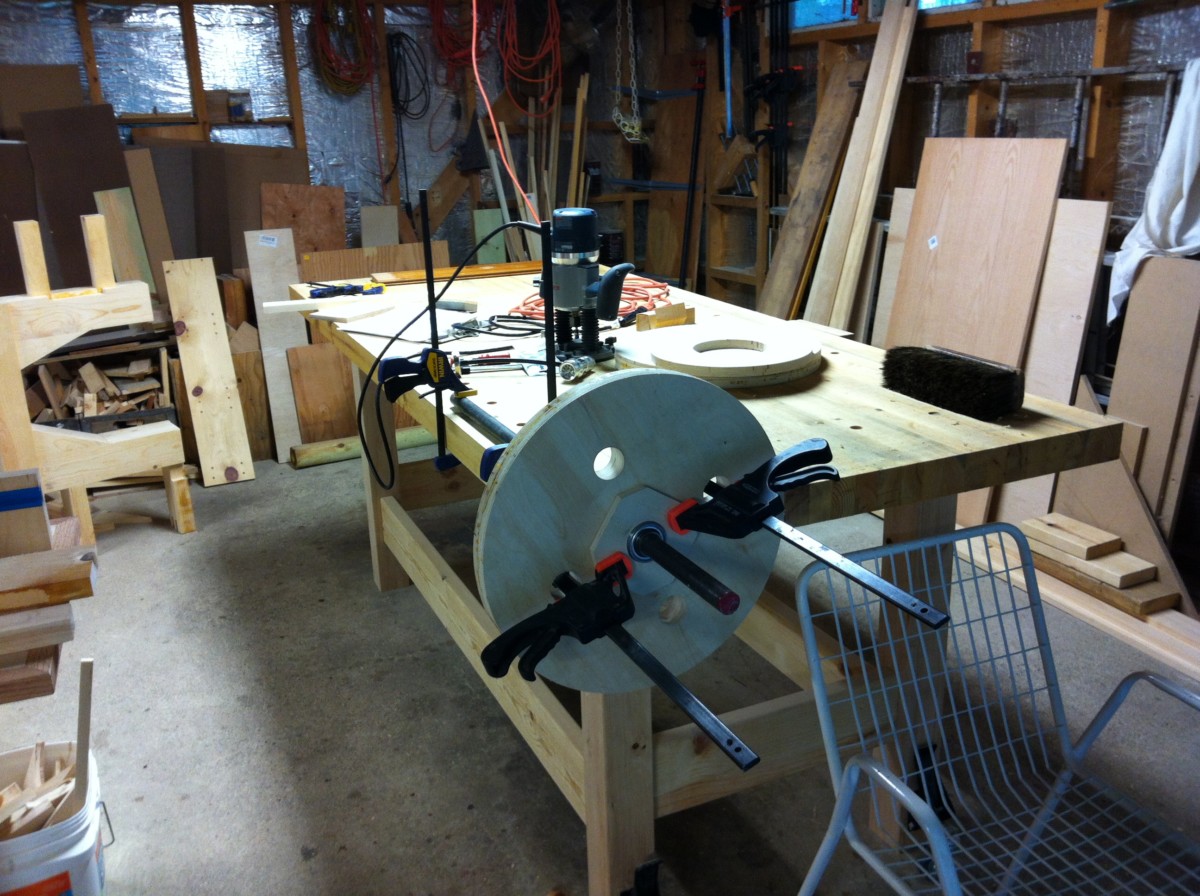
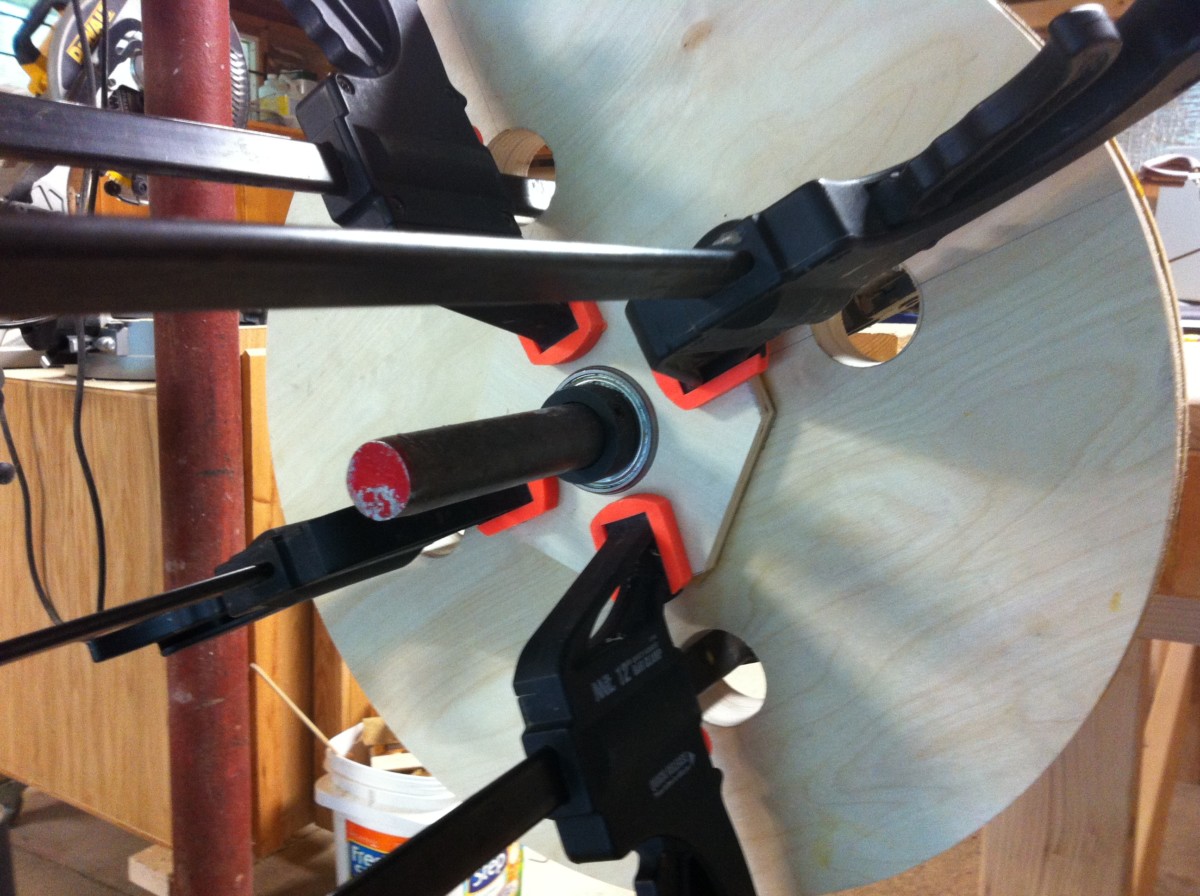
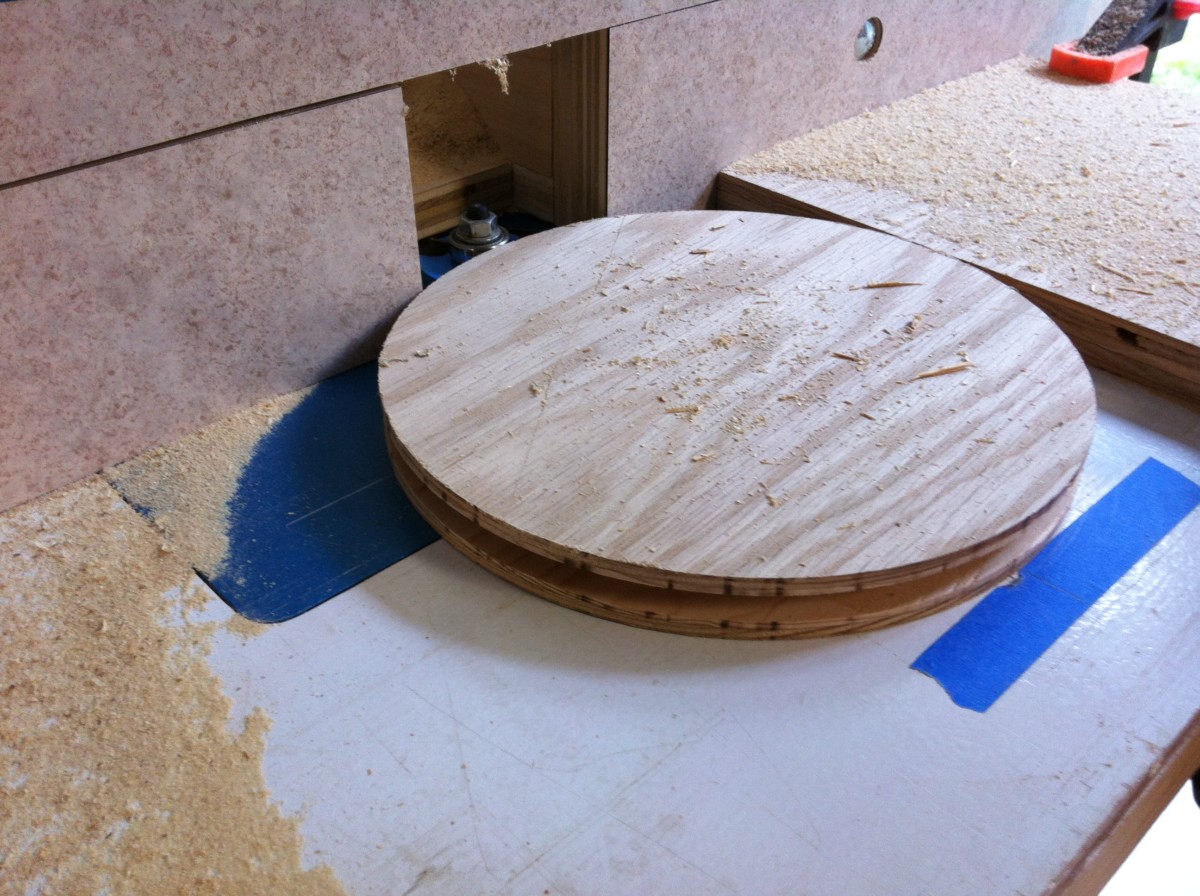
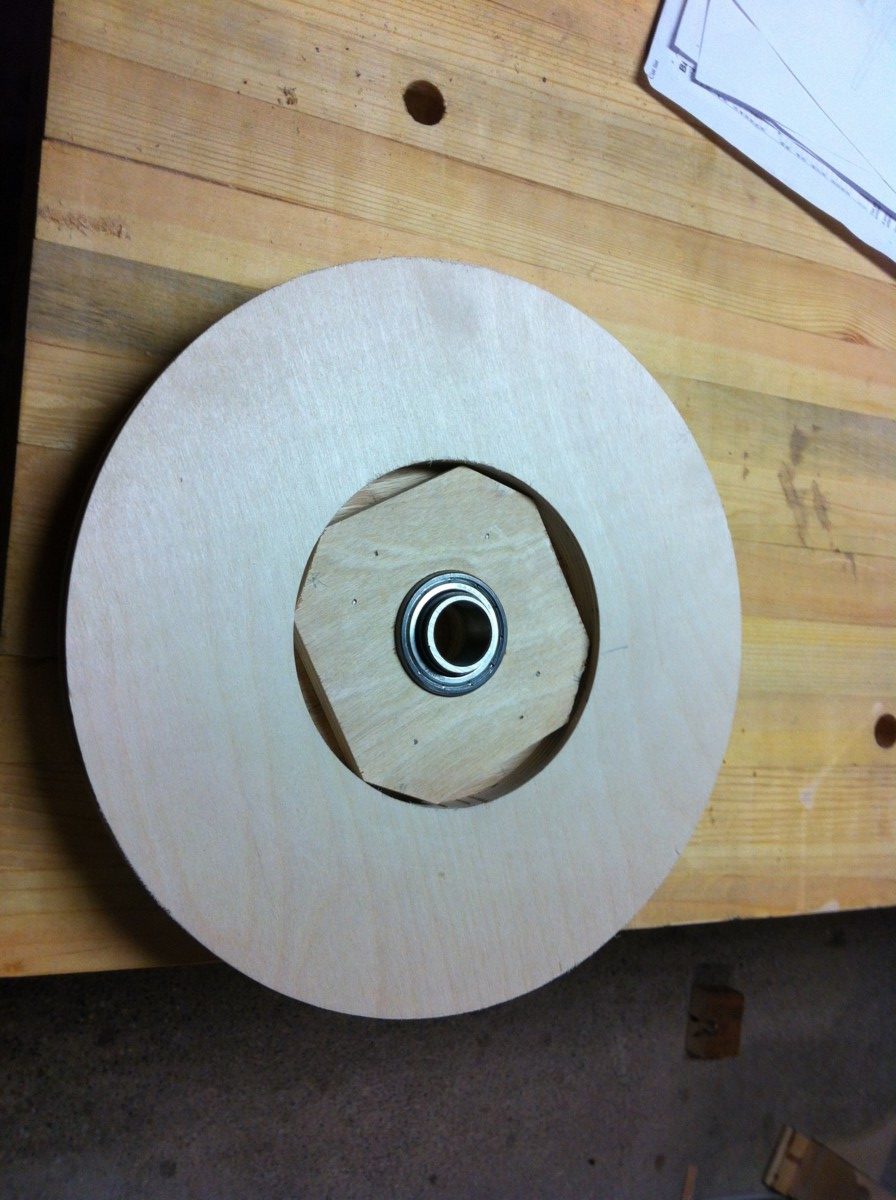
I need to glue the large disk pieces together to make 2 wheels 1 1/2" thick.
Lots of clamps.
Now I need to find out how big a hole to drill to get a tight press fit on the bearings that will spin the wheels.
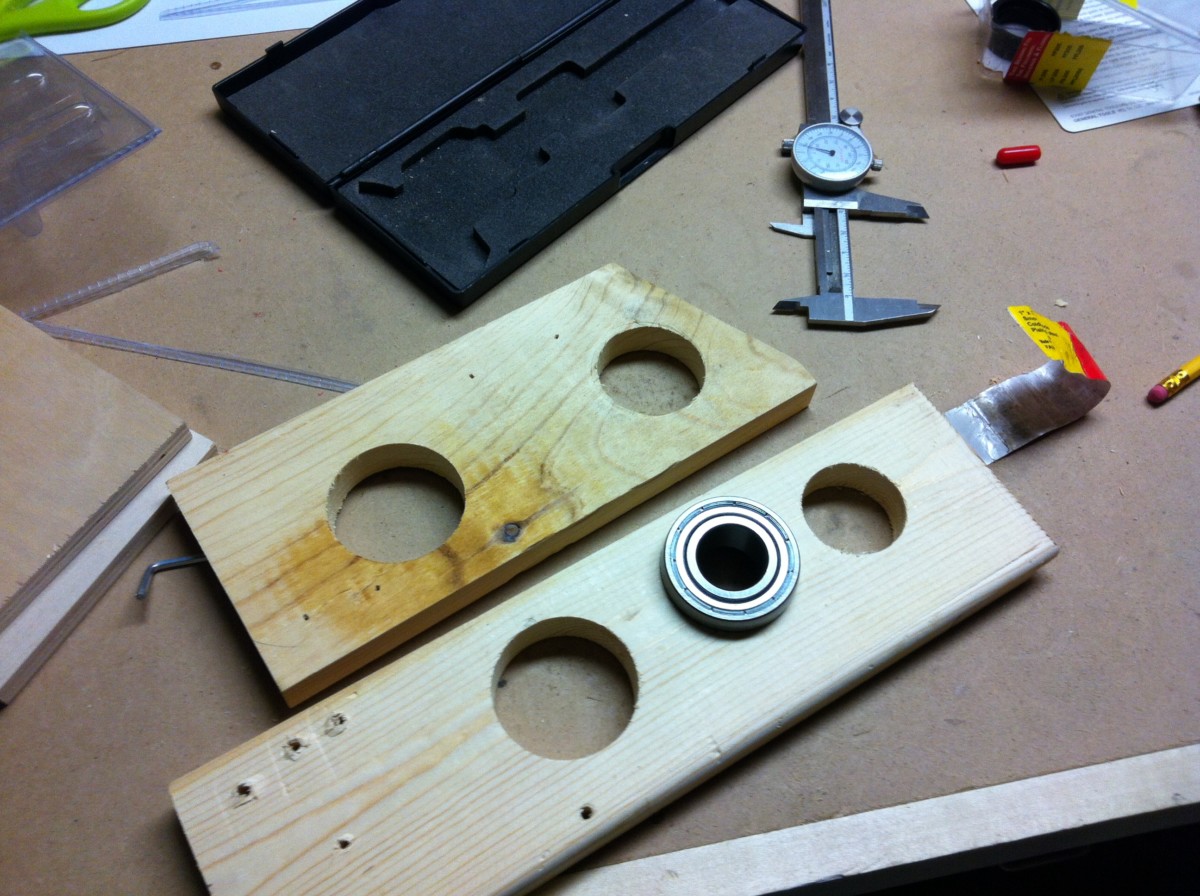
After a few false starts I think I have the right diameter for these bearings.
Here's an early look at how the bearings are going to be attached to the wheels.
A week ago there were a dozen hummingbirds fighting over this feeder and now I haven't seen a single hummer in two days. The end of summer.
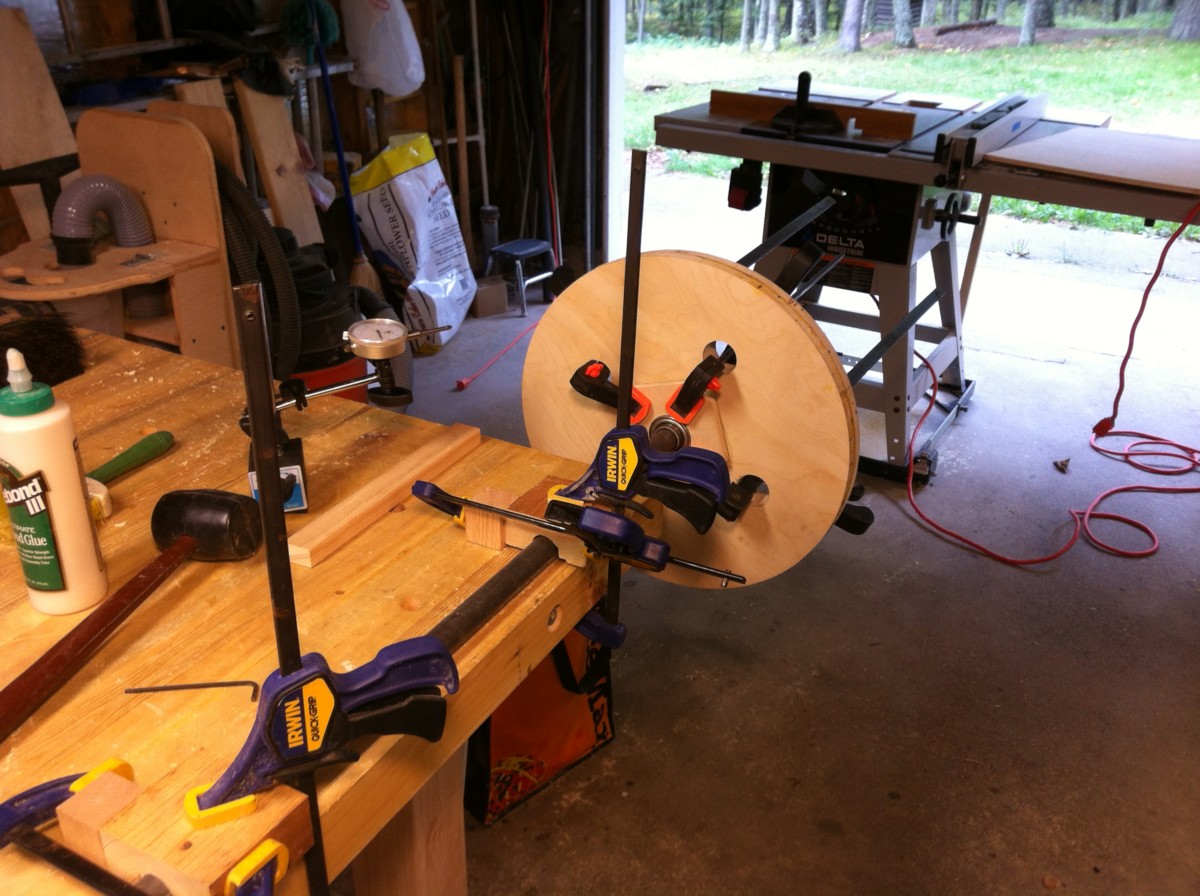
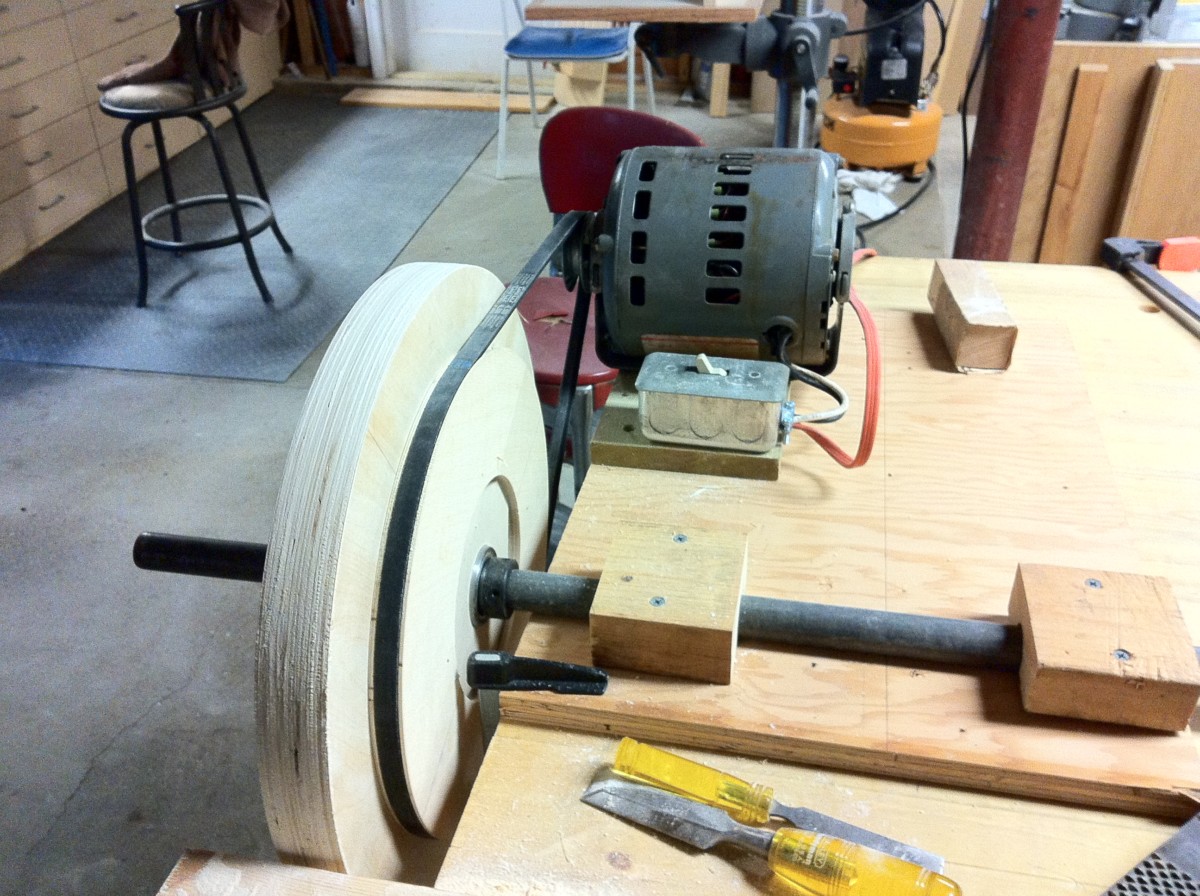
This is the actual glue up of the first wheel. Try as I might to eliminate it the outer rim has a wobble of ±0.01". I hope that won't cause a problem.
Here's a peek at the other side.

The first wheel turned out well enough so now I need to make another one.
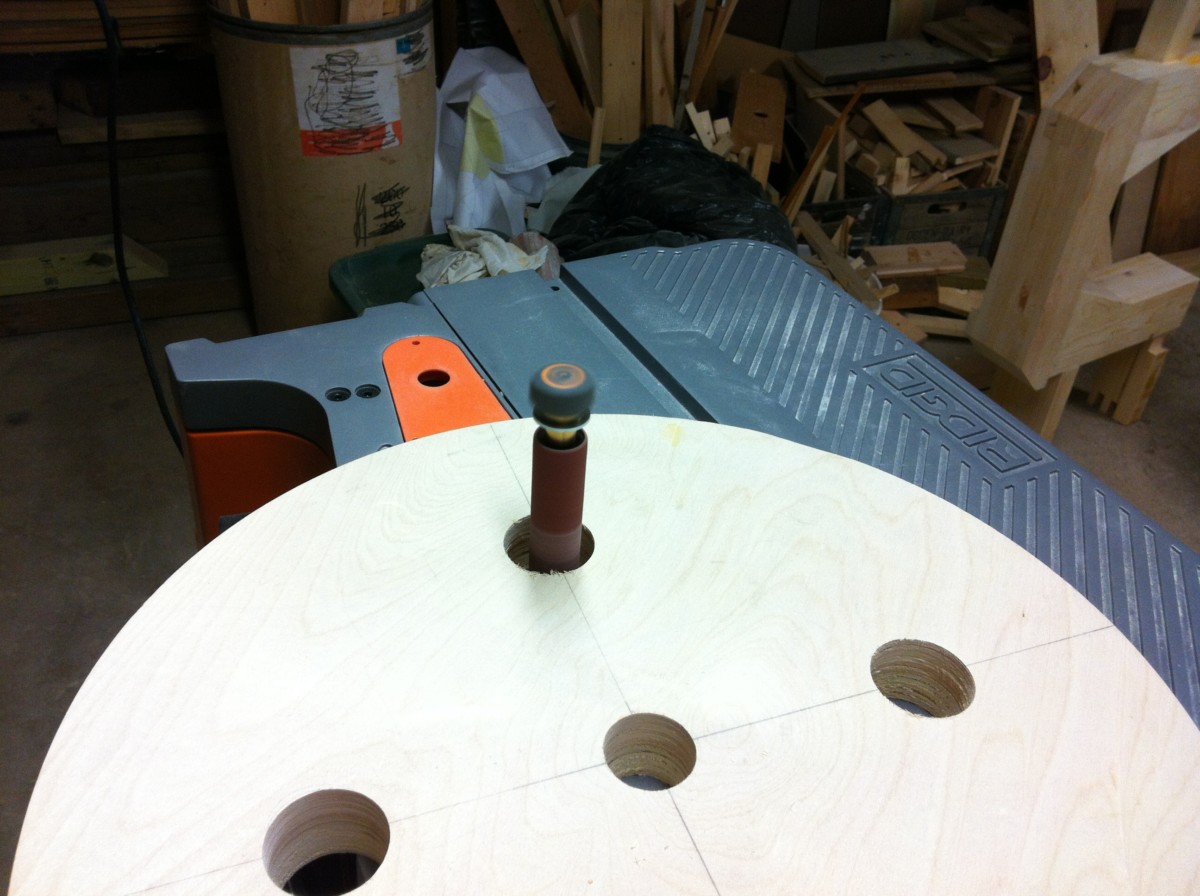
I use the new spindle sander to smooth out the inside of the holes.
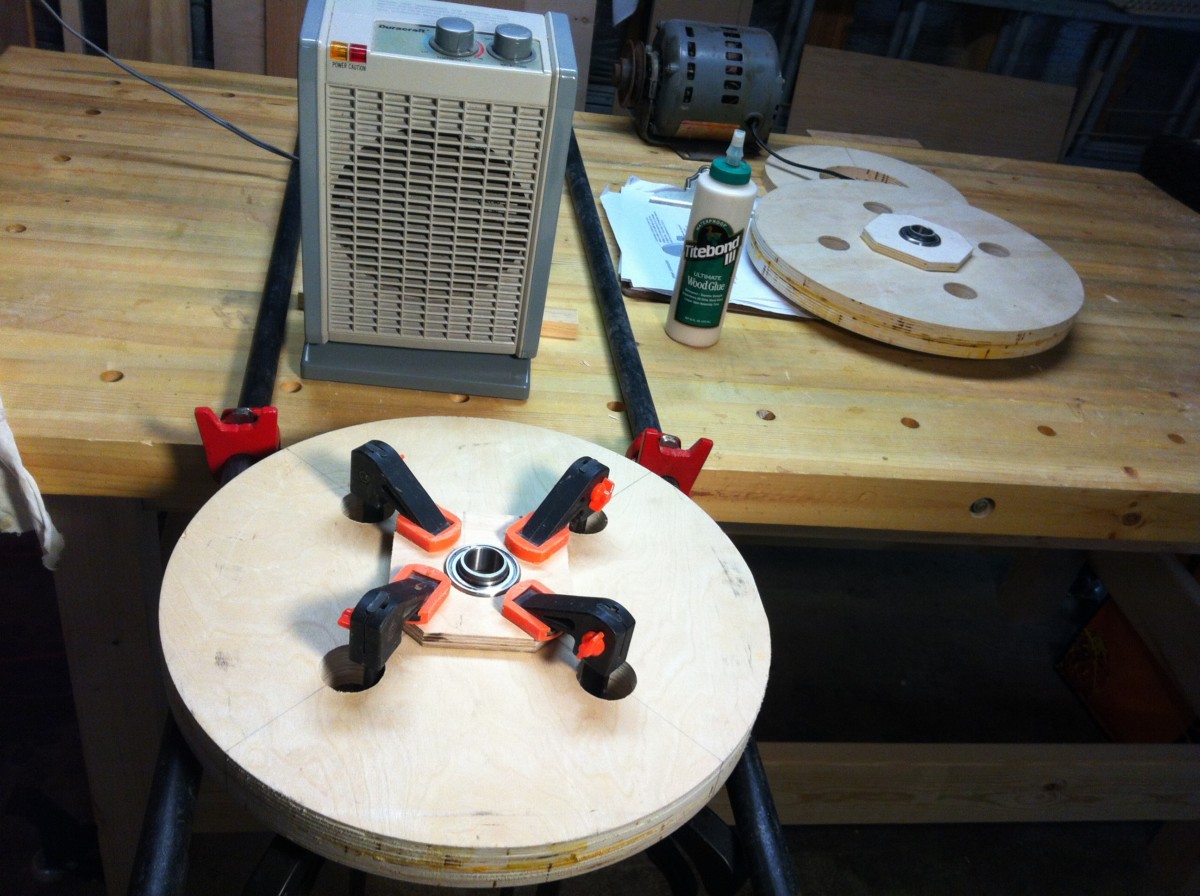
Glue up of the first bearing on the second wheel. It's cold enough today that I think I need that heater to help the glue dry.
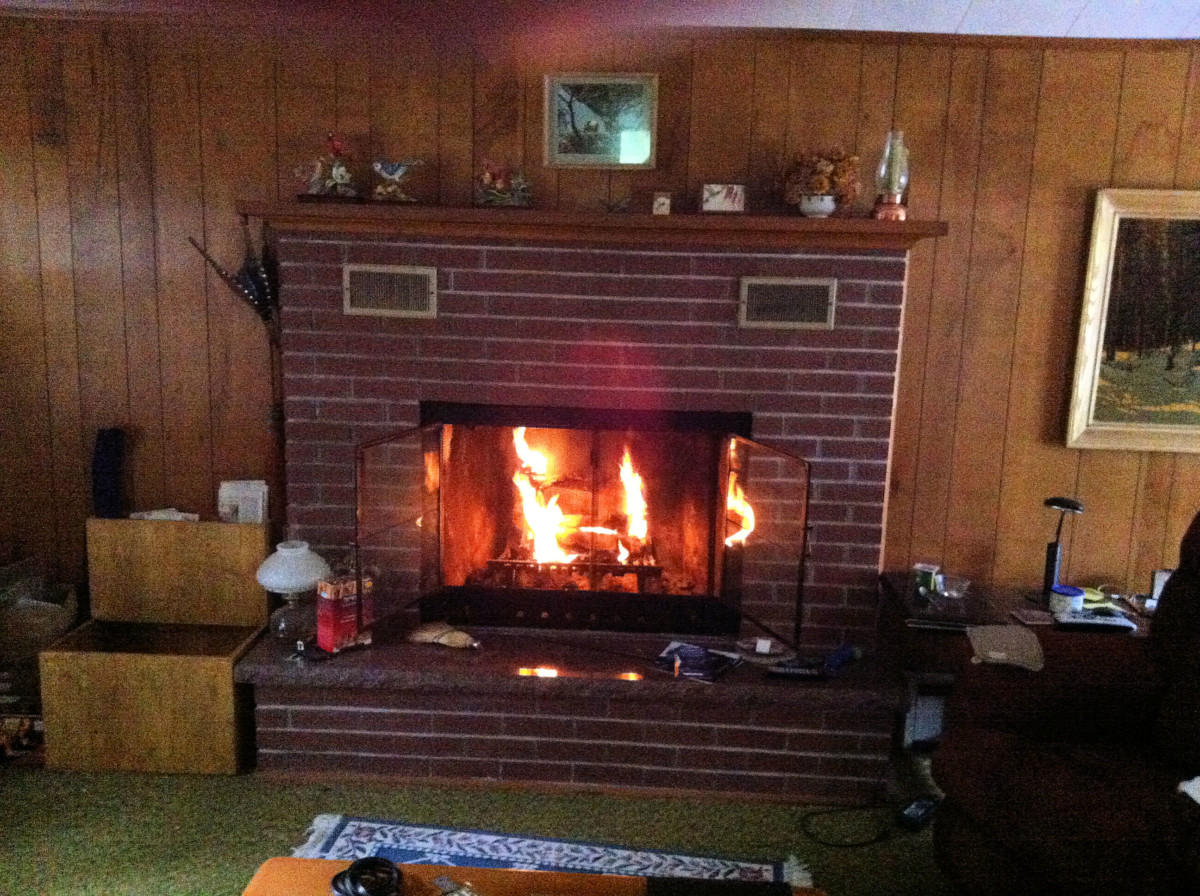
It was below freezing this morning - the fire felt nice. I know there are still some warm days left this year but summer is waning fast.
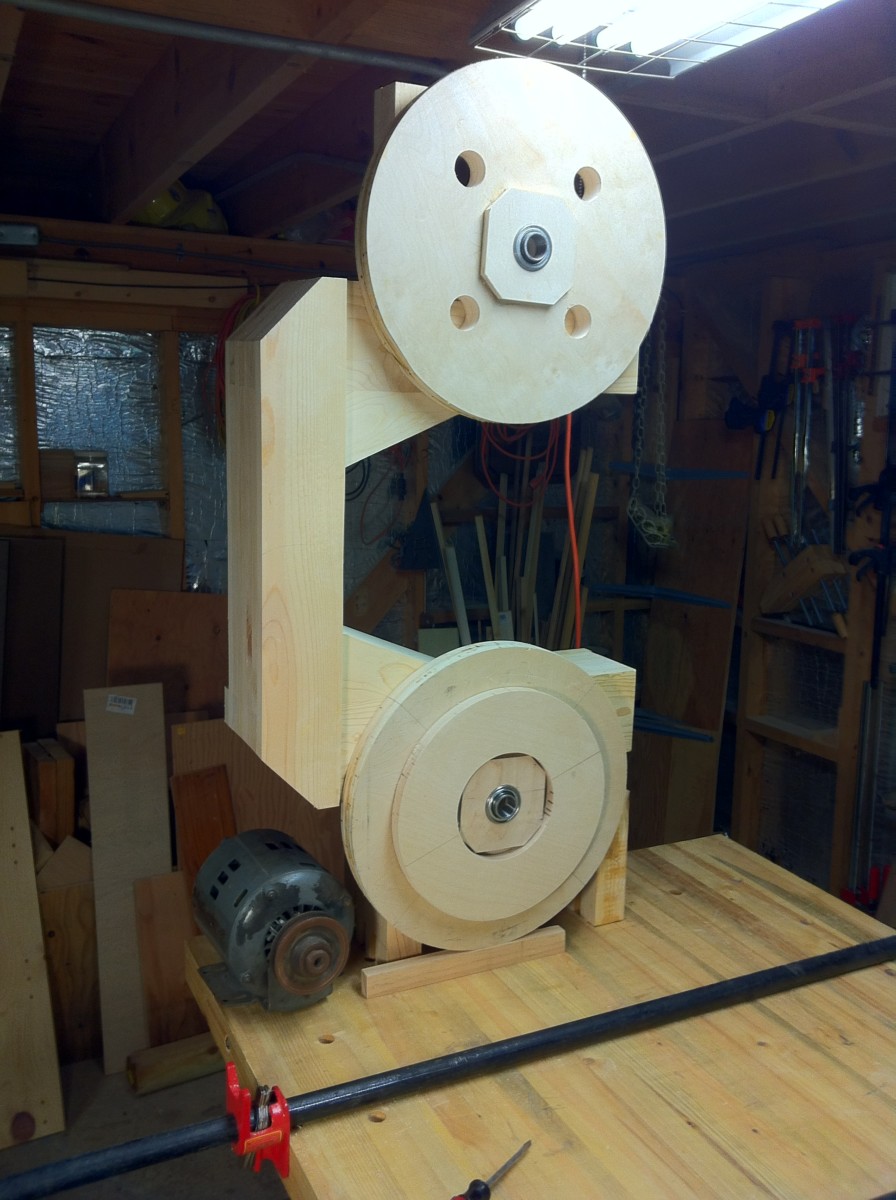
Here is the first inkling of what this will look like when I finish, which is still a long ways off. There is much more to do which will most likely not be finished until next year.
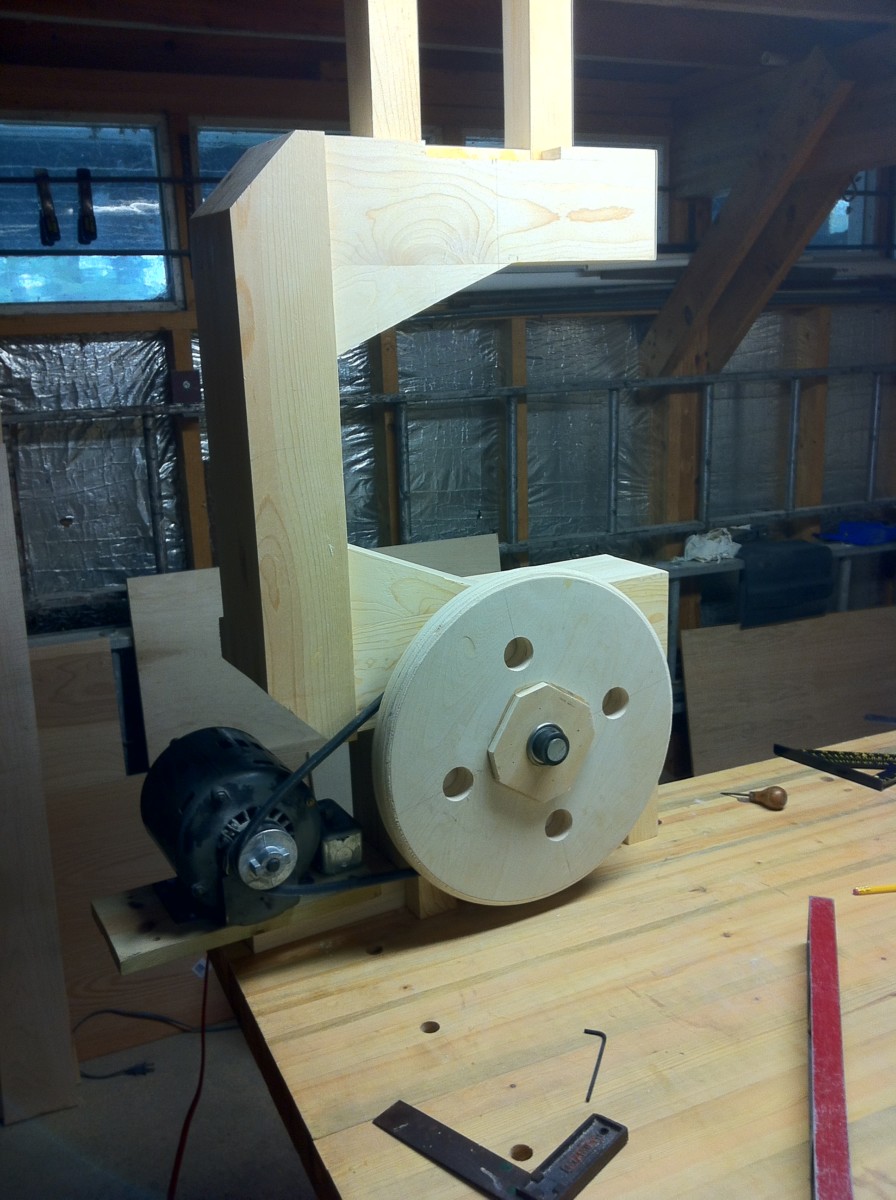
This is the current puzzle in search of a solution. I need a groove in the edge of this drive wheel which will accept this V-belt. I don't have a lathe.

There must be dozens of ways to do this but here is what I did. First I used the circle jig to make an 8" disk out of a scrape piece of 3/4" plywood.
Next I used a slot cutting bit (I just happened to have one) in the router to cut a 1/4" slot on the edge of that new disk. That's the new router table fence I made last spring.

Next I drilled a 5/8" hole in the center. 5/8" is the size of the arbor on a table saw.
I put the plywood disk in the table saw just as if it were a saw blade. Then when it was spinning I used rasps and files and such to expand the groove to fit the v-belt.

I carefully centered the 8" disk on the drive pulley (the donut shaped thing) and shot some nails into it to join them together. This is only temporary.
Here's the other side. I used the nail gun to temporarily attach the bearing block to the 8" disk.

This is what I was after. Now that the drive pulley is spinning I can shape the edge groove to fit the v-belt just like I did on the table saw.

I separated the donut from the temporary 8" disk and attached it to one of the main wheels. I mounted the motor and the axle on a scrap piece of plywood to make it easier to smooth the outer rim.
That was stupid. I put the motor on the wrong side. I need the wheel to turn down into the chisel, not up.

Here is this wheel finished. It's an odd bit of physics that the crown on the rim causes a flat belt (or a band saw blade) to rise the top. We'll see.
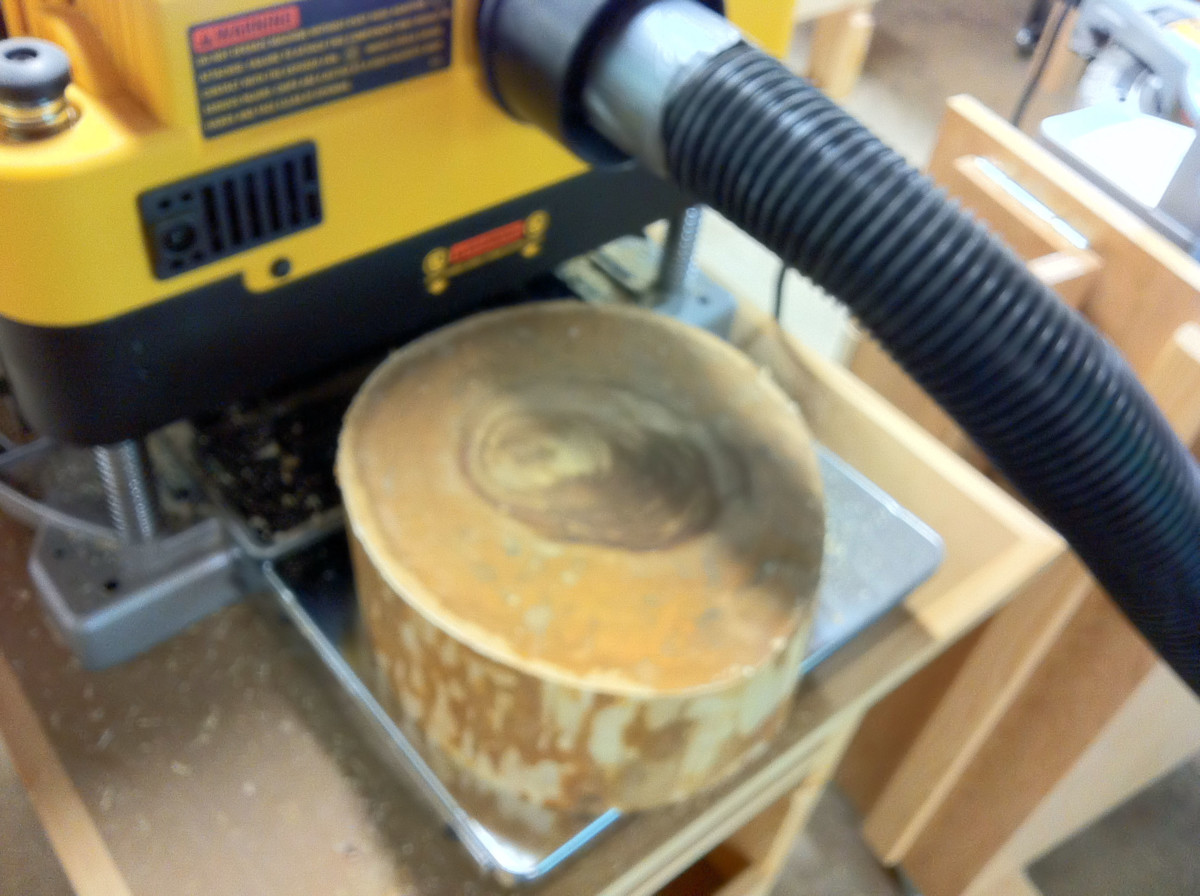
Here's a small side project. This is a slab of birch from the wood pile. I cut the disk with a chain saw and ran it through the planer until both sides were smooth and parallel. (It's not your eyes, this picture is blurry.)

Then I used it to replaced the rotted wood base of this hat rack. It's not mine, I'm doing this for a neighbor.
Yet another sign that summer is over.
I'm taking a break from the wheels and back working on the C frame. This is the base I'm gluing up. I need a few more layers. That bottom section detaches from main body for now.
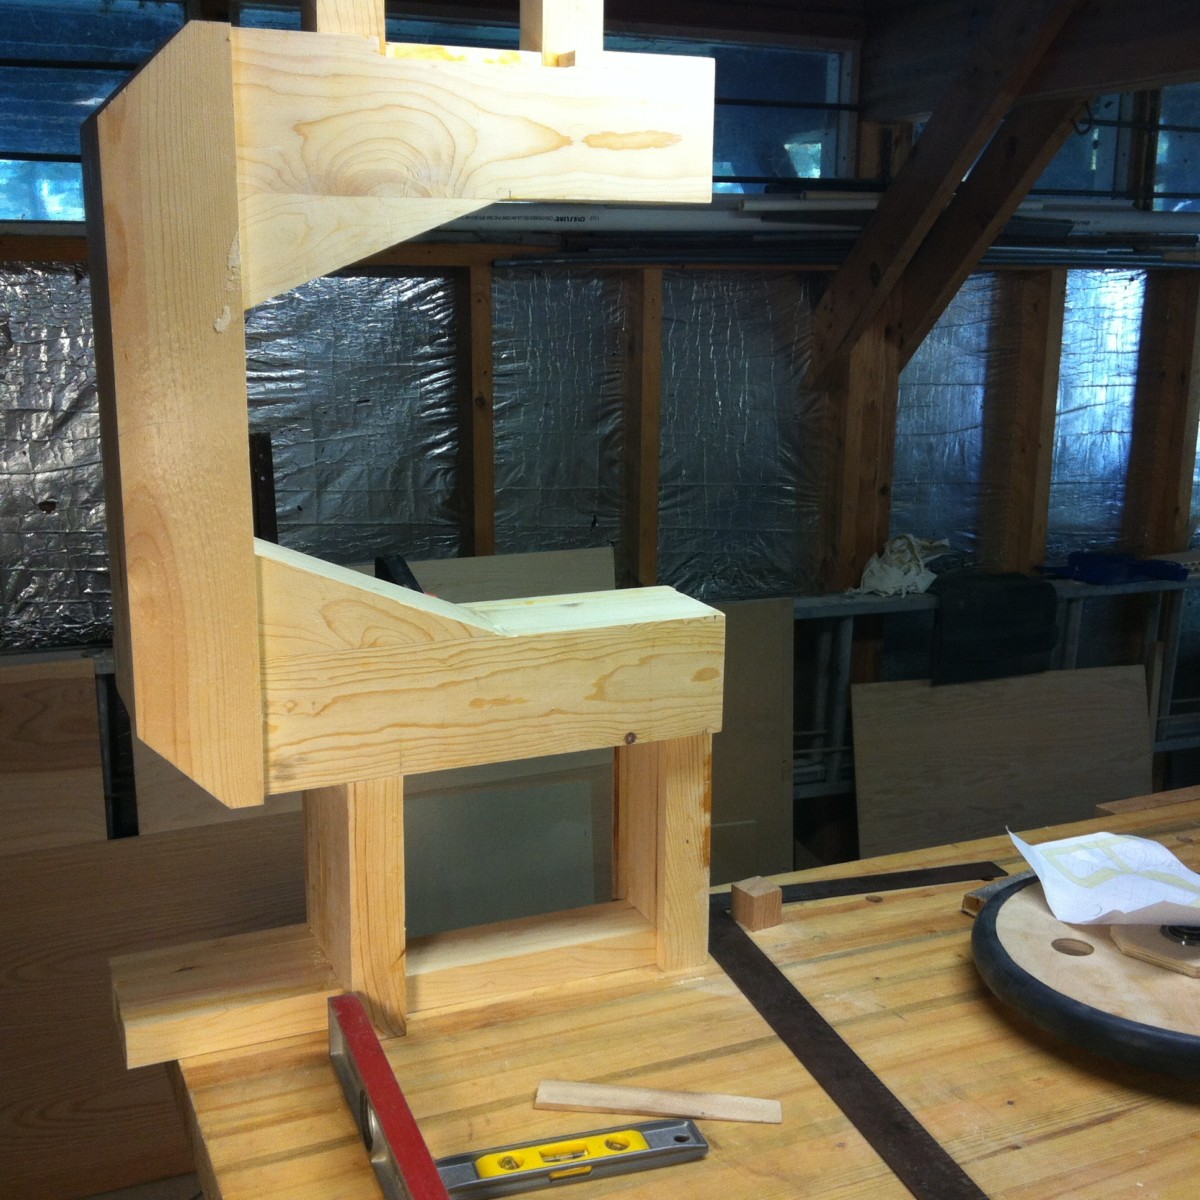
There's the base done. It took a little finagling to get the whole thing to sit absolutely vertical but I think it's OK now.
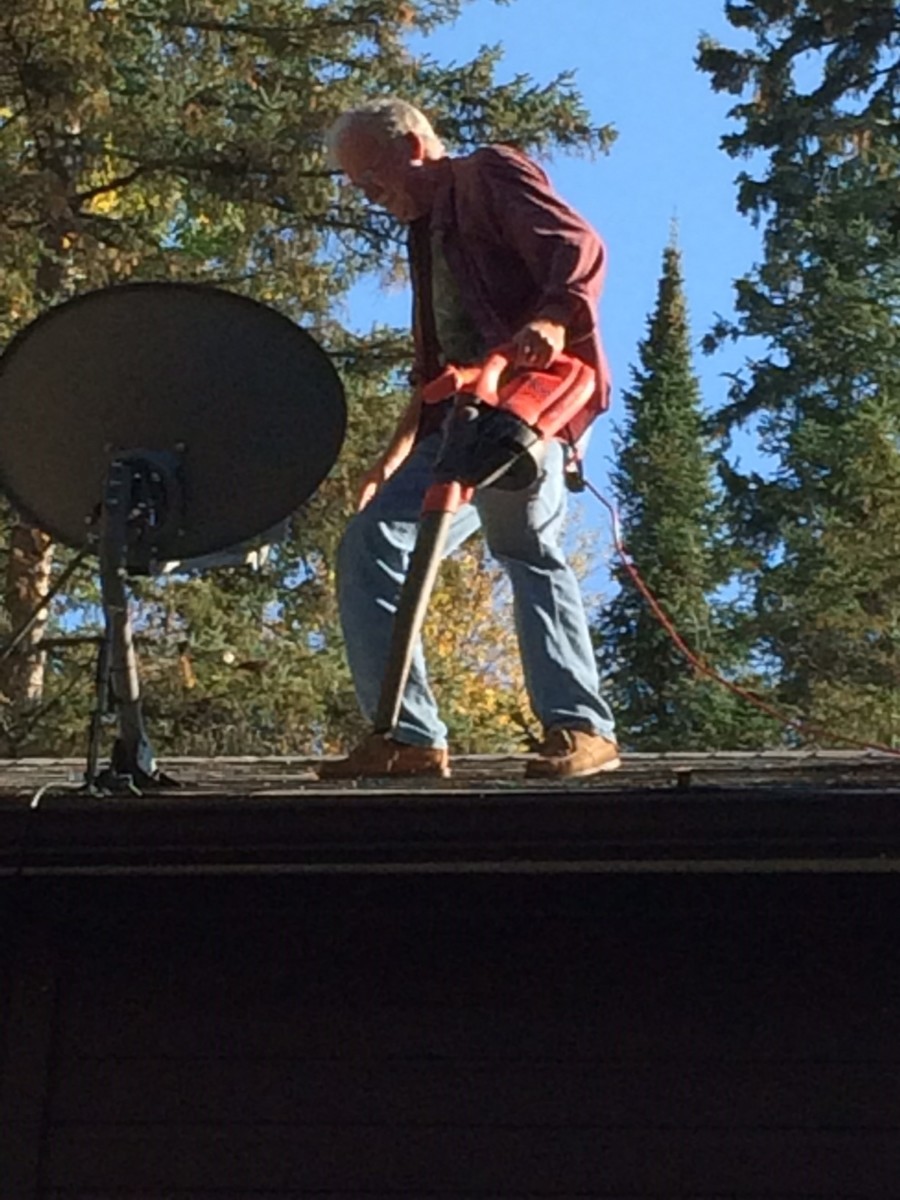
Up on the roof one last time this year to blow out the gutters

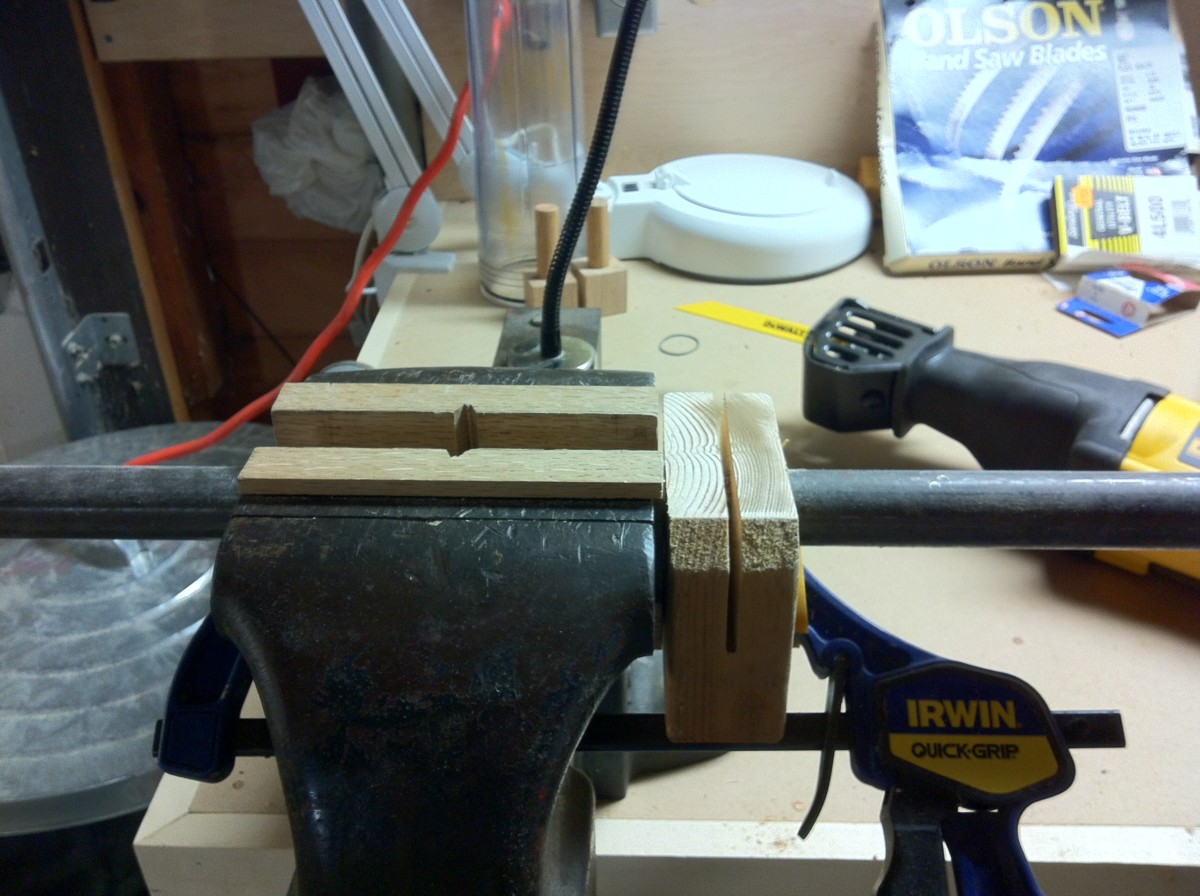
This is a learning experience. I used a grinder on an electrical box cover to make a cutting template for the wheel profile. It worked pretty well making both wheels identical.
I needed to cut a 22.5cm length from the 3' x 1" steel shaft. I drilled a 1" hole in a 2x4 block and then cut a groove down the middle to guide the reciprocating blade.
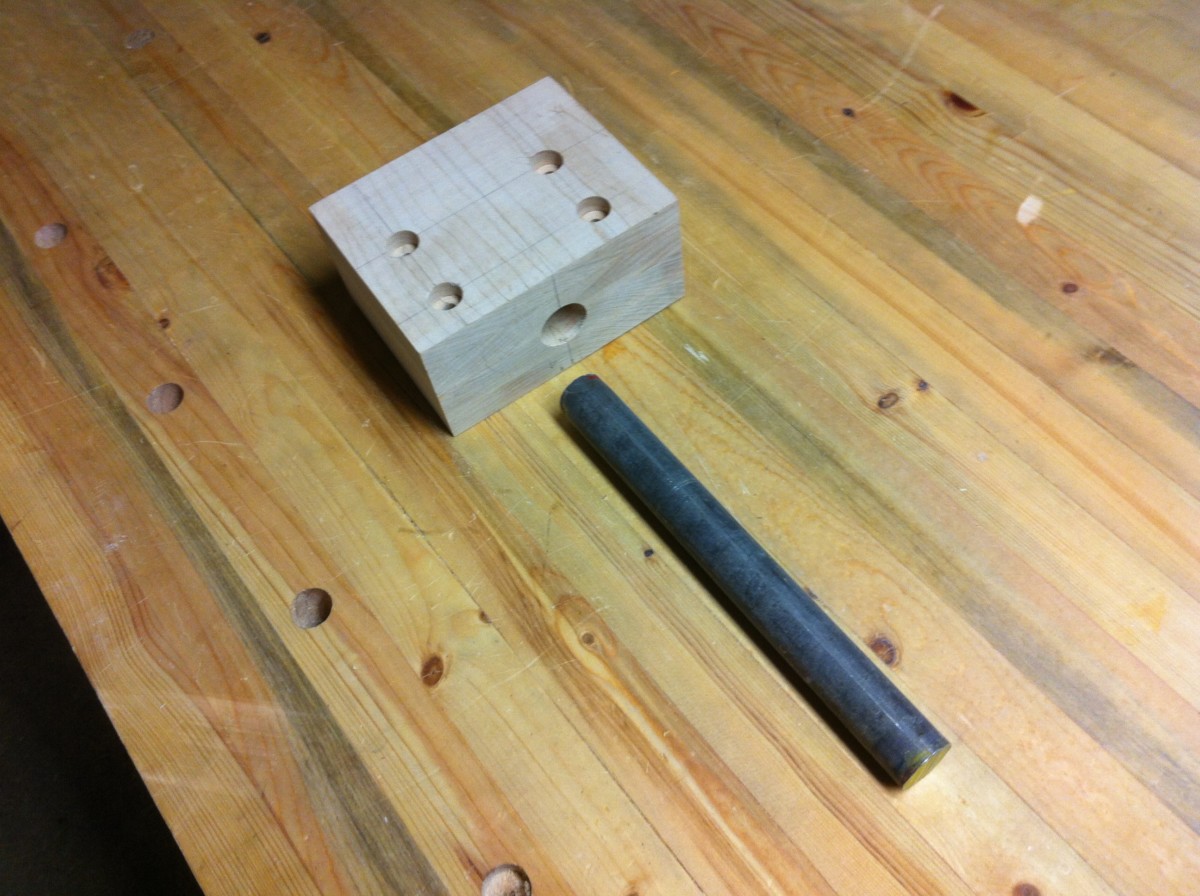
Here's the short shaft section next to the maple block that will be the bottom bearing support.

This is why the base had to be removable, so I would have room to drive lag screws through the block and into the underside of the frame.
A hint of what I'm going for. Not quite right though - the top of the wheel is toed out slightly. I'll need to sand off some from the top near side of the maple block or shim the back side.

Sigh. I've blown out the water pipes, put anti-freeze in the drains and closed up the log cabin.

The Velcro sanding pads on my random orbit sander kept flying off. The hooks on the sander pad were shot. Here's a replacement.

The dock and all the water toys are stored away for the winter. Even the ducks are ready for a nap.
It's a few days early to bring things in but we're having some warm days here and why should I wait until it's cold and nasty?

End of another season: everything is put away, the water pipes are blown out, the power is off. I think (hope) I've done everything I need to - I'll find out next spring.